
Sending WireGuard data to Home Assistant via MQTT
Introduction
This guide will walk you through setting up an MQTT Mosquitto script on an Ubuntu Linux machine to send WireGuard data to Home Assistant. The setup includes configuring Mosquitto on the Ubuntu machine, creating a bash script, and configuring Home Assistant to receive and display the data. This guide is ideal for users looking to integrate their WireGuard VPN with Home Assistant for real-time monitoring. This assumes that you have followed or have a similar setup to my guide here. I wanted to separate this article as it is quite extensive in itself.
Prerequisites
- An Ubuntu Linux machine running WireGuard with an active connection to your Home Assistant.
- Home Assistant running with the Mosquitto broker installed and configured.
Steps
1. Setting Up Mosquitto on Ubuntu
Install Mosquitto
sudo apt update
sudo apt install mosquitto mosquitto-clients
Enable Mosquitto to Start on Boot
sudo systemctl enable mosquitto
sudo systemctl start mosquitto
2. Create MQTT User and Password for Home Assistant

- Go to Home Assistant Configuration > People > Users tab.
- Click “Add User” and create a new user for MQTT with a username and password.
3. Create Environment Variables on Ubuntu
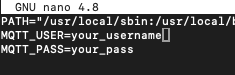
Add the MQTT credentials to /etc/environment for permanent use.
sudo nano /etc/environmentAdd the following lines:
MQTT_USER="your_mqtt_username"
MQTT_PASS="your_mqtt_password"
Replace your_mqtt_username and your_mqtt_password with the credentials you set up in Home Assistant.
Load the new environment variables:
source /etc/environment4. Create the Bash Script
Create and Edit the Script
nano ~/mqtt.shScript Content
Replace <Public Key> with the actual public key of your connected devices which you can get from wg show.

#!/bin/bash

# List of client IDs
clients=(
    "client1:<Public Key>" # replace with actual public keys for each client
    "client2:<Public Key>"
    "client3:<Public Key>"
    "client4:<Public Key>"
)

# Credentials and settings
mqtt_ip="Your Home Assistant IP" #replace this with actual
mqtt_user="$MQTT_USER"
mqtt_pass="$MQTT_PASS"
mqtt_topic="wireguard"

# Script
for client_info in "${clients[@]}"; do
    client_name=$(echo "$client_info" | cut -d':' -f1)
    peer_id=$(echo "$client_info" | cut -d':' -f2)

    ip=$(sudo wg | grep -A 4 "$peer_id" | grep 'endpoint' | sed 's/endpoint://' | sed -e 's/^[[:space:]]*//')
    lastseen=$(sudo wg | grep -A 4 "$peer_id" | grep 'latest' | sed 's/latest handshake://' | sed -e 's/^[[:space:]]*//')
    data=$(sudo wg | grep -A 4 "$peer_id" | grep 'transfer' | sed 's/transfer://' | sed -e 's/^[[:space:]]*//')

    final='{"Client":"'"$client_name"'","IP":"'"$ip"'","Last Seen":"'"$lastseen"'","Data":"'"$data"'"}'
    topic="$mqtt_topic/$client_name"

    mosquitto_pub -h "$mqtt_ip" -u "$mqtt_user" -P "$mqtt_pass" -t "$topic" -m "$final" -r
done
Make the Script Executable
chmod +x ~/mqtt.shSummary of the Script
The mqtt.sh script gathers information about WireGuard clients, such as IP, last seen time, and data transferred. It formats this information into JSON and publishes it to an MQTT broker using mosquitto_pub.
5. Add the Script to Cron
Schedule the script to run every 30 minutes using cron.
Edit the Crontab
crontab -eAdd the following line:
*/30 * * * * /home/user/mqtt.shThis will make the script run every 30 minutes. If you want to change the frequency of how often the script should run you can change this to what you prefer.
6. Configure Home Assistant
Add the MQTT sensors to your Home Assistant configuration.
Edit configuration.yaml
Add the following lines to your configuration.yaml file:
mqtt:
  sensor:
    - name: "Client 1 Data"
      state_topic: "wireguard/client1"
      value_template: "{{ value_json | tojson }}"
      json_attributes_topic: "wireguard/client1"
      json_attributes_template: "{{ value_json | tojson }}"
    - name: "Client 2 Data"
      state_topic: "wireguard/client2"
      value_template: "{{ value_json | tojson }}"
      json_attributes_topic: "wireguard/client2"
      json_attributes_template: "{{ value_json | tojson }}"
    - name: "Client 3 Data"
      state_topic: "wireguard/client3"
      value_template: "{{ value_json | tojson }}"
      json_attributes_topic: "wireguard/client3"
      json_attributes_template: "{{ value_json | tojson }}"
    - name: "Client 4 Data"
      state_topic: "wireguard/client4"
      value_template: "{{ value_json | tojson }}"
      json_attributes_topic: "wireguard/client4"
      json_attributes_template: "{{ value_json | tojson }}"
Summary of the Sensors Configuration
The configuration.yaml sensors are set up to listen to specific MQTT topics corresponding to each WireGuard client. They extract and store JSON data attributes such as IP, last seen time, and data transferred.
7. Create Lovelace Dashboard
Install Vertical Stack In Card

To use the vertical stack card, install it via HACS (Home Assistant Community Store).
- Go to HACS in Home Assistant.
- Search for and install the “Vertical Stack In Card” integration.
Edit the Lovelace UI
Go to Home Assistant > Overview > Edit Dashboard, and add a new manual card with the following content:
type: vertical-stack
cards:
  - type: horizontal-stack
    cards:
      - type: markdown
        content: |2
          **Client**: Home

          **Data**: {{ state_attr('sensor.client_1_data', 'Data') }}

          **IP**: {{ state_attr('sensor.client_1_data', 'IP') }}

          **Last Seen**: {{ state_attr('sensor.client_1_data', 'Last Seen') }}
      - type: markdown
        content: |2
          **Client**: Box

          **Data**: {{ state_attr('sensor.client_2_data', 'Data') }}

          **IP**: {{ state_attr('sensor.client_2_data', 'IP') }}

          **Last Seen**: {{ state_attr('sensor.client_2_data', 'Last Seen') }}
  - type: horizontal-stack
    cards:
      - type: markdown
        content: |2
          **Client**: Tablet

          **Data**: {{ state_attr('sensor.client_3_data', 'Data') }}

          **IP**: {{ state_attr('sensor.client_3_data', 'IP') }}

          **Last Seen**: {{ state_attr('sensor.client_3_data', 'Last Seen') }}
      - type: markdown
        content: |2
          **Client**: My iphone

          **Data**: {{ state_attr('sensor.client_4_data', 'Data') }}

          **IP**: {{ state_attr('sensor.client_4_data', 'IP') }}

          **Last Seen**: {{ state_attr('sensor.client_4_data', 'Last Seen') }}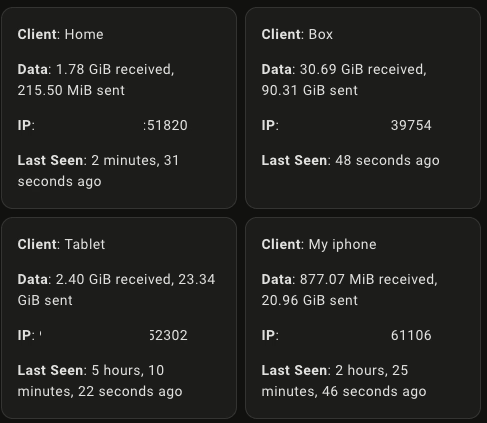
Summary of the Lovelace Card
The Lovelace card code creates a dashboard view displaying the data of each WireGuard client. It uses markdown to format the output, presenting the client’s data, IP address, and last seen time in a user-friendly manner.
Additional Resources
Home Assistant’s MQTT integration documentation
WireGuard’s official guide
Configuration YAML guide
My WireGuard post
HACS for Home Assistant
Events tool documentation for troubleshooting
Conclusion
With these steps, you should have successfully set up MQTT Mosquitto on your Ubuntu machine to send WireGuard data to Home Assistant and configured Home Assistant to receive and display the data. As always I hope this has helped you out.


Recent Comments