
How to Integrate Microsoft Text-to-Speech Using Azure in Home Assistant
Introduction
Voice automation is becoming a key feature in modern smart homes. Whether it’s to give your home a voice or provide verbal alerts and responses, integrating text-to-speech (TTS) services with home automation platforms opens up many possibilities. Microsoft Azure offers an excellent Text-to-Speech service that can be seamlessly integrated into Home Assistant.
In this blog post, we will go through the process of setting up Microsoft Text-to-Speech (TTS) with Azure in Home Assistant. From creating an Azure account to testing various voices.
What You Need for Microsoft TTS in Home Assistant
Before we dive into the step-by-step guide, let’s go over the requirements:
- Microsoft Azure Account: You’ll need a free tier Azure account to use Microsoft’s Text-to-Speech service.
- Home Assistant: Ensure you have a running instance of Home Assistant, whether locally or on the cloud.
- API Key: An API key from Azure’s Speech service is required to connect the TTS functionality to Home Assistant.
- Configuration.yaml: A basic understanding of Home Assistant’s
configuration.yamlfile for setup. - Restarting Home Assistant: In some cases, after adding new configurations, you may need to restart Home Assistant to apply the changes.
Step-by-Step Guide: Setting Up Microsoft TTS in Home Assistant
The integration setup is in the configuration.yaml
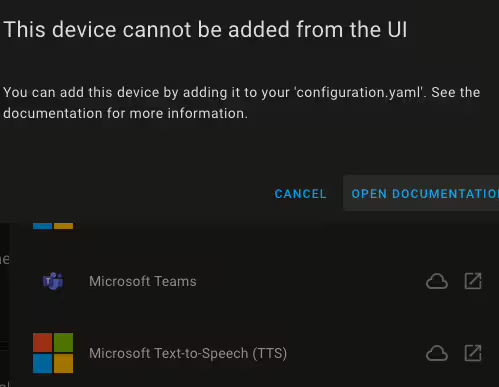
When you go to the devices and services and search for an integration to add it. You will find the Microsoft integration and the TTS service under it. But when clicked on it will tell you this configuration is done through the configuration.yaml file. So we will get to it once we do the other steps.
1. Create a Free Microsoft Azure Account
If you don’t already have a Microsoft Azure account, you can easily sign up for the free tier.
- Visit Microsoft Azure: Head to https://azure.microsoft.com/free to get started.
- Sign Up for the Free Tier: Click on “Start for free” and follow the sign-up process using your Microsoft account.
- Activate Your Account: Once you’ve signed up, activate your account via the email confirmation you receive.
This free tier will allow you to use Microsoft’s AI services, including Text-to-Speech, without incurring any costs.
2. Set Up the Azure Speech Service and Get the API Key
With your Azure account set up, it’s time to create a Speech resource and get the necessary API key for Home Assistant.
- Log in to Azure Portal: Go to https://portal.azure.com/ and log in to your account.
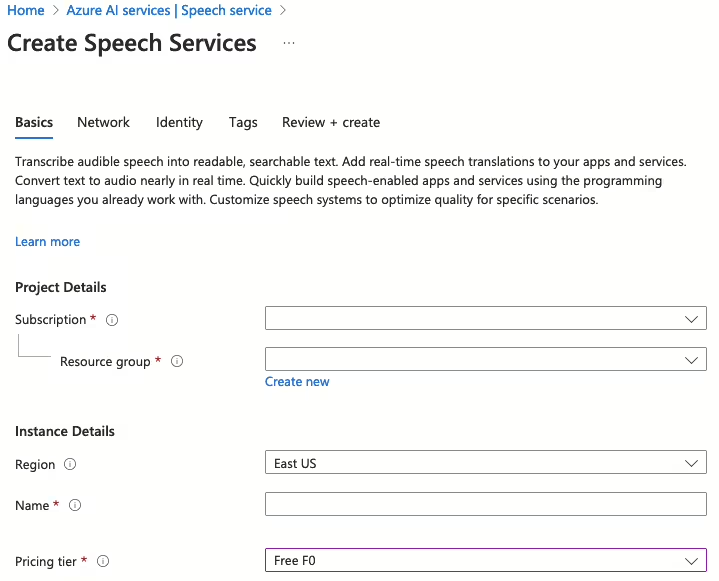
- Create a New Resource: In the Azure portal, click “Create a resource” and search for “Speech” in the marketplace.
- Select the Free Pricing Tier: When creating your Speech service, choose the free tier option to avoid charges.
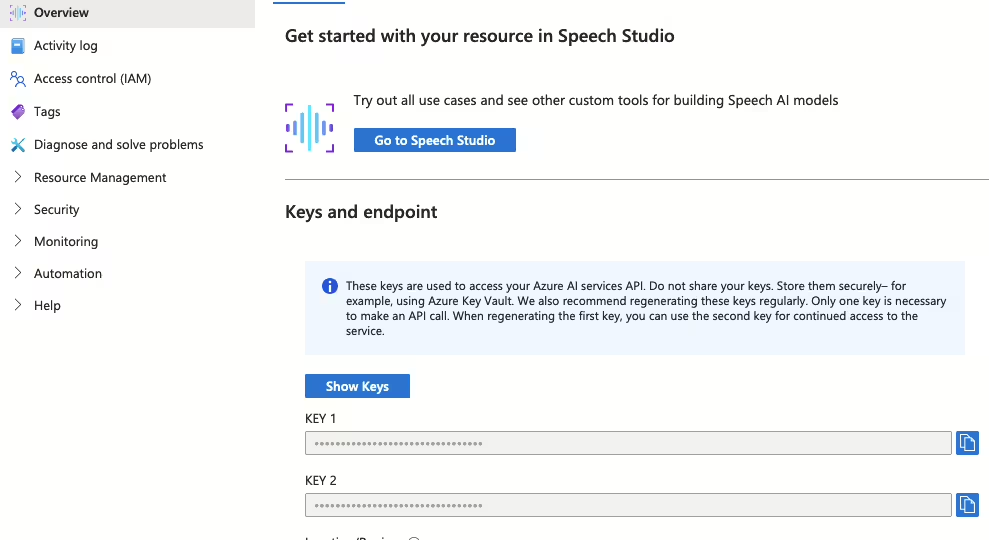
- Get the API Key: Once the Speech resource is created, navigate to the “Keys and Endpoint” tab. Copy your API key, as this will be used later in Home Assistant.
3. Add Microsoft TTS to Configuration.yaml
Now that you have your API key, it’s time to configure Home Assistant to use Microsoft TTS. You’ll need to add a few lines to your configuration.yaml file.
- Open the Configuration.yaml File: Access the
configuration.yamlfile in Home Assistant using the File Editor or via SSH. - Add the TTS Configuration: Paste the following block into the file:
tts:
  - platform: microsoft
    api_key: YOUR_AZURE_API_KEY
    region: YOUR_AZURE_REGION
    language: en-US
    voice: en-US-JennyNeural  # Example of specifying a voice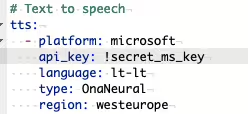
- Save and Restart Home Assistant: After making these changes, save the file and restart Home Assistant. You can restart it by going to Settings > System > Restart. This step is crucial for the new configuration to take effect.
4. Explore and Test Available Voices from Microsoft
One of the great features of Microsoft Text-to-Speech is the variety of voices and languages it offers. You can explore and test these voices before selecting one for Home Assistant.
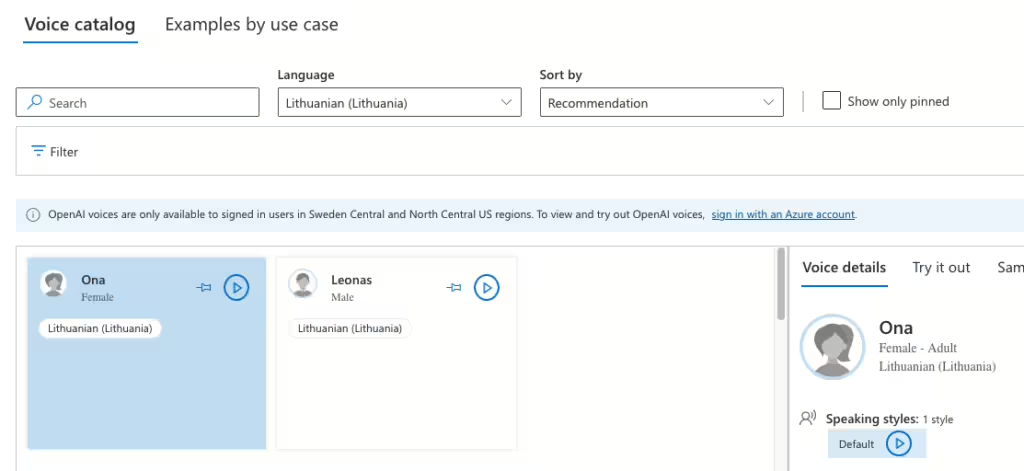
- Visit Microsoft’s Voice Gallery: Head over to Microsoft’s Voice Gallery to explore the available voices. You can filter voices by language and style (e.g., cheerful, conversational).
- Listen to Voice Samples: Each voice has a sample that you can listen to, helping you decide which one fits your needs.
- Select a Voice: When you’ve found a voice you like, note down its code (e.g.,
en-US-JennyNeural), which you’ll include in your Home Assistant configuration.
You can update the voice: field in your configuration.yaml to reflect the voice you’ve chosen.
5. Test Microsoft TTS in Home Assistant
Now that everything is set up, it’s time to test Microsoft TTS to make sure it’s working properly.
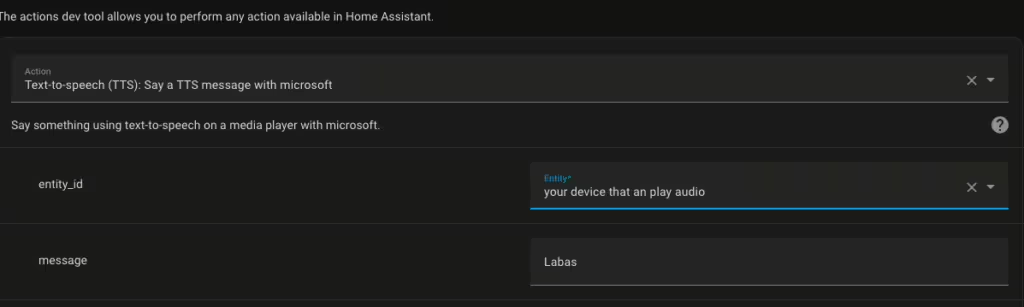
- Open Developer Tools: Go to Developer Tools in Home Assistant.
- Call the TTS Service: In the “Services” tab, select
tts.microsoft_sayfrom the dropdown list. - Input a Test Message: Type a message like “Hello, Home Assistant” and select the speaker or device you want to use.
- Check the Output: The selected device should now speak the test message using the voice you’ve configured. If nothing happens, ensure your configuration is correct and that Home Assistant has been restarted.
Conclusion: Exploring Alternatives
Microsoft Text-to-Speech allows adding voice automation to Home Assistant, with a wide range of voices, languages, and regional accents. It’s especially useful for making your smart home feel more responsive and interactive.
However, Microsoft TTS isn’t the only option available for Home Assistant users. Here are a few alternatives worth considering:
- Google Text-to-Speech: Google’s TTS service is another reliable option and can be easily integrated into Home Assistant. Learn more at https://cloud.google.com/text-to-speech.
- Amazon Polly: Amazon offers Polly, a robust text-to-speech service with lifelike voices. Check it out at https://aws.amazon.com/polly/.
- Local TTS Engines: If you prefer a solution that doesn’t rely on the cloud, you can explore local options like PicoTTS or Rhasspy, which offer offline text-to-speech capabilities.
For those interested in privacy or reducing reliance on external services, running a local language model (LLM) for TTS may be a future consideration, though it requires significant computing resources.
Additional Resources
Here are some additional links and resources that may be helpful as you set up TTS in your Home Assistant environment:
- Home Assistant Official Website: https://www.home-assistant.io/
- Microsoft Text-to-Speech Documentation: https://learn.microsoft.com/en-us/azure/cognitive-services/speech-service/text-to-speech
- Azure Pricing for Speech Services: https://azure.microsoft.com/en-us/pricing/details/cognitive-services/speech/
- Home Assistant TTS Integration Documentation: https://www.home-assistant.io/integrations/tts/
By following this guide, you’ll be able to enhance your Home Assistant setup with Microsoft’s Text-to-Speech capabilities, providing your home with a voice that fits your preferences.
As always I hope this has helped you out!


Recent Comments