
BMW E46 headlight washer motor replacement
Another car-related post. This time for the headlight washer of the Xenon headlights. This only applies to models that did not come with Halogen front lights. Since those do not have the washing system I believe. The issue with the motor was that it was not clear what was wrong so I’ll go through some of the steps I took before concluding that a replacement was needed.
The problem
The general troubleshooting steps are provided here if you are interested in trying to fix your own:
BMW E46 Washer Pump Testing and Replacement
The issue in my case was that when trying to wash the headlights no water was coming out. So the headlight washing system works in a way that the motor pump creates the pressure which pushes out the two headlight washers below each headlight and sprays the same windshield fluid since it’s the same reservoir. Now here the problem was nothing was happening so the initial steps were to see if anything was happening.
Troubleshooting
Opening up the hood and checking if the motor makes any noise or is responding was the first step. Once attempted I could hear the pump running but it seemed no water was coming out. So this already helped in not needing to check the cabling or fuses as I would have expected it to be dead. The next idea was there could be an issue that the filters were clogged. This requires a bit of disassembly but is fairly straightforward. Remember to first empty the tank, as once you start unplugging stuff from the bottom the fluid is gonna start pouring out. Remove the 10mm screw holding the reservoir, unplug both cables that go to the washer motors, unplug the fluid sensor cable, and disconnect the hoses that run out of the bottom of the tank. This is detailed in the Pelican Parts tutorial linked previously.
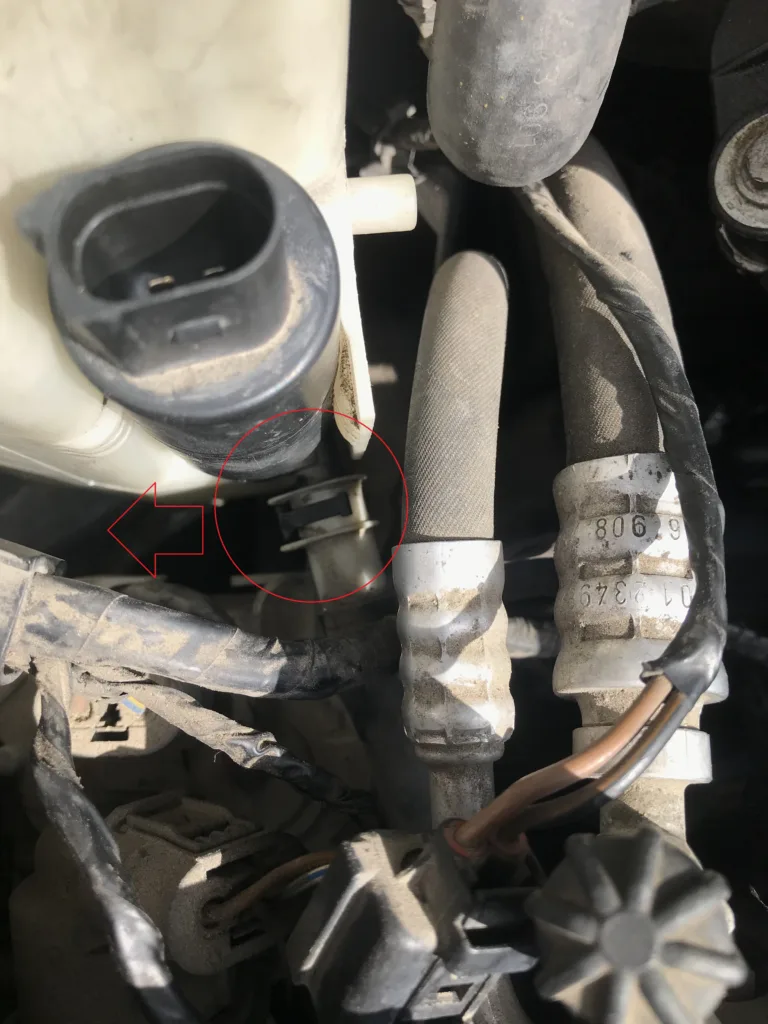
The connectors are easy to take off as they just have a clip on the connector to pull off as you squeeze it. Removing the hoses is best done in a twisting motion while pulling. One of the tubes has a plastic clip that you remove by sliding it off. Be sure to have a good grip on it as if it falls you don’t want to spend half the day trying to fish it out.
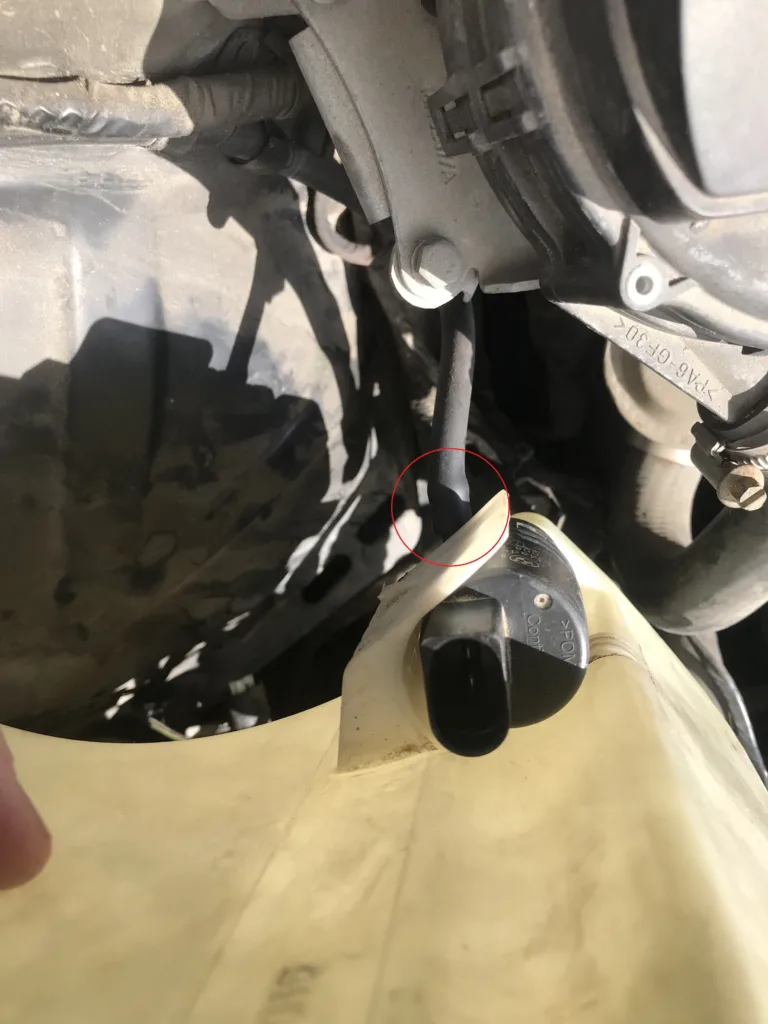
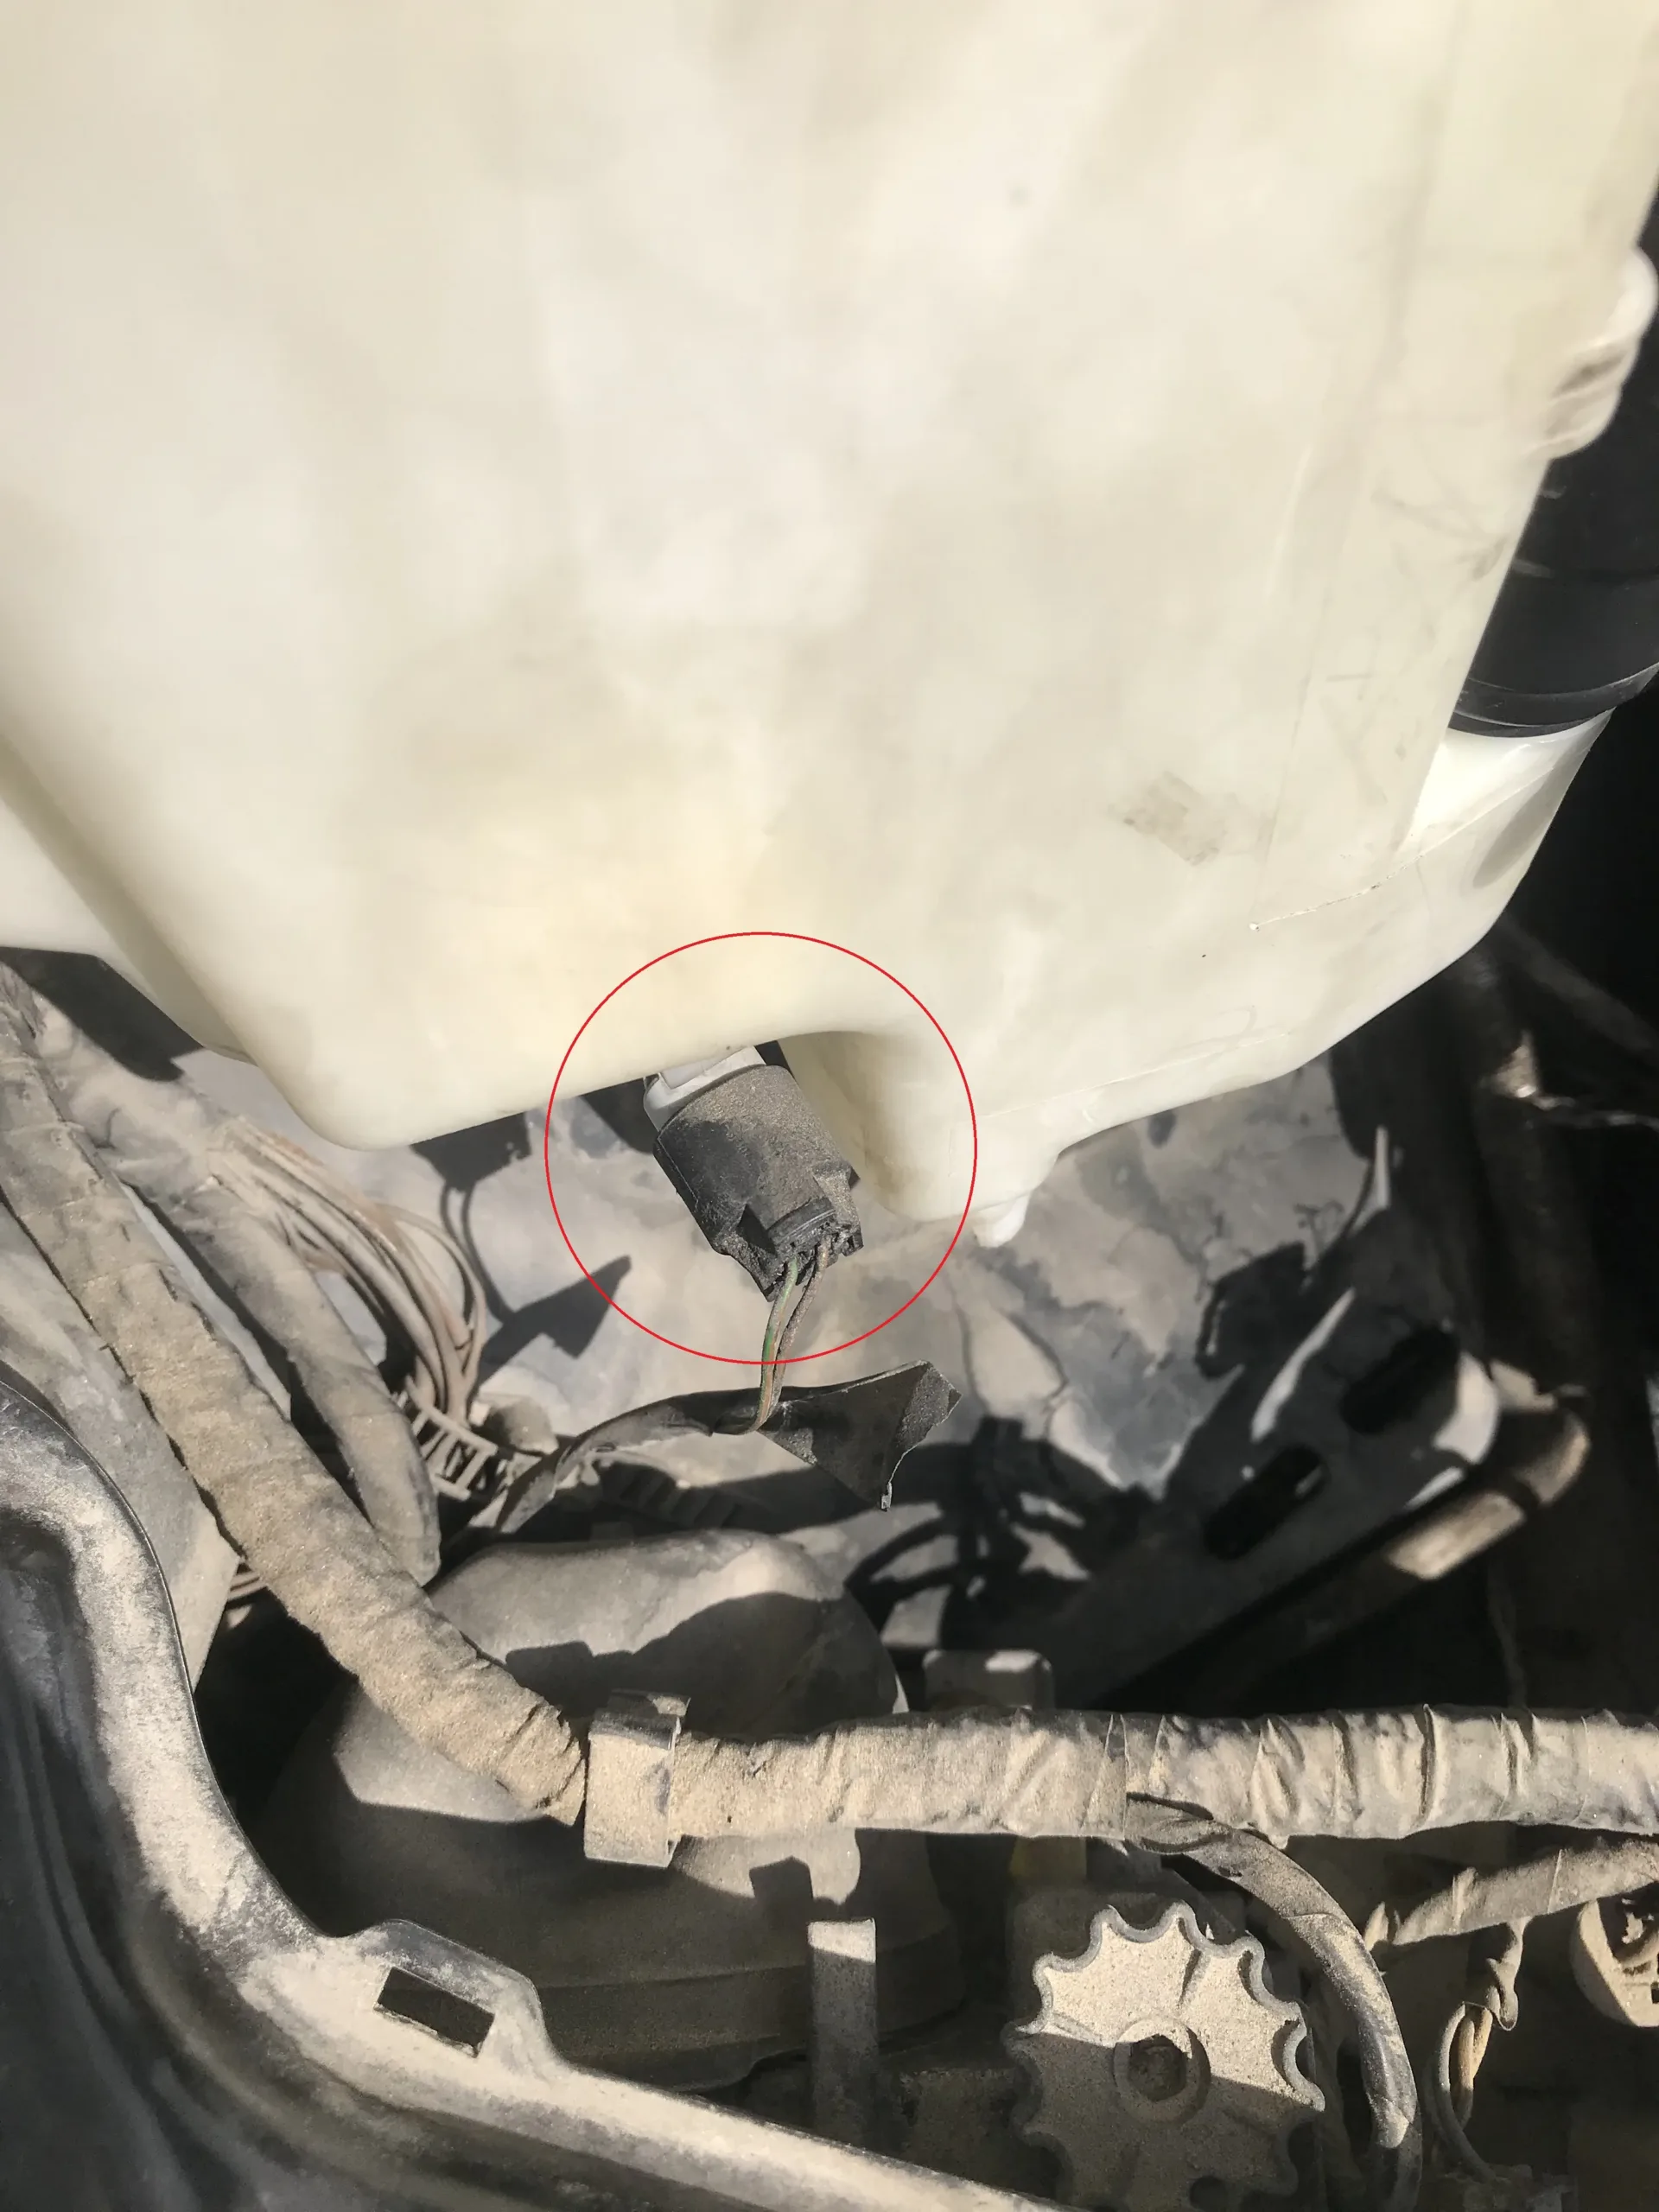
Now we can safely pull the tank out. You can also proceed with removing the motor as well. It just pulls straight up out of the plug so use the pull and twisting motion so we don’t rip anything out. You will have now the filters left in the holes.
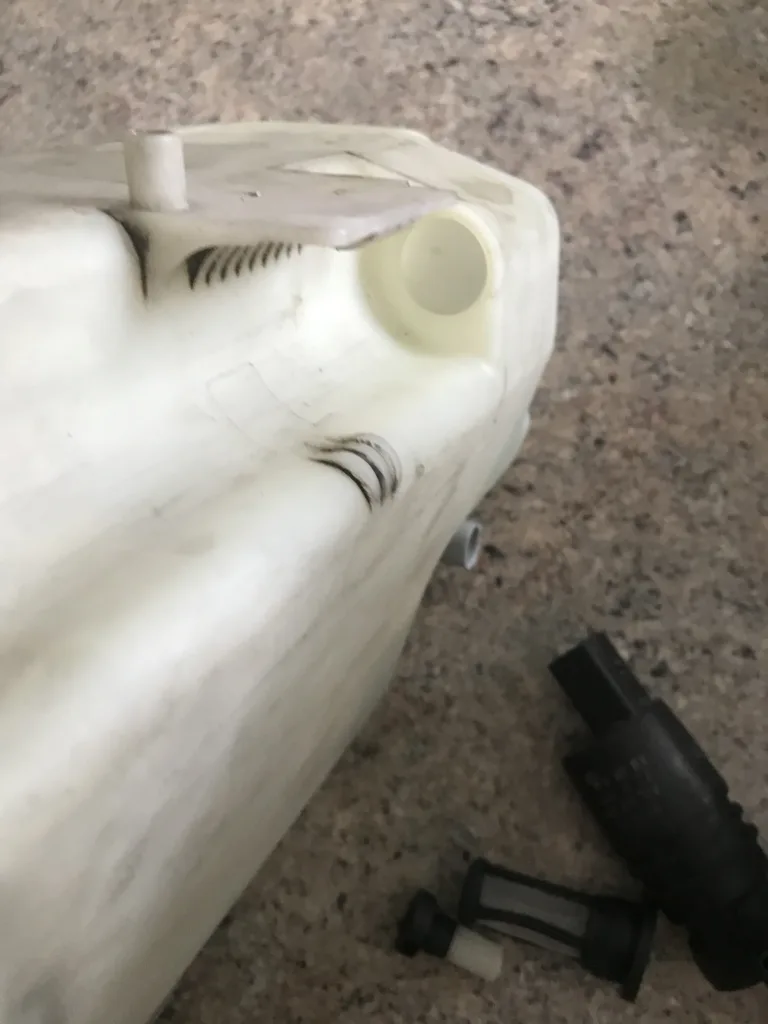
Same as the motors the filters just pull out as well. You can then inspect for any gunk or debris on them and wash them. Now in my case, they were pretty much cleaned so that was not the issue.
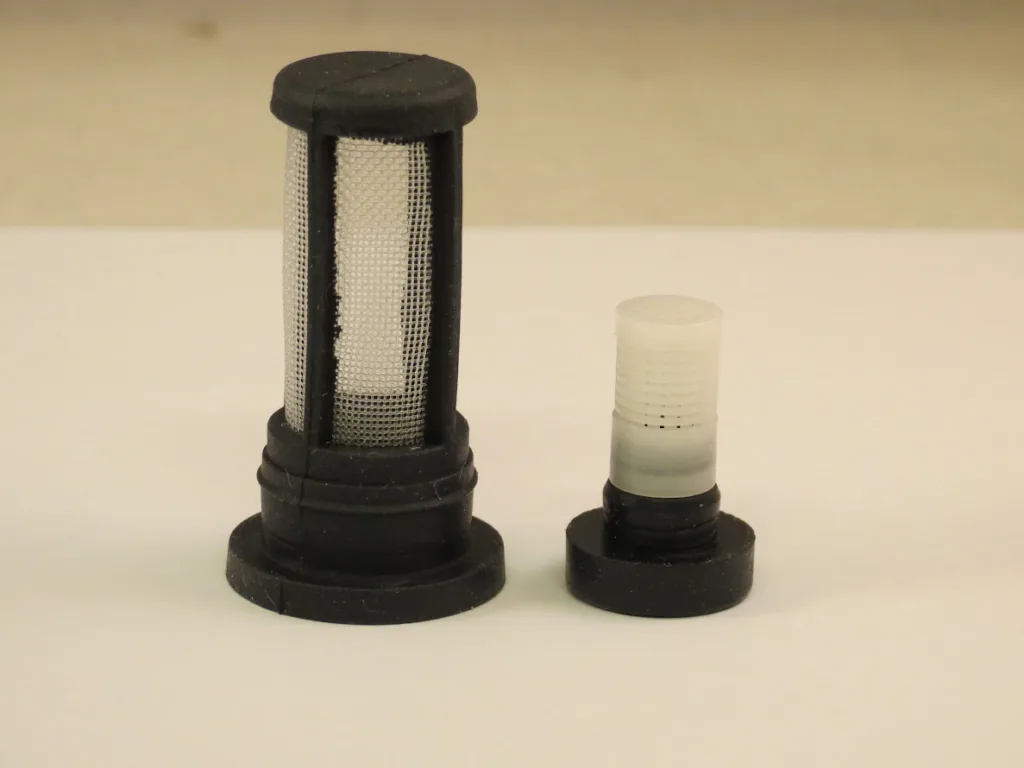
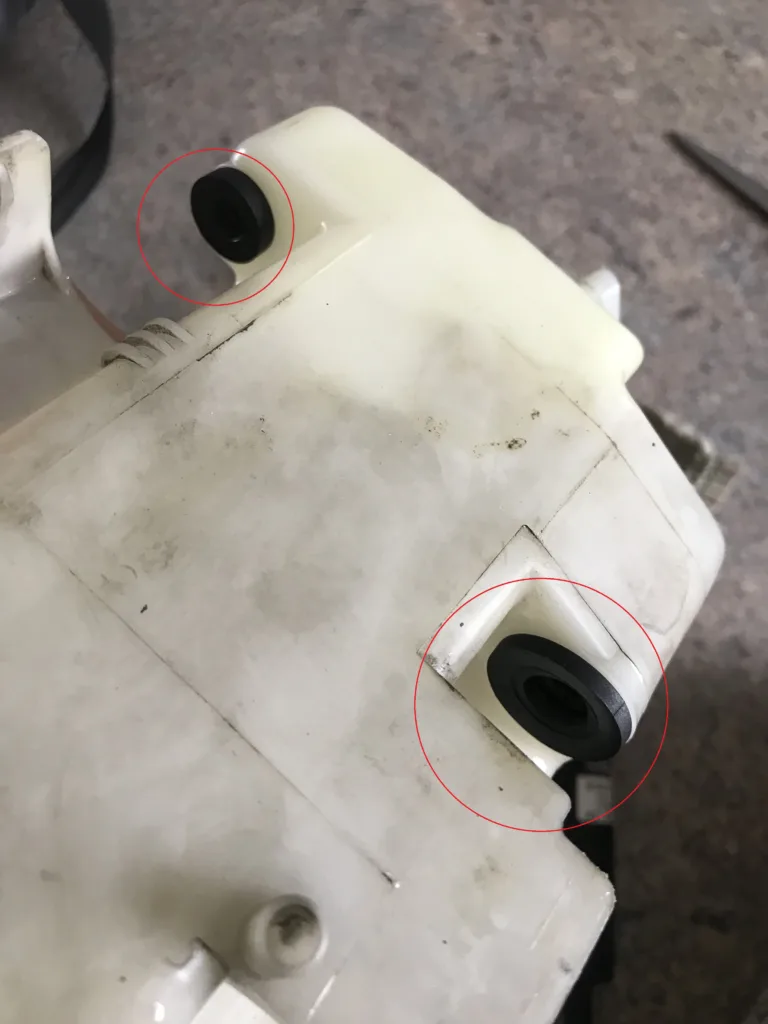
This is also a good time to inspect the rubber seals on these for any cracks or breaks so that there is no leakage. Since there is no issue here we turn our attention to the motor itself. The first thing I did was to check the bottom of the motor where the plastic flaps spin. Attempting to move them by hand seemed to be not an issue. There wasn’t any noticeable issue that the motor was broken or seized up to prevent it from spinning

At this point, I got a 12V power supply to just test it and see what is happening when power is applied.
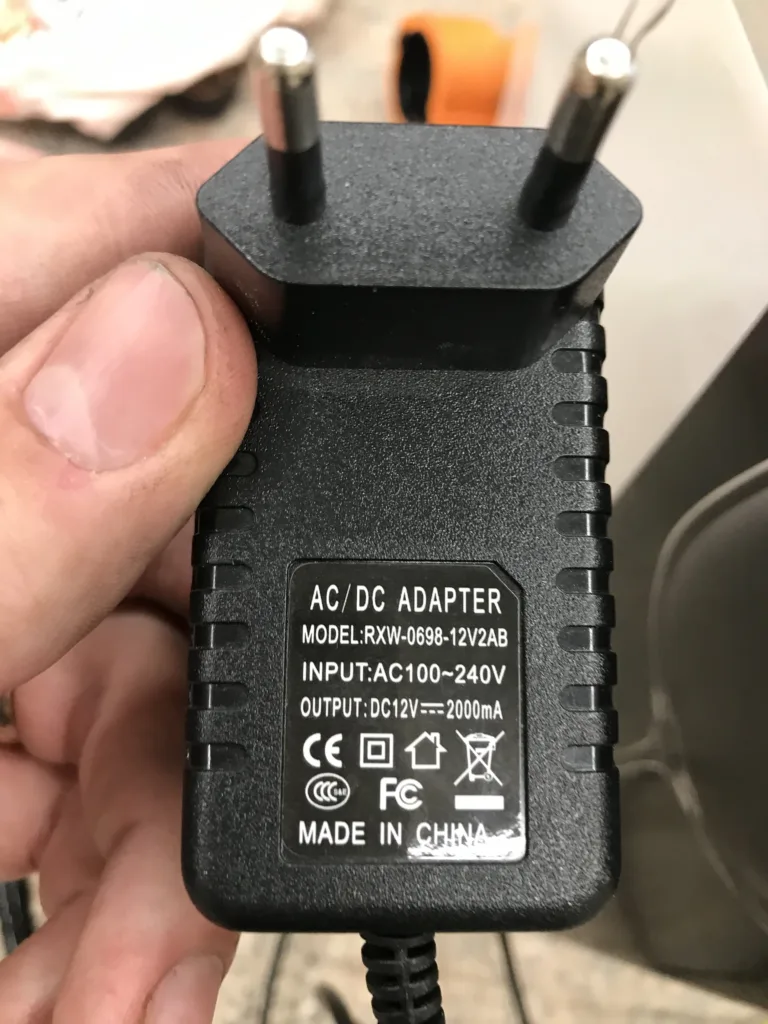
Having a couple of alligator cable clips it was easy to wire it for testing.

Having this and a few alligator clips I proceeded to wire up the motor for testing and the problem was starting to become apparent. So once power is applied the motor can be heard as working but when looking at the bottom nothing is moving.
So I went out and bought a replacement before assembly I tested it out the same way to see the difference.
So the problem is found as it is just most likely a broken motor or assembly. Going backwards I went through assembling everything and refilling the tank. Once that was done I had working headlight washers again.
Tips and conclusion
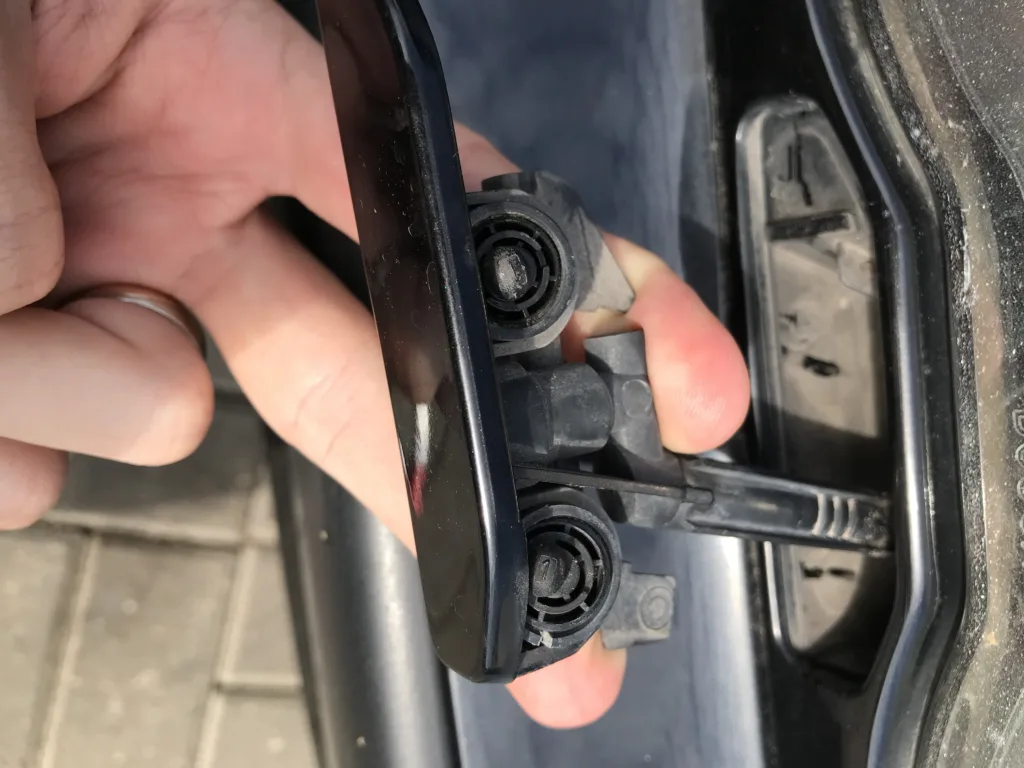
In the process of this, there are most likely better ways of going about this. I more than likely went to greater lengths than needed to diagnose this. I could have just pulled out the motor without removing anything else and tested it. But in turn I confirmed everything else was in order and in addition cleaned the reservoir, filter and parts as an added bonus. Now in addition to that you can also question whether the sliding mechanism under the headlight is not stuck or something else isn’t wrong. So using some form of plastic spudger or butter knife that isn’t quite sharp you can put it in between the slot to pull it out. If it’s not stuck it should pull out fairly easily, just take care not to scratch up the paint. So you can see if it slides in and out without obstruction.
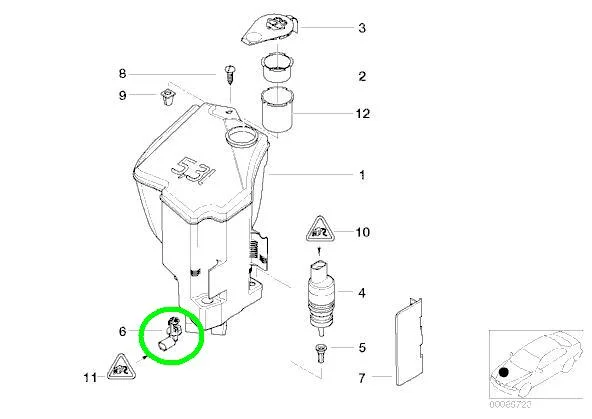
In testing something like this it’s best to have a second person to for example pull the washer lever on the steering wheel and check what is happening under the headlight and the hood. As doing it myself was a bit more difficult understanding what was happening when I attempted to operate the washer mechanism. I’ll end this with an exploded view of the washing tank reservoir as it may help in understanding what goes where.
As always I hope this helps you out.


Recent Comments