
Using Zigbee devices with Home Assistant
In the world of home automation, you perhaps come across devices that use either Wi-Fi, Z-Wave, or Zigbee. However, integrating Zigbee devices with popular home automation platforms like Home Assistant can sometimes be challenging due to the proprietary nature of many Zigbee gateways. This article will guide you through the process of integrating your Zigbee devices with Home Assistant using Zigbee2MQTT, with a focus on using the CC2652RB stick as the coordinator from slae.sh.
Prerequisites
Before we begin, ensure you have the following:
- Home Assistant: Ensure you have Home Assistant running on a device in your network.
- MQTT Broker: Home Assistant needs to be configured with an MQTT broker. Mosquitto is a popular choice and can be easily installed as an add-on in Home Assistant.
- Zigbee Coordinator Hardware: You’ll need a Zigbee coordinator, such as a CC2652RB USB dongle, flashed with the Zigbee2MQTT firmware to connect your Zigbee devices.
- Alternative: The Sonoff Zigbee USB dongle has a great write-up if you prefer that instead here.
Step 1: Installing Zigbee2MQTT
The CC2652RB stick comes prepped with the firmware ready for use, so it’s fairly easy to set up as it will just be plug-and-play. Alternatives exist like the Sonoff ZBDongle. Avoid the CC2531 models, they are very cheap but they also have very poor range and performance so I would not recommend starting with them as your experience will be bad.
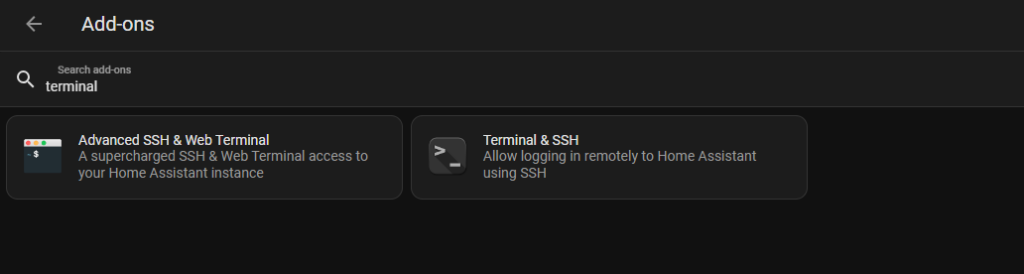
You can plug the Zigbee USB stick into the device your Home Assistant is running on. Then you can follow the Add-on documentation to find out where the device is mounted. So this can either be done by connecting to your device via SSH or using one of the available Terminal addons in Home Assistant.
Once you have direct access to the terminal you can determine the USB stick’s location as described here
Next, install Zigbee2MQTT. The installation process varies depending on your setup (running Home Assistant OS, Docker, etc.). Detailed instructions for each scenario are available on the Zigbee2MQTT documentation site. Generally, it involves cloning the Zigbee2MQTT repository and running the service. The add-on itself is fairly straightforward to install via Home Assistant.
Step 2: Configuring Zigbee2MQTT
From Home Assistant you can navigate to the Settings -> Add-ons page and open the Zigbee2MQTT integration from which you can proceed with the configuration. Example of such below:
configuration.yaml
data_path: /config/zigbee2mqtt
socat:
enabled: false
master: pty,raw,echo=0,link=/tmp/ttyZ2M,mode=777
slave: tcp-listen:8485,keepalive,nodelay,reuseaddr,keepidle=1,keepintvl=1,keepcnt=5
options: “-d -d”
log: false
mqtt:
base_topic: zigbee2mqtt
serial:
port: /dev/ttyUSB0
external_converters: []
devices: devices.yaml
groups: groups.yaml
homeassistant: true
permit_join: true
advanced:
log_level: warn
pan_id: 6755
channel: 11
network_key:
– 1
– 3
– 5
– 7
– 9
– 11
– 13
– 15
– 0
– 2
– 4
– 6
– 8
– 10
– 12
– 13
availability_blocklist: []
availability_passlist: []
device_options: {}
blocklist: []
passlist: []
queue: {}
frontend:
port: 8099
experimental: {}
availability: true
The default for port is /dev/ttyUSB0 so you will need to adjust it if it’s different for you. Also permit_join should be set to false afterwards so you don’t accidentally join unwanted devices.
Check Zigbee2MQTT and ensure it connects to your MQTT broker successfully. This step also varies based on your installation method but often involves executing a start script or using a service manager like systemd. If you went with the Home Assistant MQTT broker it should connect without issues.
Step 3: Integrating with Home Assistant
Ensure MQTT Discovery is enabled in Home Assistant to automatically detect and add devices connected through Zigbee2MQTT. Pair your Zigbee devices with Zigbee2MQTT by following the pairing instructions for each device. Once paired, the devices should appear in Home Assistant via MQTT Discovery. You can find all the supported devices and check how to pair each of them here.
Step 4: Using the UI
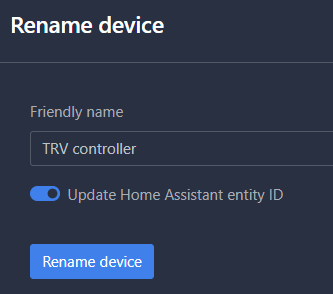
You can perform all further actions through the Zigbee2MQTT UI once it’s up and running. You will see the details of all your devices and you can adjust their settings if needed. The additional benefit of having this Add-on in Home Assistant is having all your Zigbee devices integrated and available for automation of your choosing with any existing devices. A general tip for first-time use is once you have a device paired you can click the blue pencil icon change its friendly name and toggle the Update ID as well. This will help find the device when setting automation for example with easy-to-read and find naming conventions.
Conclusion
Once all the software is set up and in place, it’s only a matter of adding your desired devices. If you have connectivity issues you can always monitor the LQI of each device to see the strength of the connection. Additional devices that act as routers are very helpful in avoiding issues with the signal. It’s also wise to check how busy the Wi-Fi channels are in your area and use one with the least interference. This can be adjusted in the configuration.yaml file via the channel: parameter. If you have a working instance of this integration with the devices you want then it just becomes a matter of using them and automating them via Home Assistant.
As always I hope this has helped you out.
Additional resources that may be helpful:
GitHub discussions
Wi-Fi channel selection
Youtube tutorial


Recent Comments