
Supercharge PC: Upgrade to M.2 SSDs on PCIe Now!
Running out of storage is not fun, using slow storage like a mechanical hard drive is not fun either. You must clean up files and decide on things to keep and remove. Deal with slower load times whether you use the drive as a boot disk or for programs, games, etc. My issue was I have pretty old and small SSDs like a 100GB and 250GB drive, one of which I use as a boot drive. They are both pretty full and all the rest of the SATA ports are taken up by the regular HDD for conventional storage for the rest of the stuff. My issue is I have no free SATA connections left on my motherboards I even have PCI expansion slots for a few more drives. But since my Asus PRIME B550-PLUS motherboard has an additional slot for storage which is an M.2 slot. Great I can use that for storage. But there is a caveat to this. As my specification states if using the M.2 slot it shares bandwidth with SATA ports 5 and 6 meaning I am down two hard drives that are already in use. Not a great deal. The option would of course be to not use every single port and switch to a singular HDD that has the storage space I require. But the trade-off is still speed and performance. Also, why invest in a thing that will bring the same solution with the barely added benefit?
My solution
What I have is a free PCIe x16 slot (although running at max x4). But it has the solution that I need with minimal compromise. First, I bought this M.2 SSD PCIE Adapter from my favorite cheapo site Aliexpress. It totals about 3€.
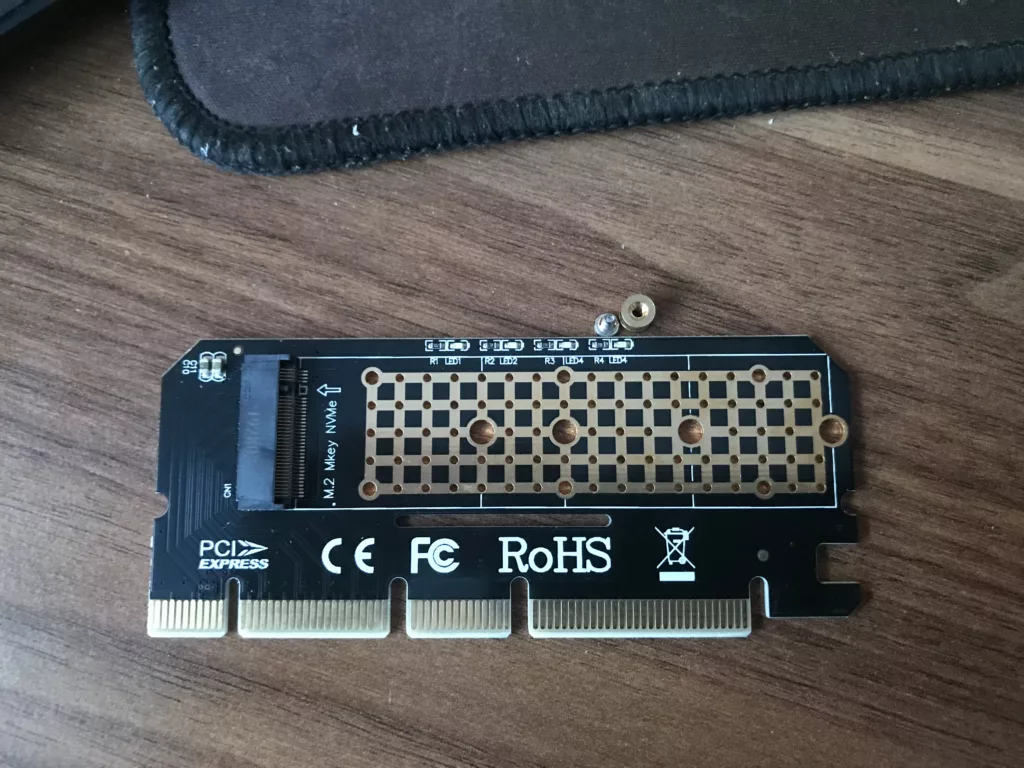
It supports many different sizes of drives and has a screw mount for mounting. The next purchase is a heat sink I chose a cheap copper-based one because it is great for moving heat. I don’t think a fan is necessary as I show in later tests the drive doesn’t really reach that much temp. Both the heatsink and adapter can be found here.
https://www.aliexpress.com/item/33053044621.html
https://www.aliexpress.com/item/1005004144778257.html
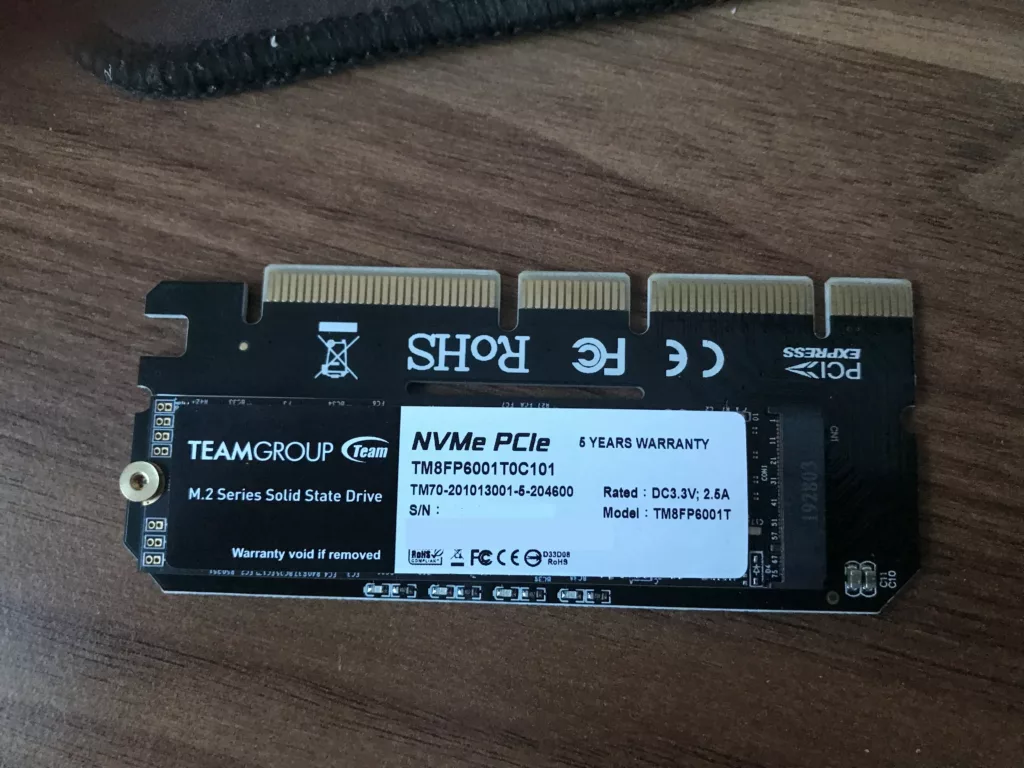
The drive I am using is a cheap Teamgroup MP33 model TM8FP6001T 1TB drive.
You can find the specification sheet here
https://www.teamgroupinc.com/en/catalog/act.php?act=2&index_id=162
Amazon link as well
https://www.amazon.com/TEAMGROUP-Solid-State-Drive-Gen3x4/dp/B07XHMBQK3
I was able to get it for about 50€. At that size and price, there was nothing cheaper around me.
We can place the drive in the adapter like so.
You can use this of course as is and I don’t see a problem with that. Just like for passive cooling, I wanted to have a heatsink. Of course, if you have a good case with good airflow this shouldn’t be a problem.
Since the heatsink is copper and is very conductive we don’t want it touching any of the components to cause a short connection. So remove the sticker, apply the thermal sticker to cover everything nicely, and place the heatsink on the top. Check as well that nothing is touching the heatsink itself.
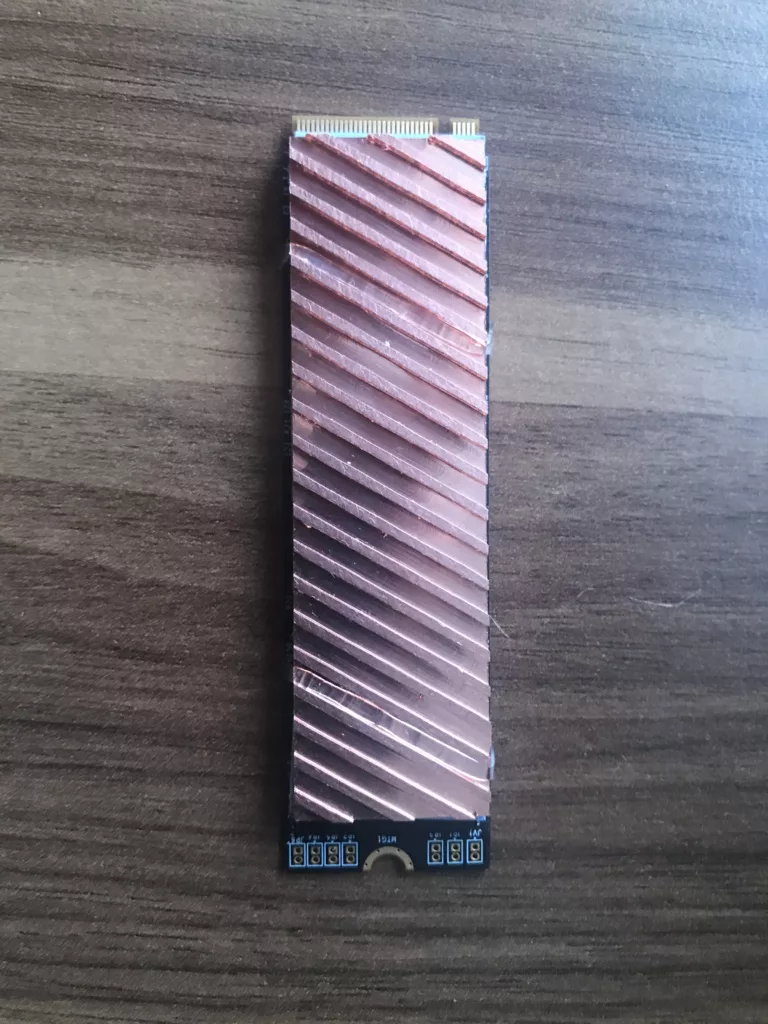
They provided some rubber rings as the thermal sticker isn’t all that sticky and there is no mounting besides the adhesion I added two of the rubber straps onto it around the drive to keep it in place.

Now we can place it in the PCIe slot on our motherboard.
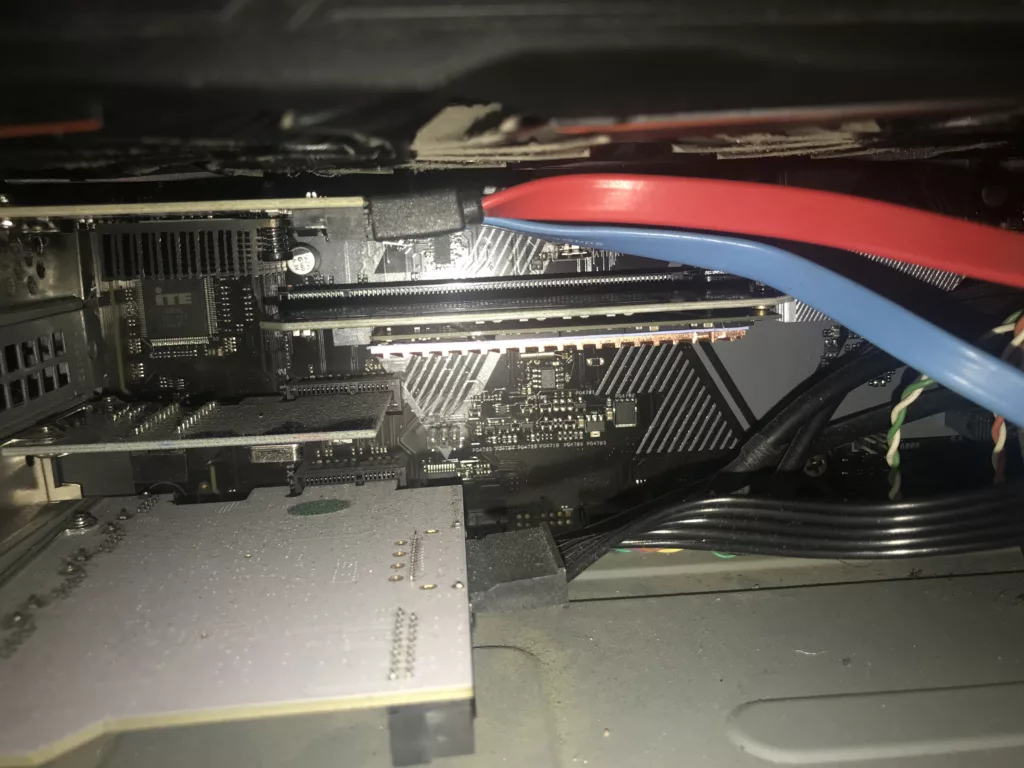
As you can see the PC is jam-packed with all sorts of extender accessories so this was practically my only option as I have one of the jankiest setups. But it works so I am ok with that.
Time for some benches. Now I will use CrystalDiskMark. To do some read and write tests. We can compare my Samsung Evo SSD, the regular Hard drives, and the newly installed M.2 Drive from TeamGroup.
The first test is at 1GB size. That already beats my old trusty Evo. Not really a huge leap but better nonetheless.
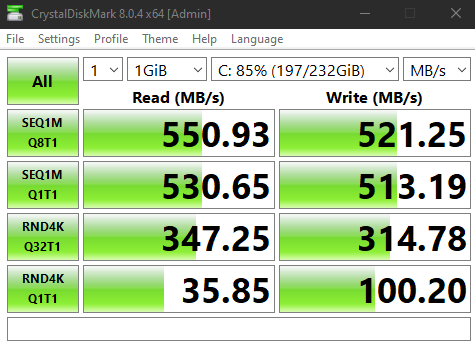
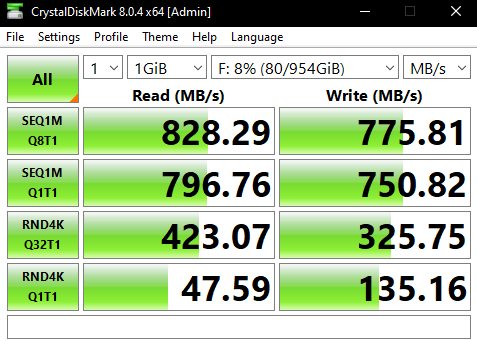
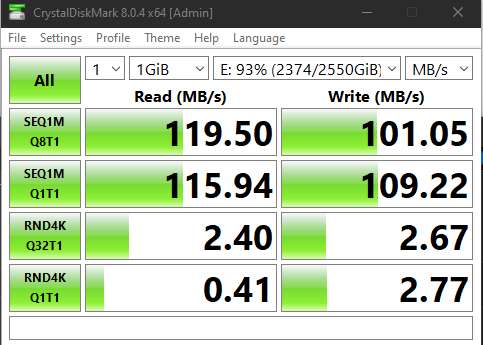
Compared to an HDD, it’s clear that even with adapters and everything such a cheap drive still stands on its own and is a great addition in terms of performance and storage space.
Quickly for thermals, I just used HWMonitor while running multiple passes of CrystalDiskMark and booted two VMs with games running in both. After about 30 minutes I was able to reach a max temperature of 51 Celsius.
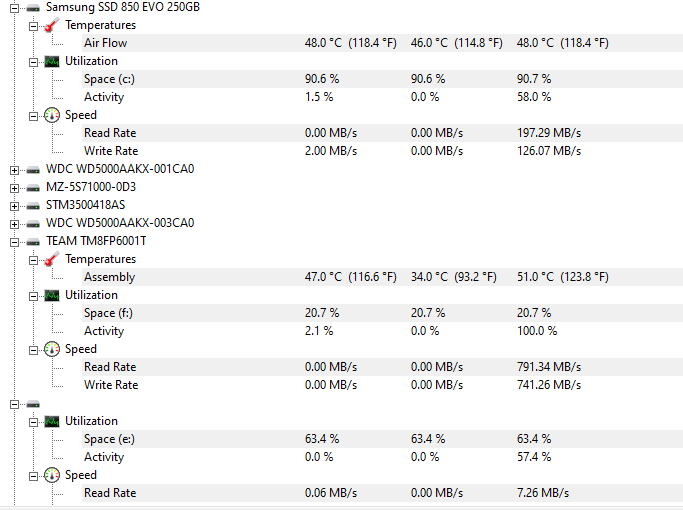
Overall it’s pretty close to the Samsung SSD under high loads. Most drives like these throttle and may start to have issues over 70 degrees but this drive with a copper heatsink was able to reach just over 50 degrees. So far I have used this driver for about 3 weeks and had no issues and the performance has been stellar.
Conclusion
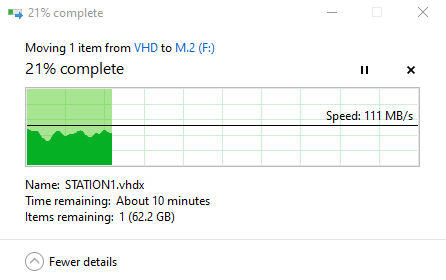
The initial idea for this was I was using my regular Hard drive to host a couple of VMs for a specific purpose that I will most likely detail in a separate post. But the issue was not so much the storage size but the speed. Since I needed two VMs to boot to Windows the load times were atrocious coming down to the machines requiring between 4 to 6 minutes to boot correctly. Not to mention loading up apps and other things. Switching to the M.2 and moving my .vhdx files over the boot times were cut down significantly. When I mean significantly I mean by a lot like down to 10 to 15 seconds. The significance is very noticeable. Overall the whole thing totals around 60€. For that price, I get 1TB of storage and a huge performance boost for my specific application of it. I think it is a great buy. If you have a need for cheap and fast storage or don’t have spare slots like SATA or M.2 maybe a PCIe adapter would work for you.
As always I hope this has helped you out.


Recent Comments