
Adding Bluetooth to your treadmill with an ESP32
The premise
Since the Covid pandemic started a few years back. We are staying at home most of the time and at some point, I decided to purchase a treadmill. After a few weeks of reviewing and investigating different options I went with a cheap Chinese no-name brand that had most of the features of a premium treadmill but none of the so-called “smart” features like Bluetooth or ANT protocols. But deep diving into some forums and projects there is a way to get Bluetooth from it via an ESP32 board.
Prerequisites
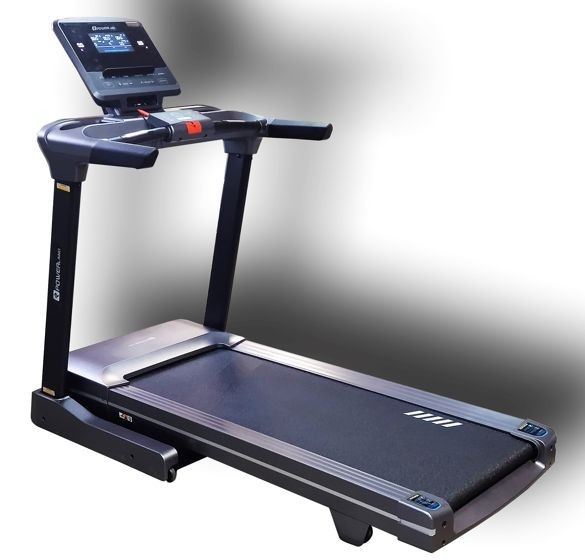
For this setup, I am using a YK-ET1801B a seemingly no-name brand treadmill.
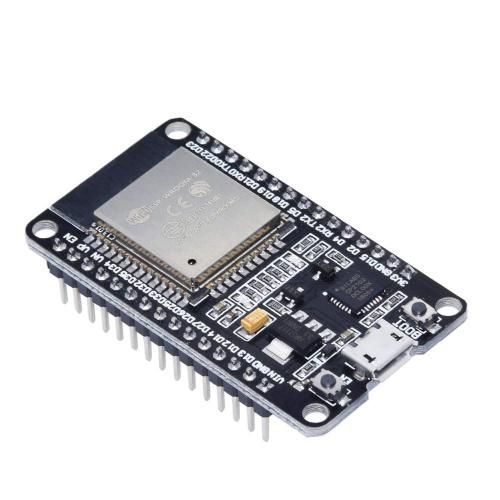
ESP-WROOM-32 module with WiFi and Bluetooth
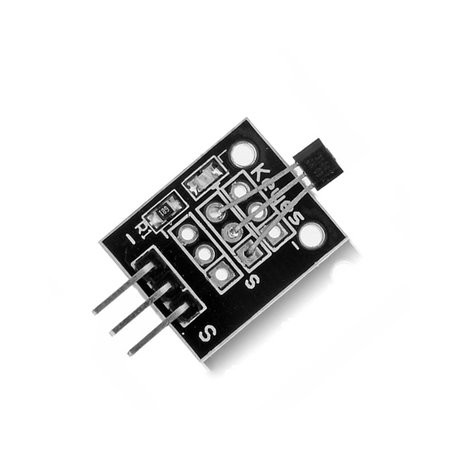
An A3144 3Pin model Hall sensor
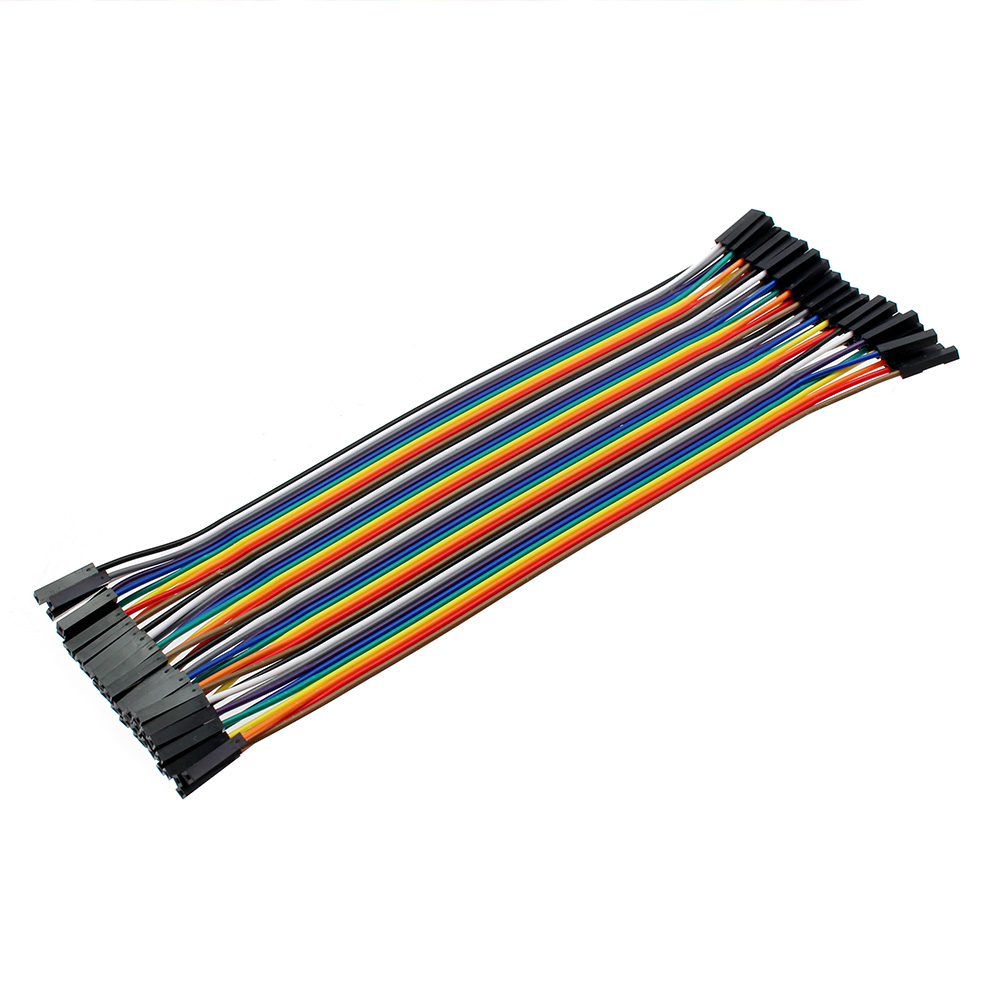
Get some Female-to-female Dupont jumper wires if you don’t want to solder. Not necessary but could make things easier
Get the Arduino IDE software from https://www.arduino.cc/en/software
Have a micro USB cable handy as we will need to connect the ESP32 to our PC.
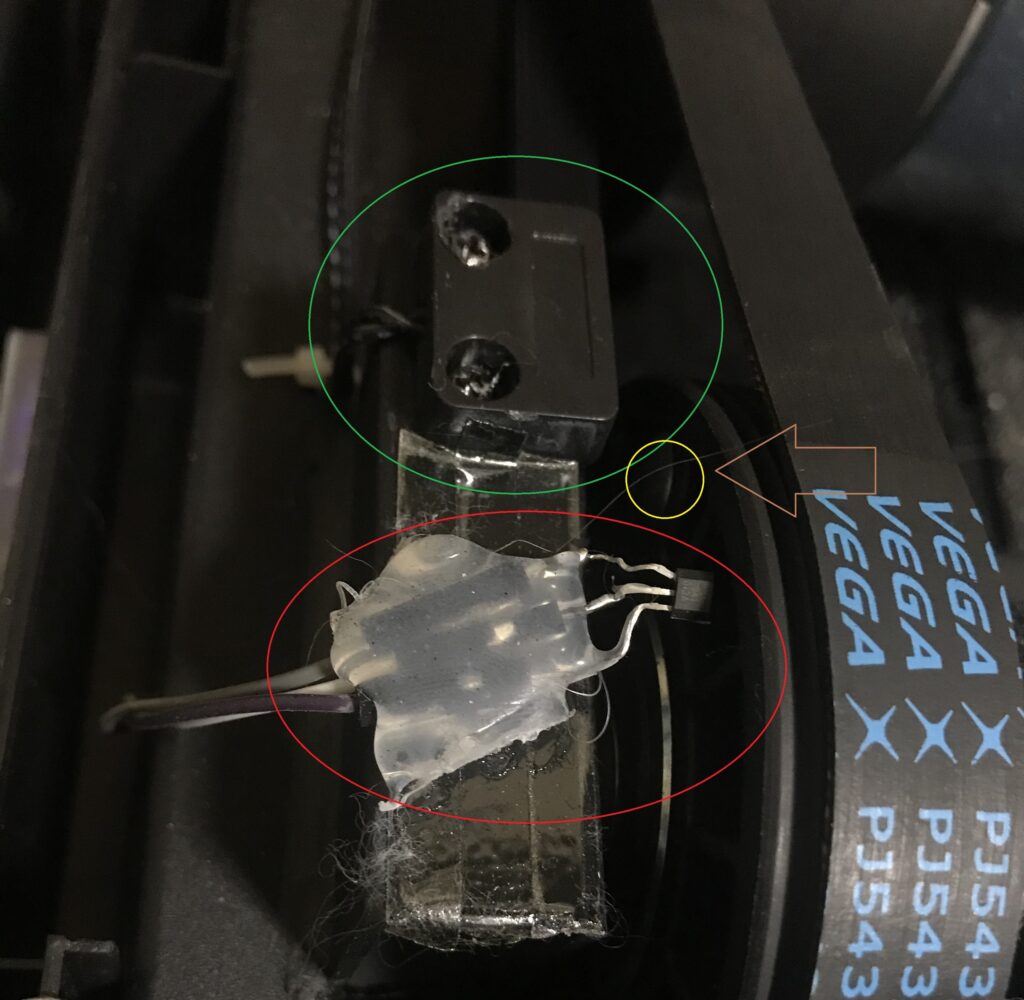
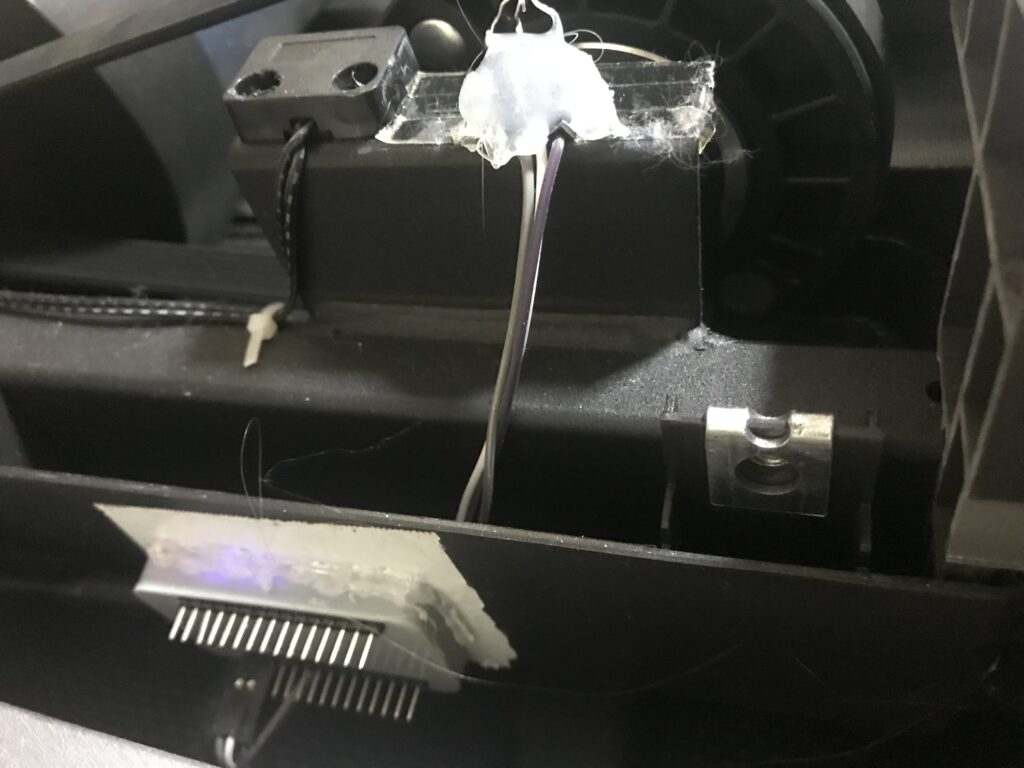
How this overall works is the sensor will get contact when the motor running the belt spins the treadmill mat. The contact is done on the rotating part on the inside of it usually there is a magnet. The treadmill itself actually does the same thing we are just adding another contact next to it. Although I do believe we could attach to the existing one by splicing in the cables I didn’t want to mod the existing manufacturer installation and just add my own. Especially since the sensor costs pennies.
You can see on my installation the original black sensor market in Green is there already. Mine (in Red) is hot glued next to it. And the magnet is inside spinning when used and comes into reach when it revolves around the sensors.
The setup
So we can initially start the Arduino IDE software. We need to do some things with it before we start.
You can head on over to the hackaday.io site where I got the .ino file that we are going to use for this. https://hackaday.io/project/175237-add-bluetooth-to-treadmill
Virus total report as well for security reasons
https://www.virustotal.com/gui/file/1d13e4b84f686d0da42139ff0de57937667eb2849cec7dd9722ced8d09396bf6?nocache=1
The work we are going to do is based on that script as that’s how I made it work on mine since it is pretty much versatile for any treadmill with this type of configuration.
In the IDE software, you can on the .ino file from File -> Open
If you are using the ESP32 board I posted above then we need to add support for it.
Go to File -> Preferences
In the Additional Board Manager URLs add this:
https://raw.githubusercontent.com/espressif/arduino-esp32/gh-pages/package_esp32_index.json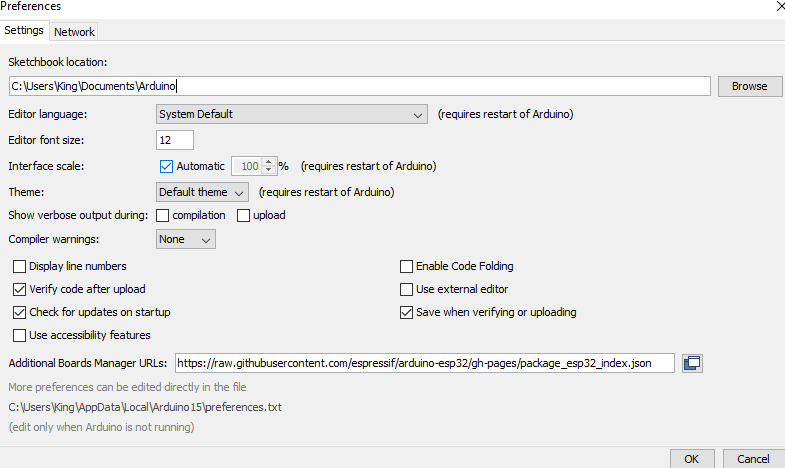
Once the link is added press OK.
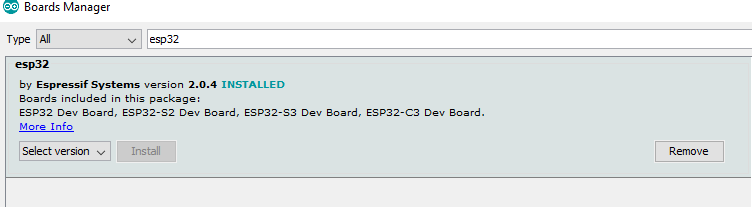
Go to Tools -> Board -> Boards Manager…
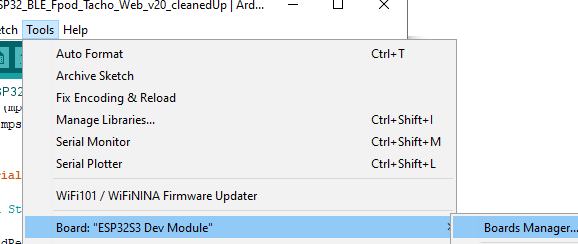
Search for ESP32 and install it.
We will need a few libraries since they do not come as standard with the stock IDE application. First, we go to Sketch -> Include Library -> Manage Libraries…
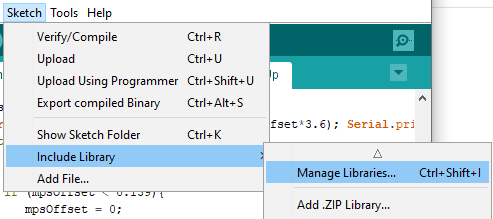
In the search, menu type in Time. Alphabetically scroll down until you find the Time library and install it

We need two more libraries but they are not in this list so we will need to add them manually.
You can get them at
https://github.com/me-no-dev/ESPAsyncWebServer
https://github.com/me-no-dev/AsyncTCP
Download the code as ZIP.
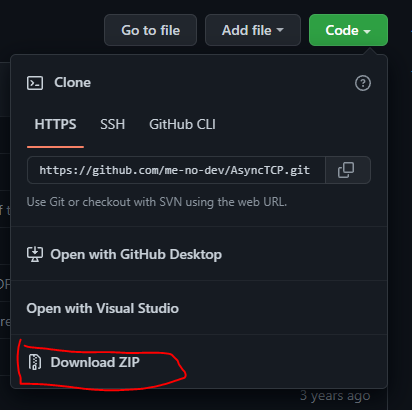
Add both libraries by navigating the same way to the library manager but instead choose Sketch -> Include Library -> Add .Zip Library…
Once added we should be good to go with compiling.
Few more things to change.
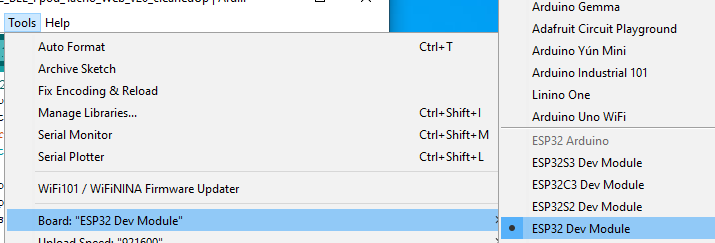
Go to Tools -> Board and select ESP32 Dev Module
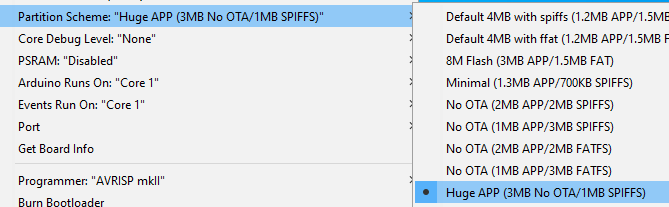
Set Upload speed to 115200

Set the Partition Scheme to Huge APP (3MB No OTA/1MB SPIFFS)
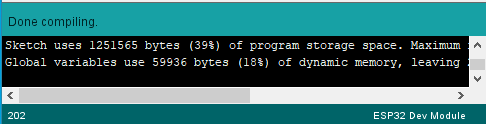
We’re done here. You can verify if it compiles by going to sketch Verify/Compile. It will take some time but should finish without any errors. You will see the message at the bottom console
Now inside the code, you need to first change these lines
const char *ssid = "Your_SSID_here";
const char *password = "Your_Wifi_Password_here";
Enter your WiFi SSID ( the name of your WiFi) and password in the second line. This will let the module connect to your WiFi and host a small Web interface that you can access to monitor how it is working.
The other line that needs to be changed is the belt distance and this will be specific to your treadmill the number is measured in mm (millimeters) so keep note. Change that number to what you have currently.
volatile long belt_distance = 142;
Mine measured to 161 but I re-flashed a few times as there was a bit of a difference in what the treadmill screen was showing and what the sensor was picking up. So you can adjust the number and re-flash your modules as many times as you like before you are satisfied with the reading accuracy.
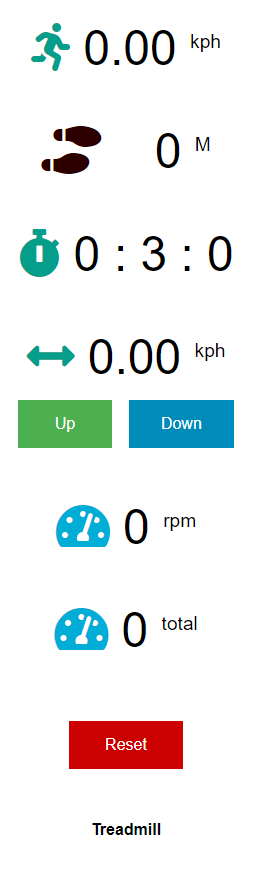
You can also change or remove the name of the device which is shown in the web interface. Default is:
<h4>FootPod</h4>But you can name it what you want or just remove it. The interface basically looks like this.
We need to connect the sensor to the ESP too.
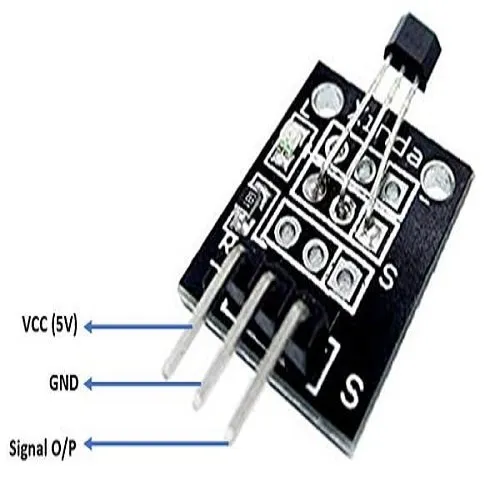
here is the pinout for the Hall sensor.
And the ESP32 pinout:
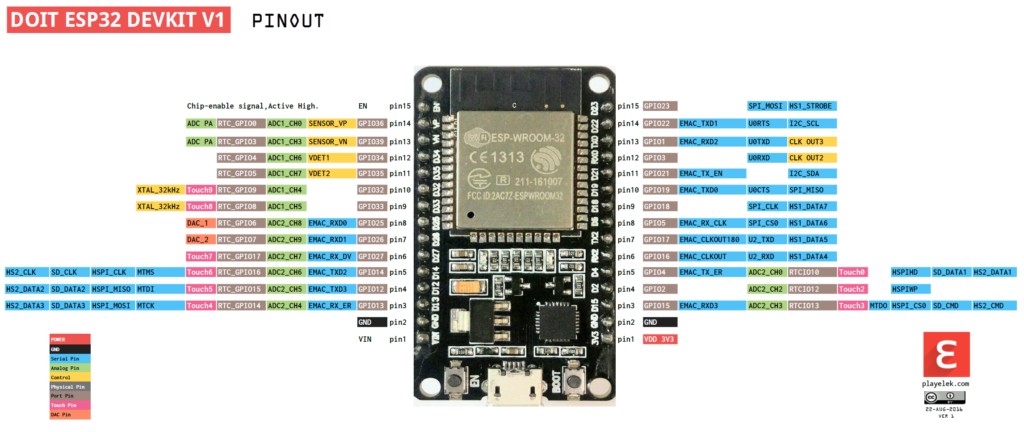
Naturally, VCC and GND are next to each other and that’s an easy one. For the Sensor itself, you can choose the PIN you want. Find the Pin in your code here:
#define interruptPin 26 // the number of the IR Receiver pinAs you can see the default is 26 but you can change it to the other GPIO pins as you like and connect the Signal wire to that PIN as you set it up.
Now the last part is what I mentioned is flashing so when you connect the ESP board via the micro USB cable you will need to select a port on which it is connected. If you don’t have any other USB devices connected you should most likely have only one so it should be easy. But if not you can find it in the Device Manager check under Ports (COM & LPT)
To set the port go to Tools -> Port -> select your port
Once that is done you can go ahead and do Sketch -> Upload. The code will start compiling and be uploaded. After that is done leave the board connected and check if the web interface is running. For that, you need to know what IP address your ESP board has. You can find that in your router or use a program like Angry IP Scanner. The program scans your network and finds any device that is connected and live. So you can try the IPs in your browser and see which one it is.
https://angryip.org/
If everything is working we can continue to the last part.
The installation
So you want the Hall sensor to detect the magnet as it spins around. The easiest way is to do it firstly by hand. Place the ESP32 near the motor and hold the sensor in hand while having a phone or laptop with the web interface the monitor the speed and if it is being detected properly. Change the speeds of the treadmill to see if it updates and if it is accurate. If not change the mm length and try again until you are satisfied with the result and accuracy no placing the sensor is up to you. Double-sided tape, super glue, hot glue. Whichever works and keeps it in place as it has to keep up with the vibrations that it will deal with once you are running on it. As well as get some kind of phone charger adapter so you can power the ESP board as well. Any will most likely do. Hopefully, you have a spare power socket nearby.
You can refer to my pictures here:
Top view as well
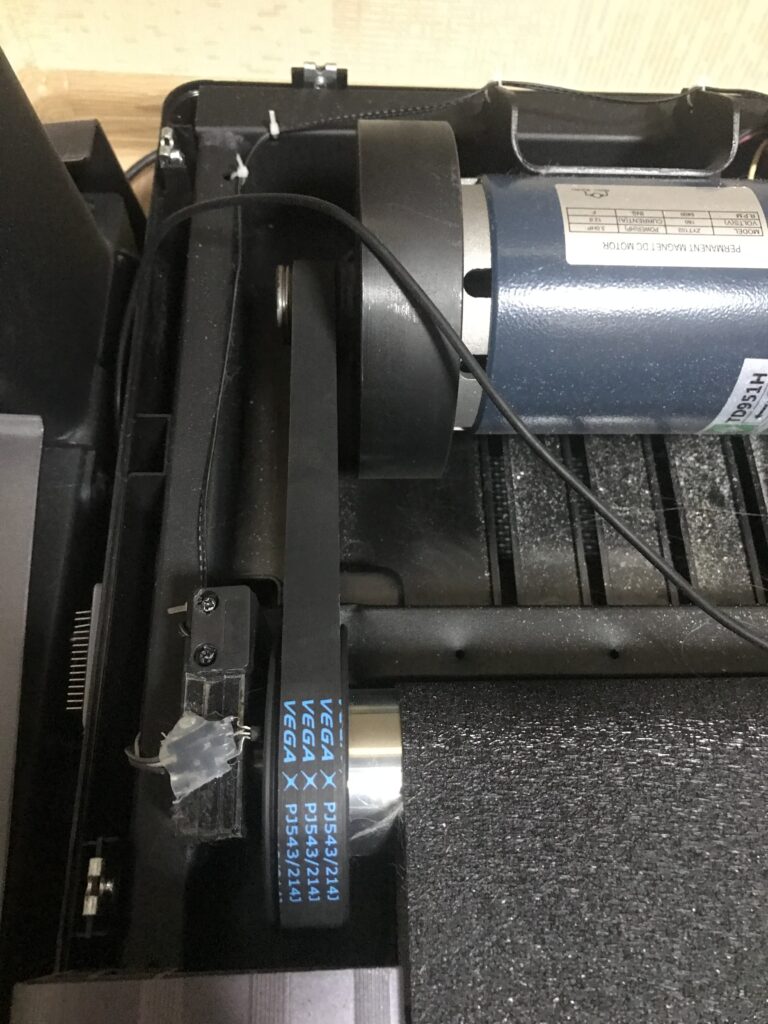
Check that no cables will snag or interfere with anything and you should be good to go.
I tested it with Zwift and you can see the results:

Conclusion
So we managed to add a sensor to measure the cadence and via Bluetooth to detect and connect to programs like Zwift to have additional interaction and provide an enhanced experience to your treadmill sessions.
I hope this has helped you out.


Im having a couple of issues with this:
– My laptop running Zwift can find the device, as can my iPhone running the wahoo app, and my Garmin watch. However, once connected, none of them really are able to get any information from it. Zwift gives a “connection issues” message once the virtual world starts, garmin refuses to connect to it, and wahoo connects to it but won’t show any info for it etc
– the web server doesn’t seem to work. I can verify that the device connects to wifi, both using the serial console, and using my routers admin page. using map shows that port 80 is filtered but that the device is up. I also tried port 8080 with no luck
– using the serial console log, I can see the messages printed, but all the values remain at zero. Ive tried using pin 26 which was the default, and changing it to pin 15, and moving the connection to pin 15. I ordered the Hall effect sensor and esp32 listed on this blog post so I feel like im not missing anything
In other words, nothing is working haha. Is there a GitHub page where you maintain this project or a similar one?
Hi Martin,
So to be fair, I haven’t touched this since 2022. But because you commented. I actually downloaded Zwift and booted up everything just to test if it still works. I can confirm it still works I was kinda worried that maybe Zwift updated since then and is no longer allowing such devices. But that’s not the case. So the way I use it is I login to Zwift. Then select Run and via Cadence attempt to pair the device. I have to sometimes reboot the ESP32 via it’s physical button after a few seconds it pops up on the screen to pair. This is done via an iOS device and Zwift on boot asks me to allow detecting devices on the network which I need to allow otherwise it wont even find it. So no issues there.
The web server also works I just found it’s assigned IP address and without any ports or anything input it into my browser. In this case I’m using Firefox. I don’t provide any ports. Some browsers can block connections due to http and certificate issues. One thing to make sure is that you need to check if it’s attempting to connect via https or http. Because this little web server works only on http so the url should be http://your-esp32-ip
If in the serial log you see values as 0 that means it’s not picking up the magnet, I had to really fidget around with the placement of the Hall effect sensor to actually get readings and test at different speeds as it would sometimes skip and the readings would be off due to inconsistency. But you could just try to first hold the hall effect senors and move it around and check the serial console if it’s even picking up something. Or use a separate magnet just to see if it detects it. Because if there is no reading it wont give you any cadence anyway.
Unfortunately I don’t maintain this and the only things I’ve found are what’s in the post which I found during that time when googling for a solution and they seem to be abandoned based on the last update. Though now when checking there are some other repositories which I haven’t seen before. Might be worthwhile to check out, one of which seems to be based from the same hackaday project.
https://github.com/lefty01/ESP32_TTGO_FTMS
https://github.com/eborchardt/BluetoothTreadmill
https://github.com/mobilars/RSC