
Cheap, easy way to stream PSVita with fixed audio noise
So I have been digging in the past to find a solution to get the PSVita to show up on the big screen or at least in OBS as well as any other streaming software. There is a solution for this called the UDCD USB Video Class plugin which lets you stream your PSVita display via USB.
For this particular topic, I’ll be going over the two known methods both of which use the same plugin as there currently isn’t another working solution besides buying a VitaTV which has a dedicated HDMI port to accomplish this. Before I proceed this does imply your console is already modified (jailbroken) and homebrew ready. If not but you are willing to attempt this. There is an amazing guide hosted here: https://vita.hacks.guide/
Easy to follow and get you going in the amazing homebrew scene for the Vita. Works for the handheld and TV models too.
For this, I am using the PSVita OLED model which is the generation 1 version or the Phat model as it is called. But it can be followed along with the slim model too.
Hardware list:
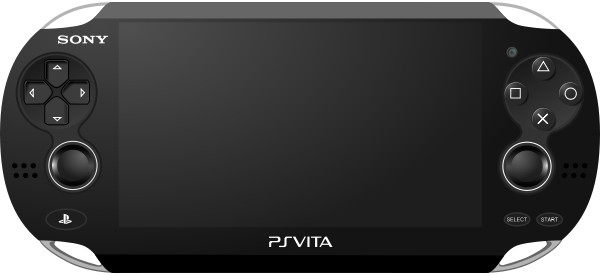
PSVita console
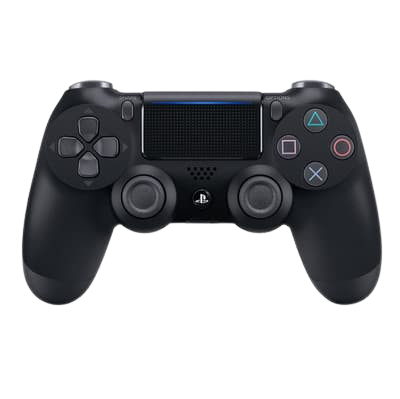
Playstation Dualshock 4 controller
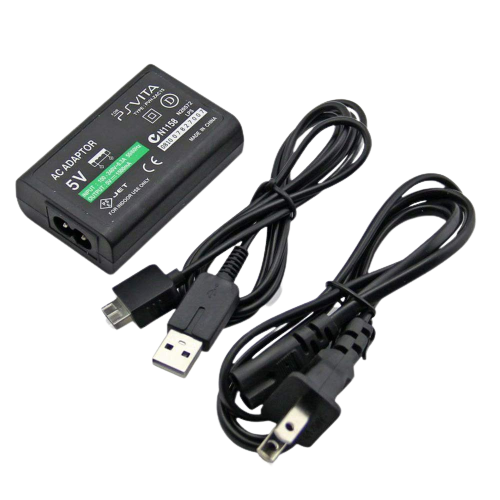
Charger(Best would be an official one or a 5V 1.5amp power supply)
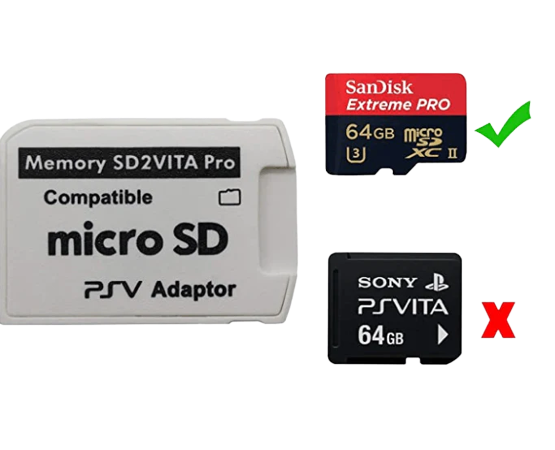
Vita Memory card or an SD2VITA adapter so you can use a generic SD card which is way cheaper
If you have the SLIM model you can get away with the 1GB internal storage since it has it built in, unlike the PHAT model. But still highly recommended.
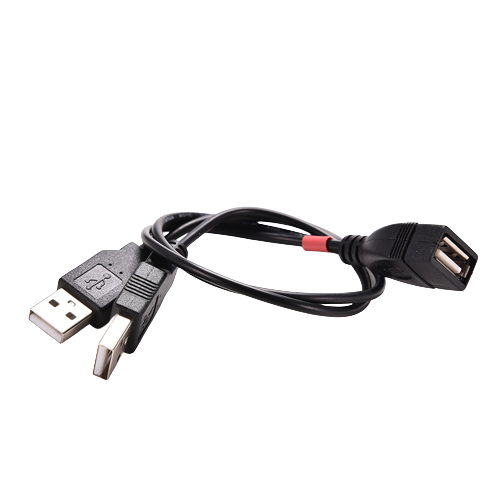
USB Y CABLE (1 Female to 2 Male)
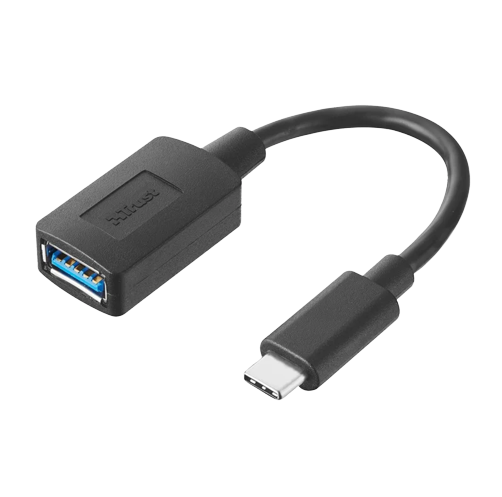
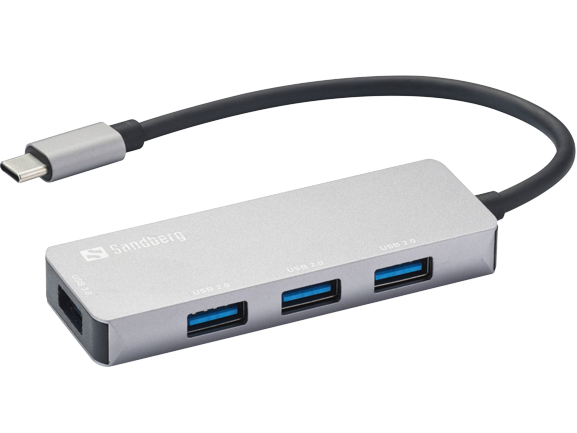
Alternatively, instead of the splitter, it can be used with a USB-C to USB-A Cable or a USB-C HUB if you have a PC with a USB-C port which is a much nicer setup overall.
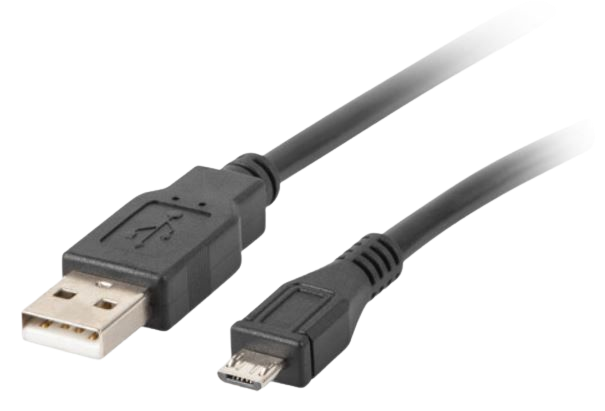
USB to Micro USB cable
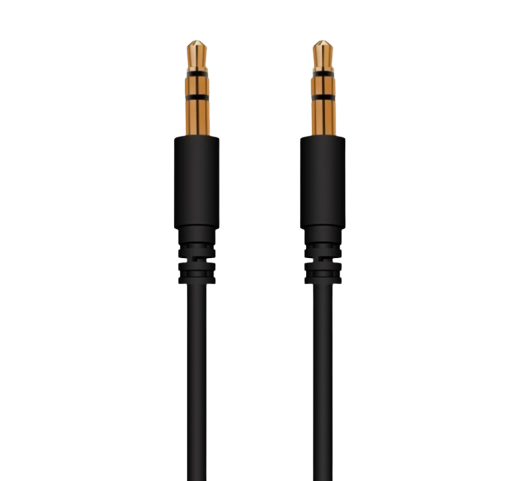
3.5mm AUX cable
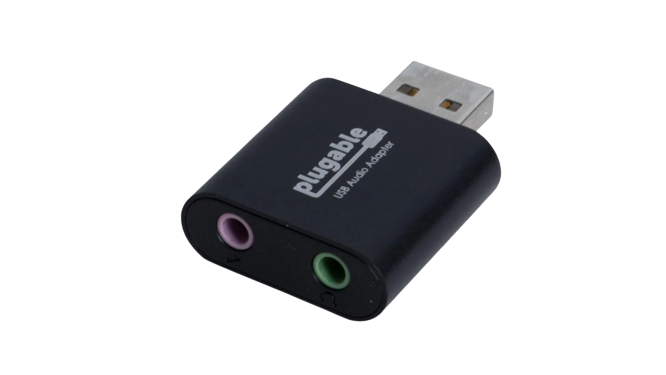
USB Audio adapter
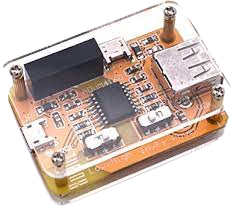
DollaTek USB Isolator ADUM4160
So at first seems like a lot of stuff is needed. But overall something like cables and adapters usually can be found lying around the house from other devices. The only bigger ticket items are perhaps the DS4 controller from the PS4 and the USB Isolator.
Other stuff can be found pretty cheap. I will have some example links to most of the stuff at the bottom.
At this point, you should have a modded/homebrew-enabled Vita ready to go. First, I will recommend installing the AutoPlugin 2 which can be found here https://github.com/ONElua/AutoPlugin2 This will make your life easier as we will be installing some plugins to make this work.
Once installed we will get these Vita Plugins listed here installed. Ignore the other ones I marked the ones we need with the blue dots.
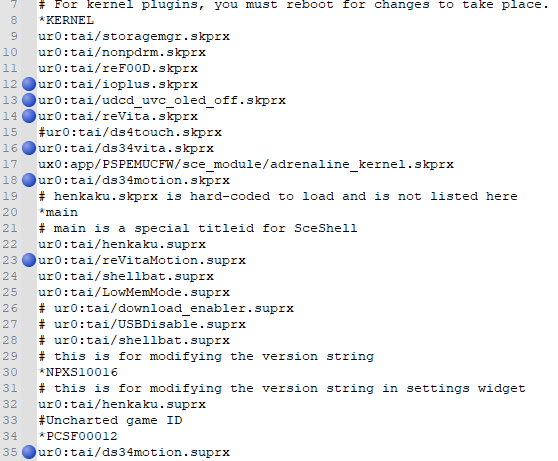
I will list the GitHub pages for all the plugins mentioned above here:
https://github.com/CelesteBlue-dev/PSVita-RE-tools (ioplus.skprx can be found here)
https://github.com/xerpi/vita-udcd-uvc
https://github.com/MERLev/reVita
https://github.com/MERLev/ds34vita
https://github.com/MERLev/DS34Motion
Quick explanation:
The ioplus plugin is used to allow more IO operations in userland and is required.
The vita-udcd-uvc plugin lets you stream your PSVita screen to your computer via USB.
The reVita is a plugin for PS Vita / PS TV, which allows you to remap inputs and trigger different actions.
The ds34vita is a combination of the ds4vita and ds3vita plugins it provides support for the DS3 and DS4 PlayStation controllers as the name implies
The DS34Motion adds motion control support with the DS controllers. This is not available in AutoPlugin and needs to be set up manually. The GitHub link explains it in detail and it’s quite easy. It has reVita support even though you could use the regular DSMotion plugin but from my testing, it was very unresponsive in games.
After installing the plugins and if needed changing the config.txt file in the /tai folder. You will first restart the console so that all the plugins get loaded and start working. If the console does not boot or hangs in a boot loop just hold down the L trigger and press the Power button until it reboots. It will reboot in safe mode with all plugins disabled so you can troubleshoot if anything goes wrong. Maybe you have other plugins interfering but usually, it’s a rare case of problems happening.
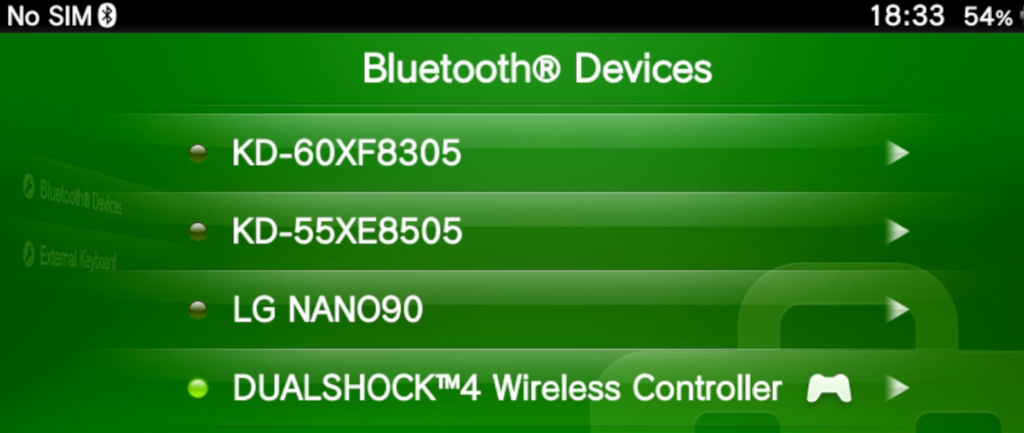
Next, we will pair the DS4 controller. In your, Vita go to Settings -> Devices -> Bluetooth Devices
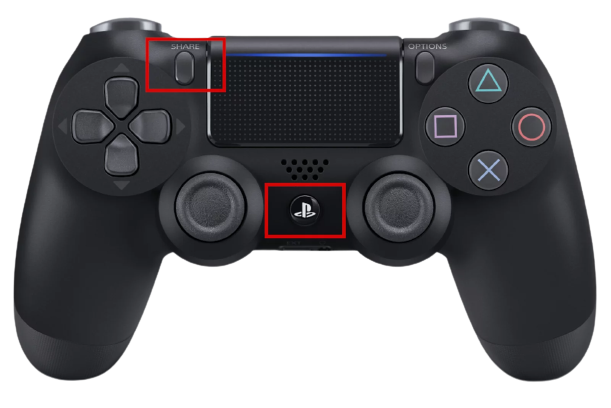
Put your controller in pairing mode by holding the share and PS buttons. Official Sony guide here https://www.playstation.com/en-us/support/hardware/ps4-pair-dualshock-4-wireless-with-sony-xperia-and-android/
The LED on the front should start flashing. Once that happens you should see the Dualshock 4 Wireless controller in the list of devices. So we connect to it. When that is done you have the controller paired and should be able to use it to move around the Vita menus.
While booting you may have noticed some popups that reVita has started and is running or something like that. So to access that menu you press Square + START together and it will bring up the menu. Here you can set all sorts of different mappings for all your DS4 buttons including calibrating, joystick dead zones, etc.
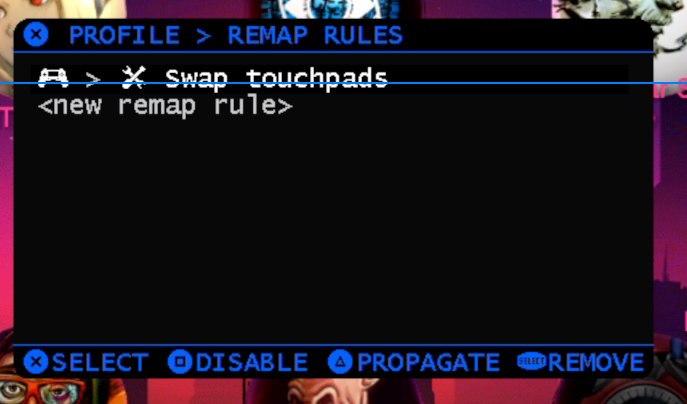
The one thing I did with my setup was check whether the Swap touchpads were working so basically how it is set up is that you Press the touchpad on the Controller which acts as a button and it swaps between the Front and Rear Vita touch pads. When you touch the DS4 touchpad it is indicated on the screen where you are touching with a Yellow or Blue finger. Yellow means front and Blue means back touch panels. Easy to remember.
Once in the reVita menu, you can access the Profile and go to Remap Rules. The Swap touchpads are added there by default. But make sure it is not disabled and propagated. So that you can use it as some games do utilize this feature. But if you won’t be using it this can be skipped. You can also add all sorts of custom remap rules by just adding a new rule.
You can already test this out in some games whether the controller works properly for you before proceeding.
Once we get that working we can proceed to get our Vita display to our PC. I used the Vita USB cable at first and just connected it to my PC. Since the plugin is already running in the background, the PC should detect the Vita and install the drivers. We can open OBS and add a Source.
In OBS add a Video Capture Source in the Devices list you should see PSVita in the list. Select it and if not Activated click Activate your PS Vita should show up on the screen.
You can tinker with the settings to see what resolutions and framerates you can pull from it. For now, I am leaving the defaults to test everything.
One thing to note is if you are using all the plugins mentioned and are streaming the screen at the same time the Vita will give an error when trying to access the reVita settings
So if you decide to change any settings while streaming in reVita you will have to disconnect the stream of the console to access the menu. I have only seen this on the PHAT console. Perhaps this is not an issue on the SLIM models but I have not tested this so keep in mind.
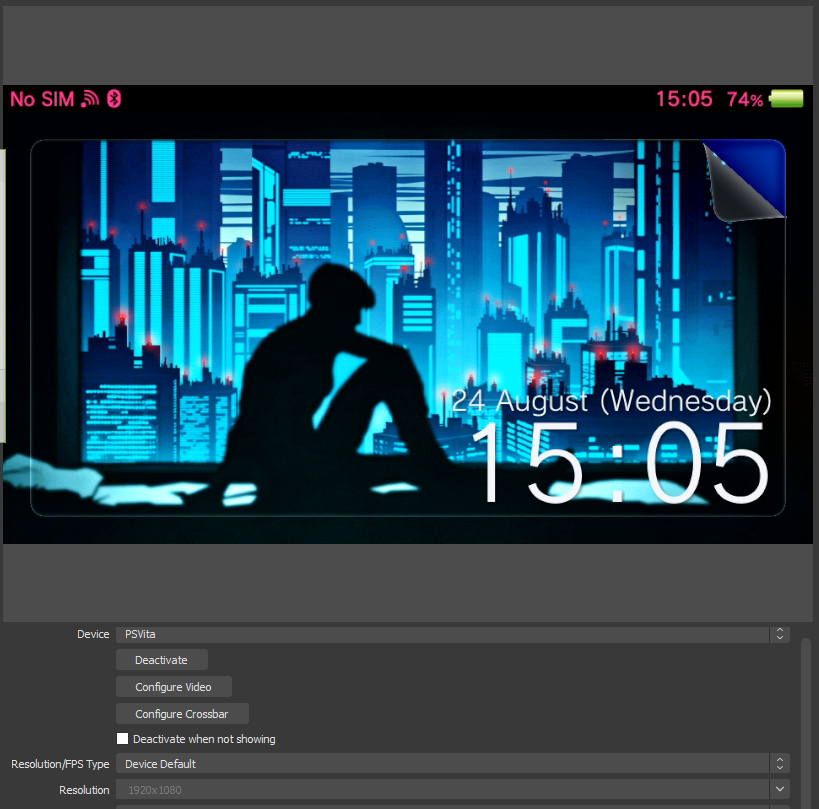
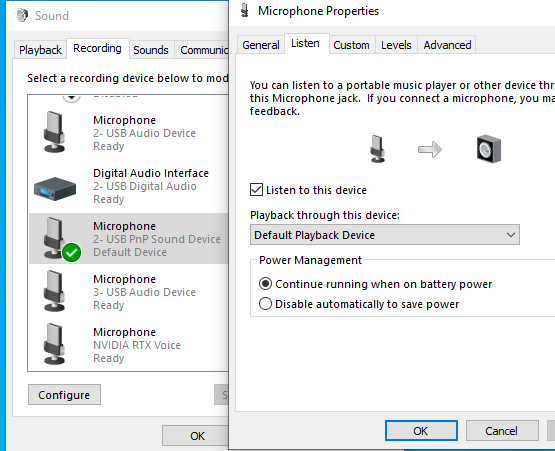
For now, all is going great. But the issue remains that we have no sound. Now you can get sound by using the AUX cable plug it into your computer’s existing Line-in or Microphone port and listen in through the device settings like in the example.
This is where we get two issues. First, if you have enabled USB Power in Vita’s settings. You will get huge static noise coming from the audio and you can somewhat play around with the settings to get it lowered but it’s always there. A cheap solution is you disable USB Power so that it does not charge while plugged into the PC. The drawback is that your console will deplete over time and run out of battery. So you have a finite time to play and stream and will have to stop to recharge before continuing. I am not going suggest to just dealing with the static sound and getting used to it. That is just annoying. The option now is the USB Noise isolator.
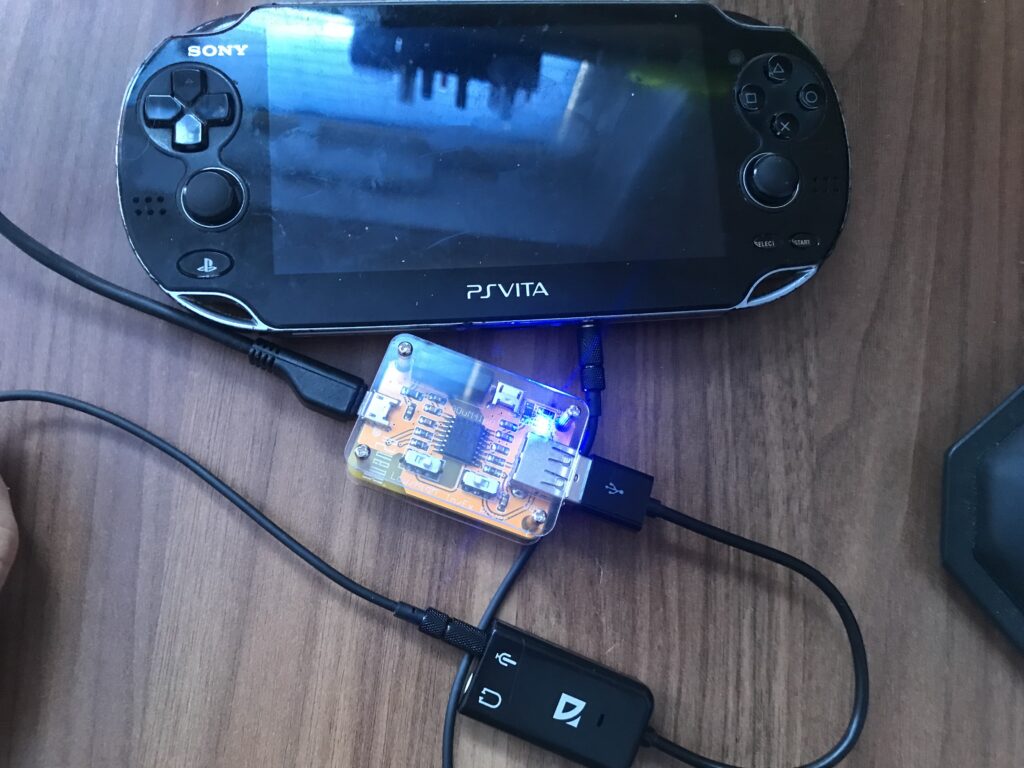
Fixing the audio issue. We wanna take the AUX cable and plug the other end that was in the PC into the USB audio adapter. I use the Microphone jack. Usually, they are labeled or color-coded (red/pink). That Audio adapter plugs into the isolator’s USB-A port. On the opposite side, we plug the Micro-USB cable in and plug the other end into one of the USB ports on your PC. Since we are using the Audio adapter we will get a notification on the PC that a new sound device should be installed and configured. Go back to the Sound settings and refer to the picture above to set up the listening settings the same way for that device. The isolator has two Sliding buttons on it one is labeled Low/High and the other In/ Ex Power. Right now we will slide the buttons toward High and the other to In meaning we want High isolation to reduce the noise to maximum and use internal power coming from the PC’s USB port. If your port perhaps does not give out sufficient power and the Isolator is not working you can use the third Micro-USB port and connect an external charger be sure to switch to the Ex Power mode to use it. But I found that the USB port on a PC is enough juice.
Once that is connected and configured you should hear the sound even without streaming the screen from your PC. Which should have the noise removed. You can test out of course the different isolator switches and Windows Sound settings to see if there are any additional changes you can make it is usually great out of the box.
So now we have a crisp sound and when plugging in the Vita’s USB cable we have video as well. So we can start streaming the screen even with USB Power turned on. The last issue we may need to tackle is charging. The USB ports on PCs usually do not provide adequate power to the Vita and it will still slowly discharge over time. To circumvent this I have tested a few methods and here are my conclusions.
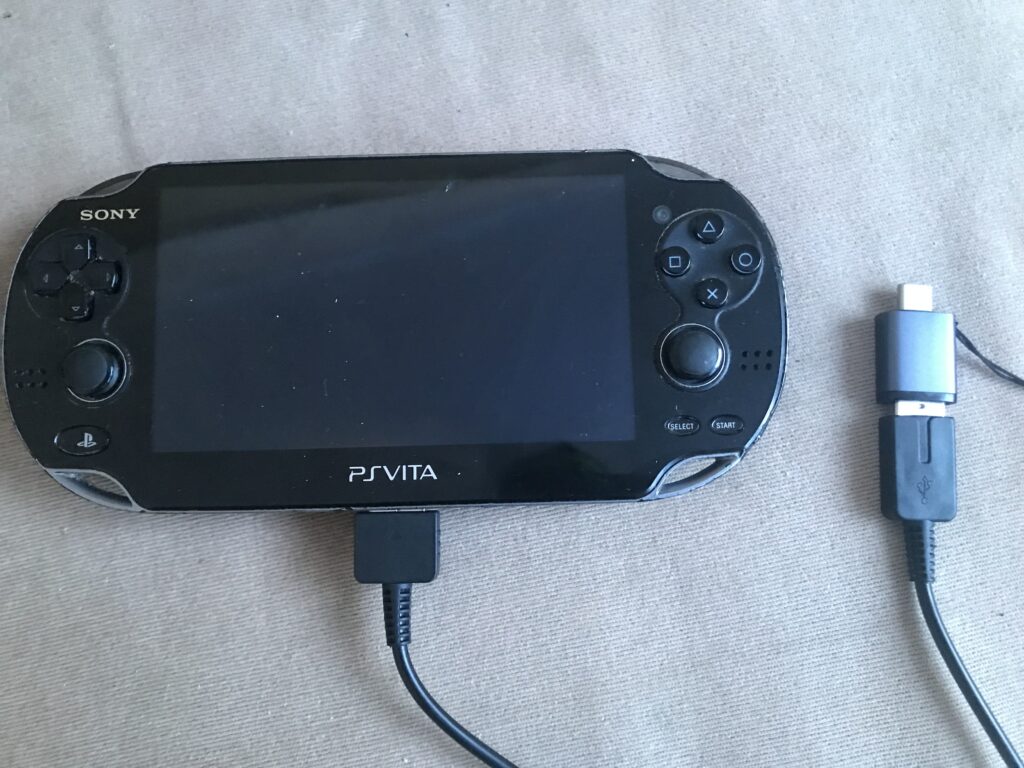
Firstly the USB Y Splitter cable the way it works if you connect one end to the power adapter and the other to the PC. Example here to help make it clear
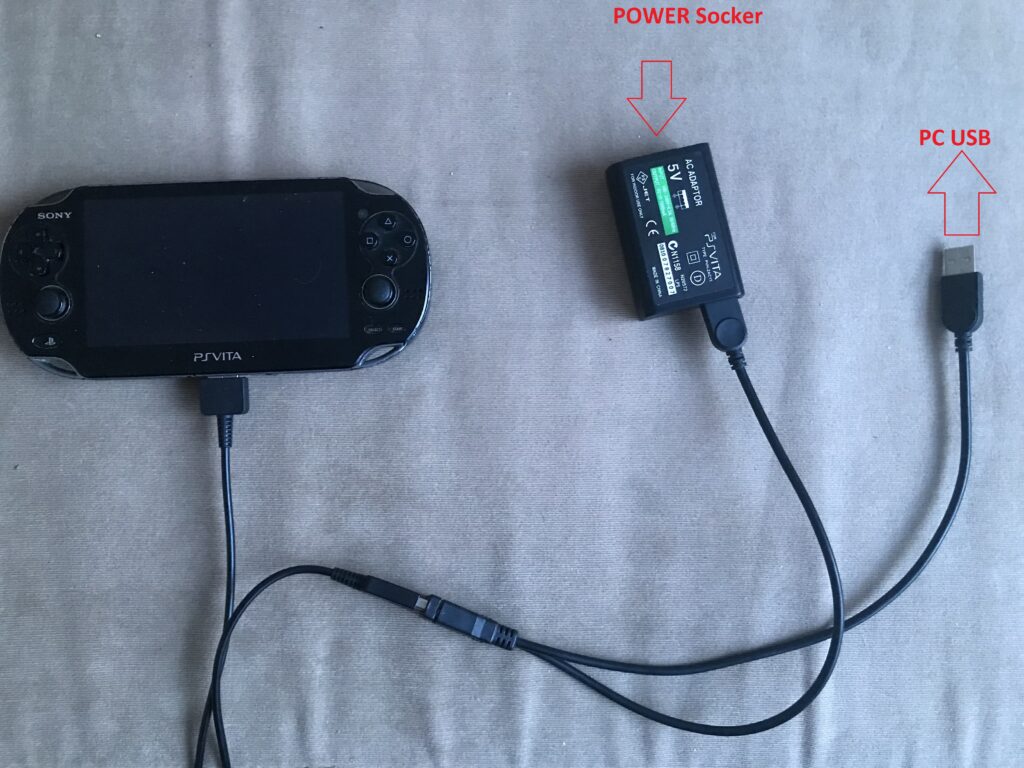
So how does this help? It keeps the battery from discharging. I have played Uncharted Golden Abyss and Killzone Mercenary to test. The result is the charge stays the same it doesn’t charge up but does not discharge so that fixes the issue and you can play as long as you like. Here are some examples of why this works I use a USB Tester to see the difference.
Here we have the Vita streaming video to the PC with just the regular cable plugged in:
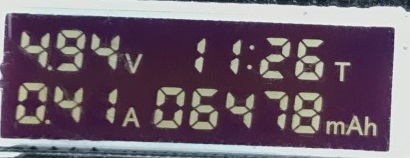
It fluctuates a bit around those numbers but is pretty stable at 4.94V and 0.41amp. The fluctuation is on the 0.01 scale. Also, there is no charging symbol on the Vita to indicate that it is charging so it slowly discharges.
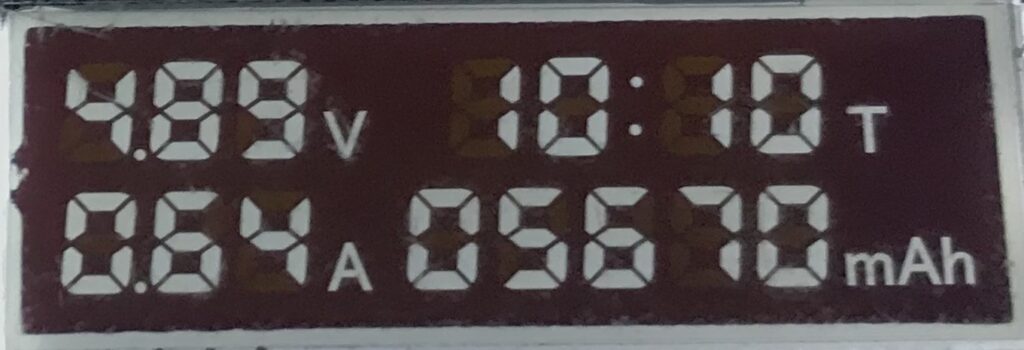
Now if we plug in the adapter with the Y splitter. This is what we see on the Tester
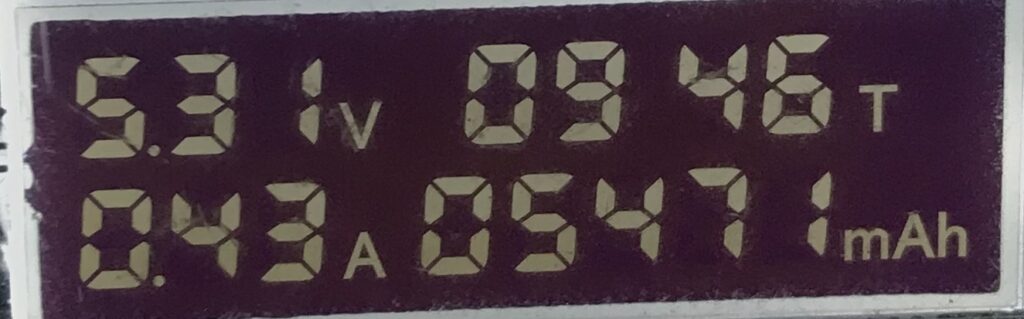
As you see the Voltage goes higher by ~0.30V and the amperage pretty much stays the same. But the key difference is that even though the Vita still doesn’t show it is charging it stays at the same battery percentage. I played around in heavy games for 30 minutes straight using this method and have streamed the full length of Uncharted Golden Abyss from start to finish without any issues and could go on for hours.
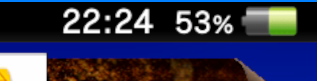
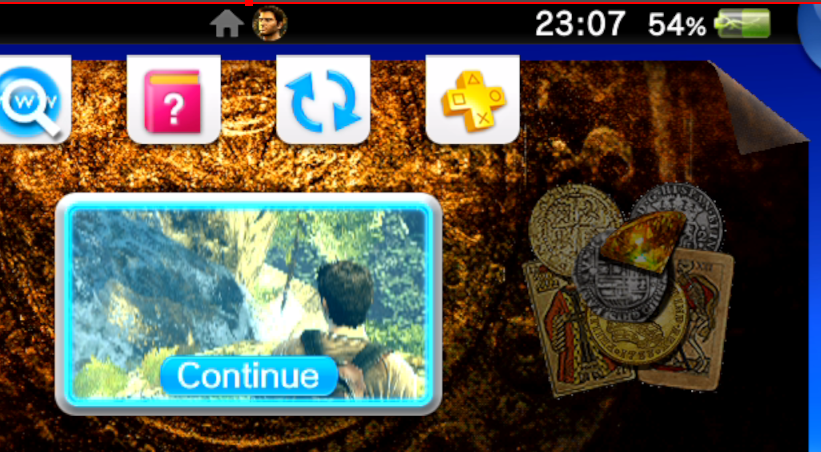
The 30-minute test can be seen here as the battery level does not change with time although no charging is shown.

Seems like we cleared all issues that prevent us from playing and streaming the console to its fullest. Which is nice. At this point, you could use it as is, but there is the option to use USB-C if your computer has such a port. Since USB-C has higher throughput of power we can leverage it and use a much cleaner solution for this. So instead of using a power adapter and a Y splitter cable. We can just utilize USB-C. I tested these options:
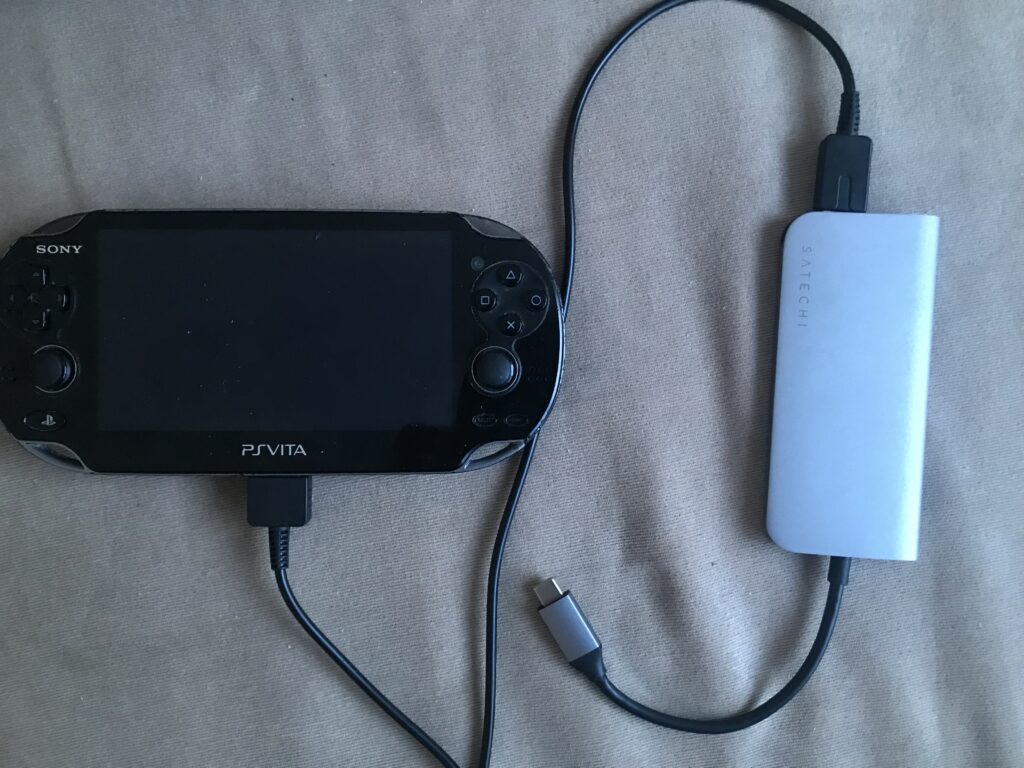
Both worked great. The good thing that comes from these is no power adapter. Single cable. But most importantly it not only streams the display it also CHARGES! Not as fast as a dedicated charger but it charges the battery and the indicator shows charging.
In terms of the ways you can do this, I would go with the USB-C route in terms of simplicity and the benefit of charging if your PC has the ports for it.
This pretty much concludes the testing and explanation on how to do this so you are able to stream your PSVita screen and audio and utilize all its features. There are worthwhile mentions though which are alternatives.
The first one is the Vita Dock. This basically uses the same USB Stream plugin but utilizes a Raspberry Pi for displaying video output. I only had a Pi Zero around so testing it did work but the Pi Zero performance was pretty bad and I would recommend a Pi 2 or better to work flawlessly. Also, you can avoid the USB Isolator with this as it can use Bluetooth to get audio from the PSVita, but that also didn’t work for me because the USB Bluetooth dongle I had didn’t want to pair with the Vita for some reason. So there may be compatibility issues.
Overall this requires hardware like a Raspberry Pi a Bluetooth dongle, an HDMI cable, a power supply, and a memory card. The added benefit of this setup is that you would be able to connect it to a TV which is a nice feature if you want that.
The other option is more of a myth or legend as it never was reproduced and only a few mentions of it exist in the years 2013-2015 and 2017 when there was an attempt to recreate it. Basically a hardware mod by adding a separate output jack for video out. Like this:
It was said to cost 150$ for the mod at the time and slowly faded into obscurity.
Notable mentions in sites if you are interested in reading deeper:
https://wololo.net/2015/07/27/vita-hdmi-mod-pinouts-xmax-katsu-not-verified/
https://wololo.net/2014/01/31/vita-hdmi-output-mod-yet-another-amazing-achievement-by-katsu/
https://yifan.lu/2017/12/31/vita-hdmi-mod-attempt/
The website that was supposedly selling this mod was 3dsvideocapture.com but it no longer exists.
The last option if you really don’t want to go through all of this then your best bet is to just get a PS Vita TV. It has an HDMI port so solves all other problems immediately. However, finding it at a cheap price is the problem.
So that is all the options that exist or have existed to my knowledge. There are plenty of videos you can find online on how to set up the video streaming feature. However, I was not able to find something of this sort to figure out the audio and charging issues. But, there is a solution if you are willing to do it.
I hope this was interesting and helpful to you.
Some links to find some of the items mentioned.
Vita charger
SD2Vita
Vita Memory Card
USB Y Splitter
USB-C to USB-A Adapter
Micro-USB cable
AUX cable
USB Audio Adapter
USB Noise Isolator

Recent Comments