
BMW X3 E83 Instrument Cluster LED Fix
This time we have a car-related issue. Although this is not something that usually happens but is due to some malicious behavior especially when purchasing used cars. But this can be applied if you ever have an issue with your cluster if you have a defective LED light or if someone as in my case pulled it out. So this write-up is mostly due to the fact that I have not really found a dedicated guide on how to disassemble the actual cluster. There may be better ways of doing this but I will dedicate this to the way I have performed this
The issue
The main problem in my case was that the 4×4 cluster light was not lighting up. This was later confirmed by running TEST 2.0 on the cluster menu to test the lights. The test can be performed as explained in this short video:

Once I confirmed that the light was not working I proceeded with finding information on disassembly. This is specific to the car model BMW E83 X3 2004 3.0d. Other year models may be different.
The solution
So first we need to remove the cluster from the car this is explained in good detail on the Pelican Parts website.
https://www.pelicanparts.com/techarticles/BMW-X3/124-ELEC-Instrument_Cluster_Replacement/124-ELEC-Instrument_Cluster_Replacement.htm
It’s held in with two screws and a cable plug at the back. Mostly you will just need a short screwdriver or a rachet wrench and move the steering wheel as far away as possible for easy removal.
For the cluster disassembly, we will need some tweezers, spudgers, a Torx screwdriver, and some paper. For LED replacement we will need a soldering iron and preferably a 12V and 3V power supply to test the cluster and or lights.
Do note that this repair is done by taking a salvage cluster and replacing the needed parts with the working ones.
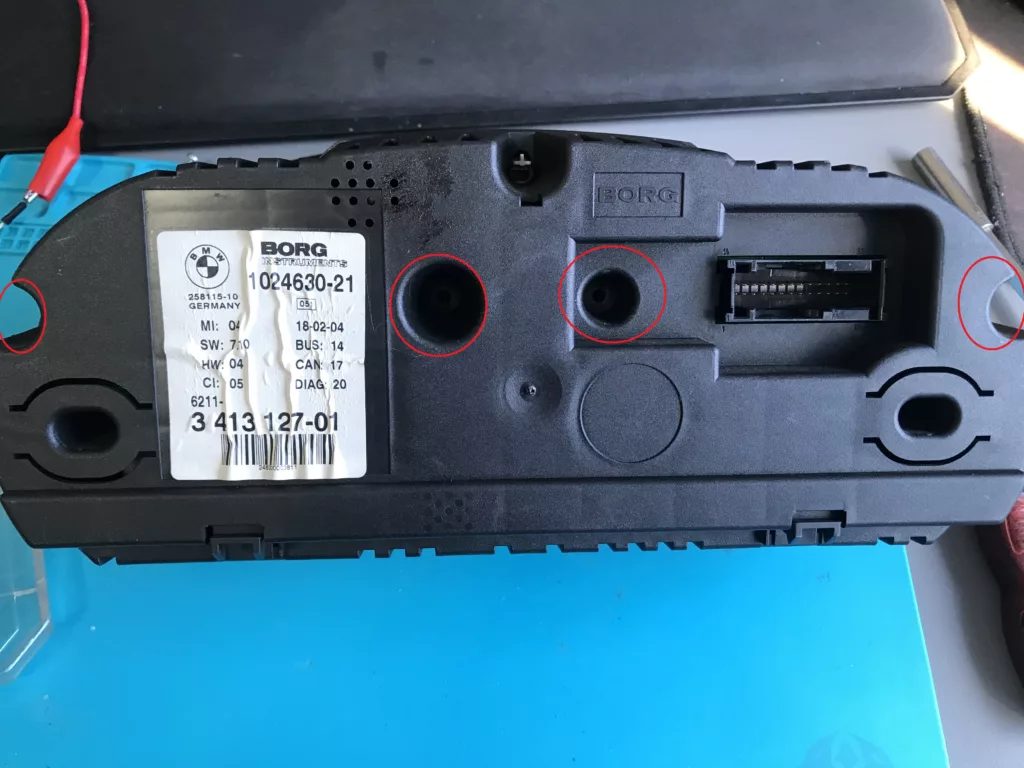
Once the cluster is removed we can remove the 4 Torx screws from the back of the cluster.

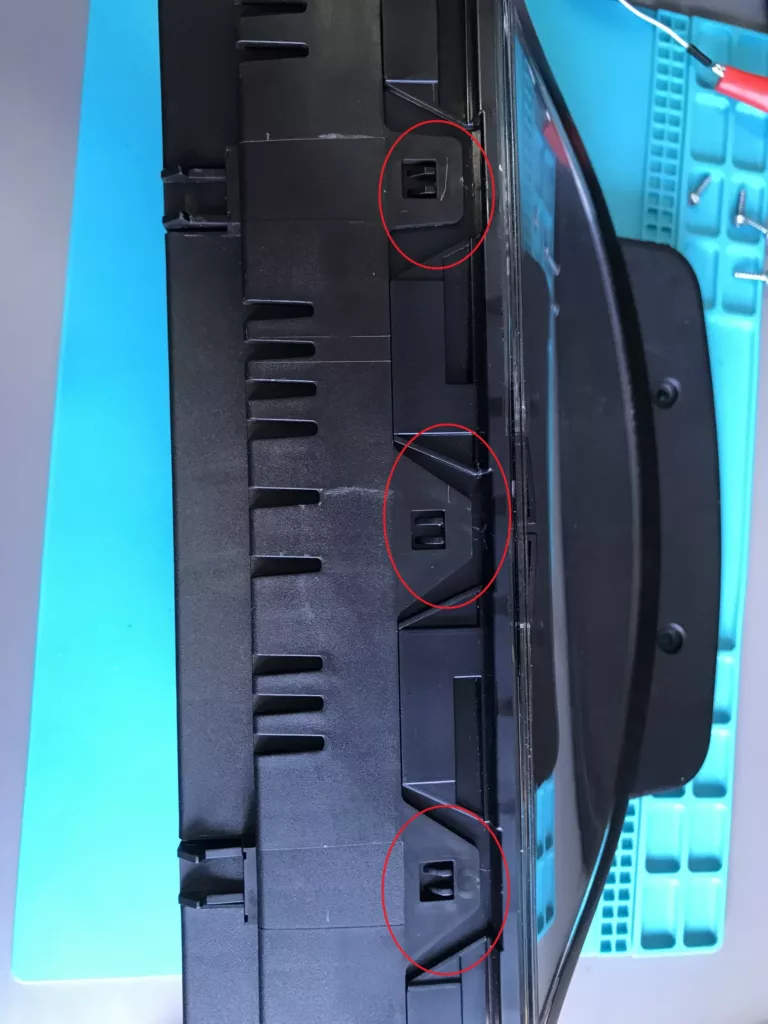
We now unclip the rear casing from the side and bottom mounting clips to release the case.
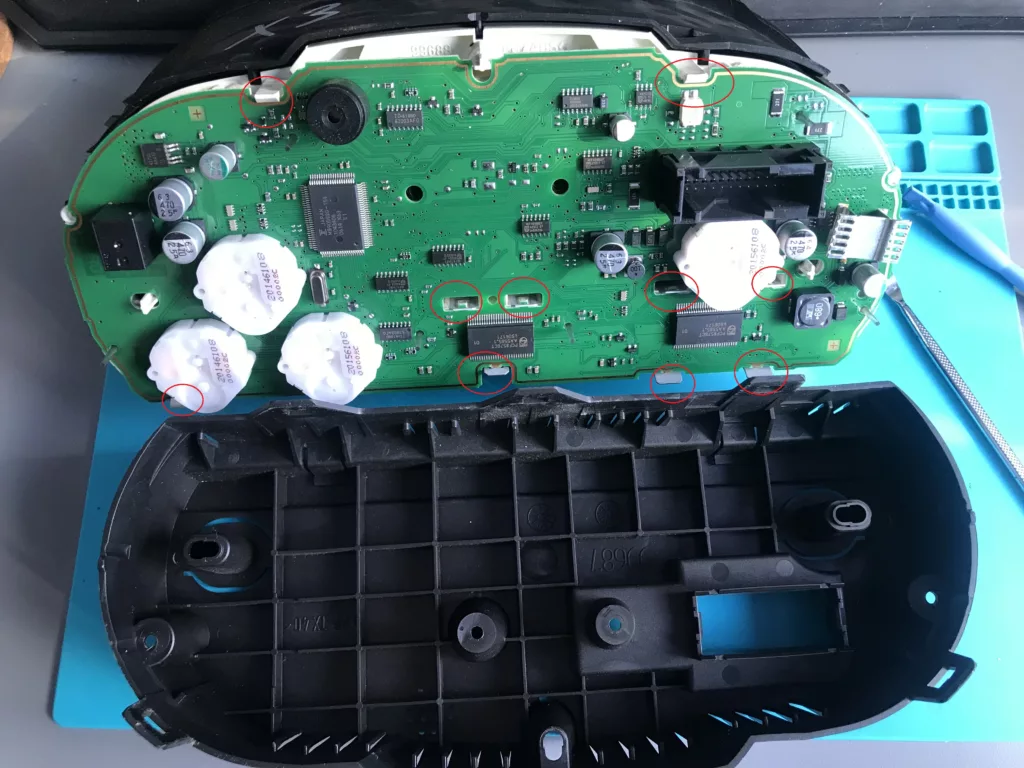
With the rear case removed you have a bunch more that are holding the front of the case. White clips around the edges and metal ones in and around the main board hold the tiny screens in place. All of these will need to be unhooked. The best is to use a plastic spudger to get underneath without damaging the board.
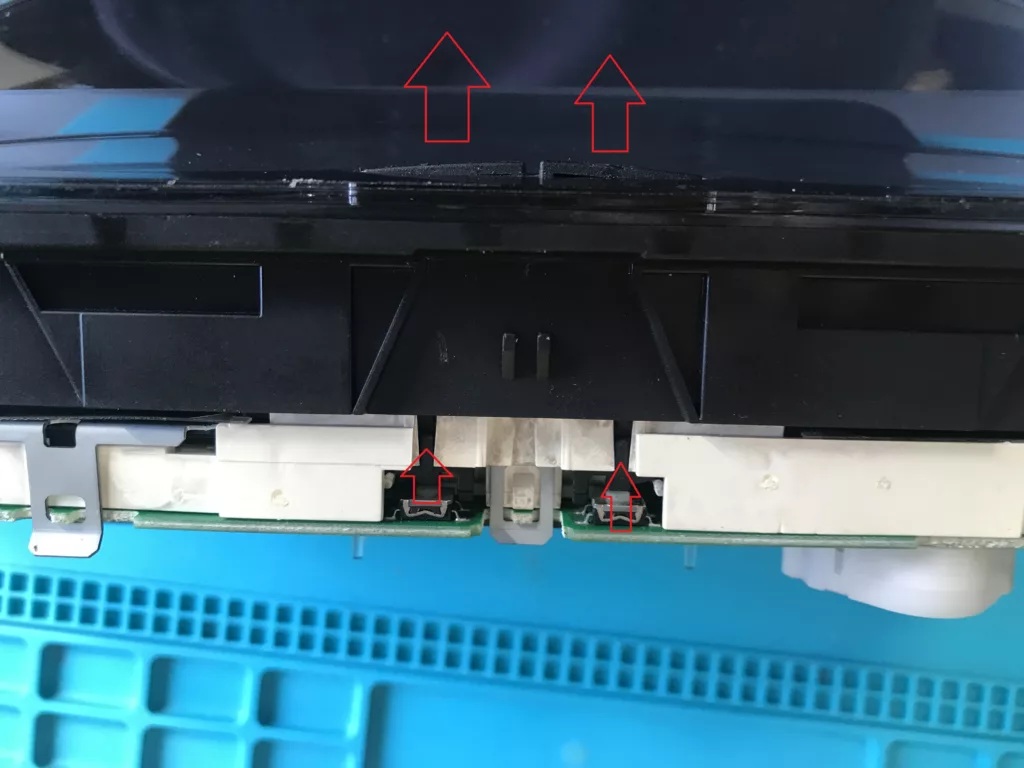
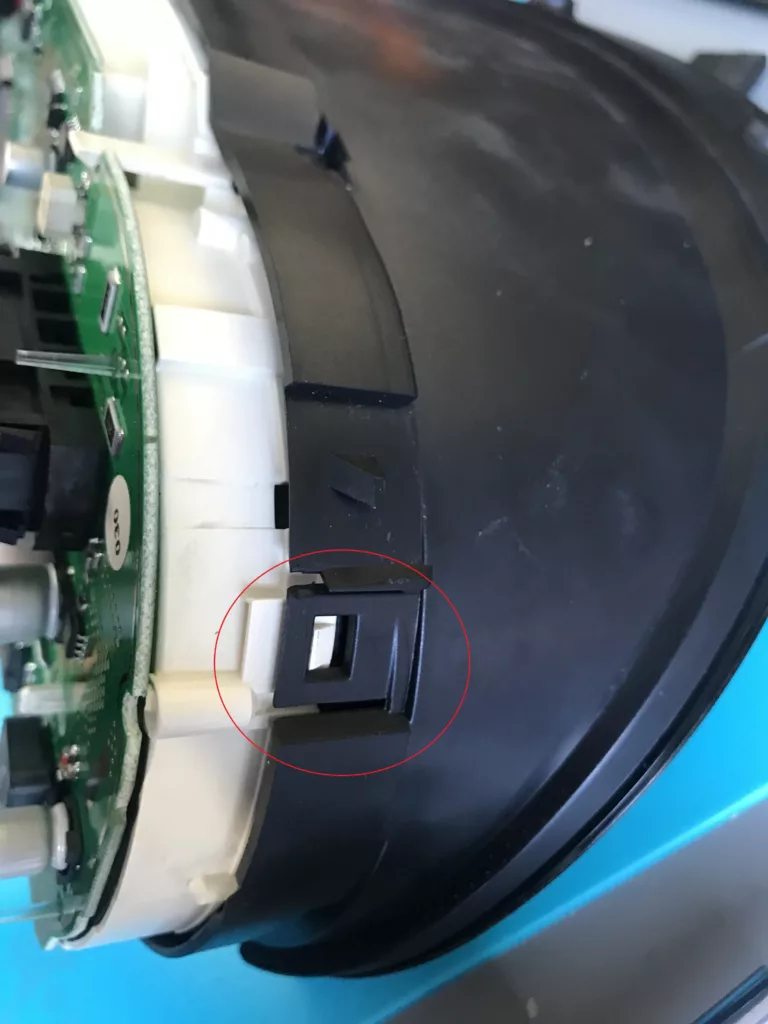
The two buttons at the front also need to be removed. Just need to push in the little clip inside near the actual button on the board and pull it out through the front case as they slide out.
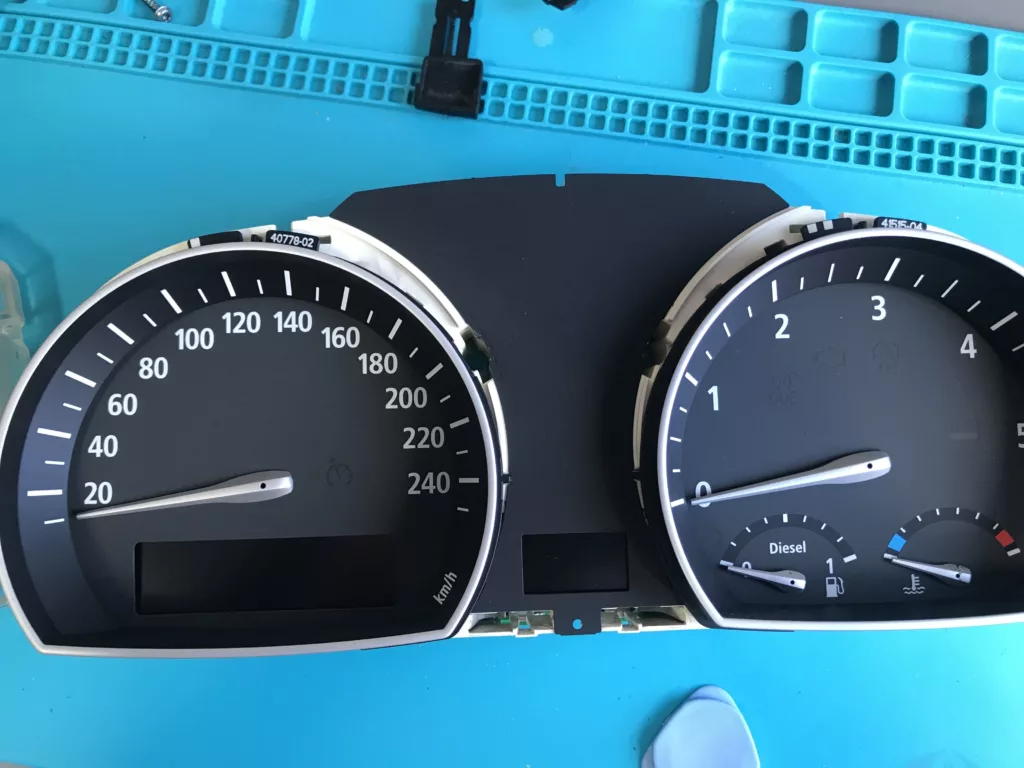
You should now have the inner part with both front and back sides removed. We need to remove the plastic rings around the cluster faces to get access to the gauge needles.
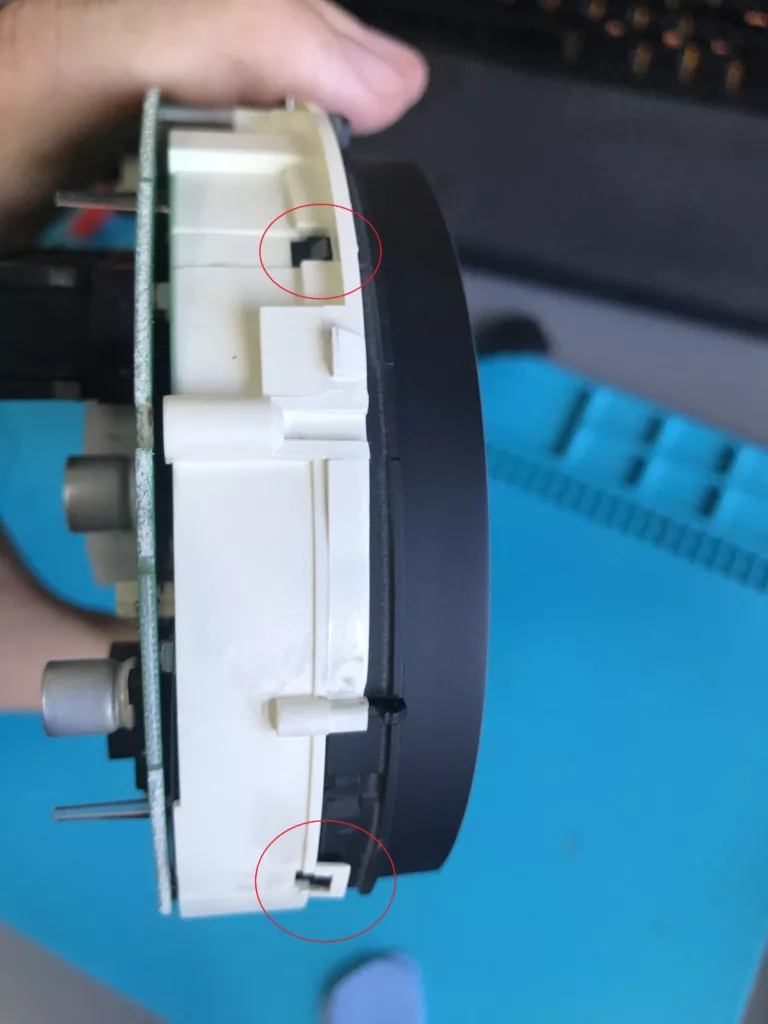
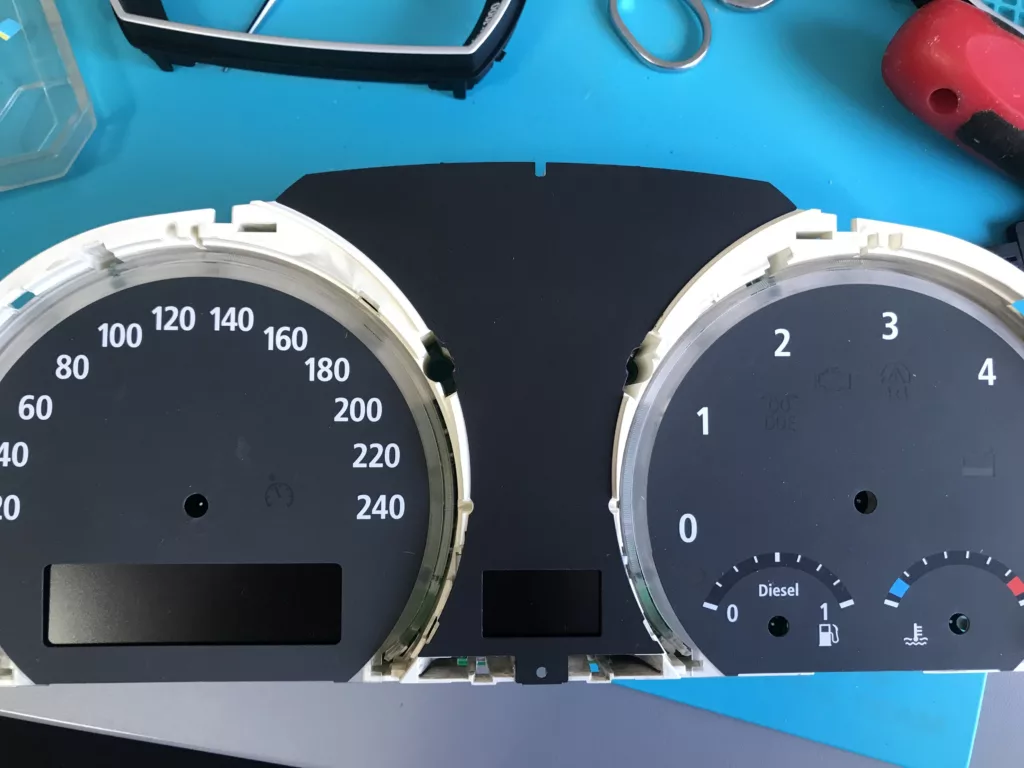
Both rings have clips around them. You will need to unhook them and the rings should come off fairly easily. Once the rings are removed my method was to slide some paper underneath each of the needles and pry them upwards with either a spudger or some tweezers.

The needle removal is probably the hardest part since you don’t want to scratch up the faces of the cluster. Folded-up paper seems to work well and doesn’t let any scratches form. The needles need to be pulled straight up from the center where the hole is and they pop out. Some force needs to be applied here. Remember the orientation of the needles as it is best to place them back the same way and position they came out.
Once everything mentioned is unclipped and removed. The board easily slides out from the back of the cluster.
Same thing we did for the salvage cluster that we are going to be pulling the LED bulb from.
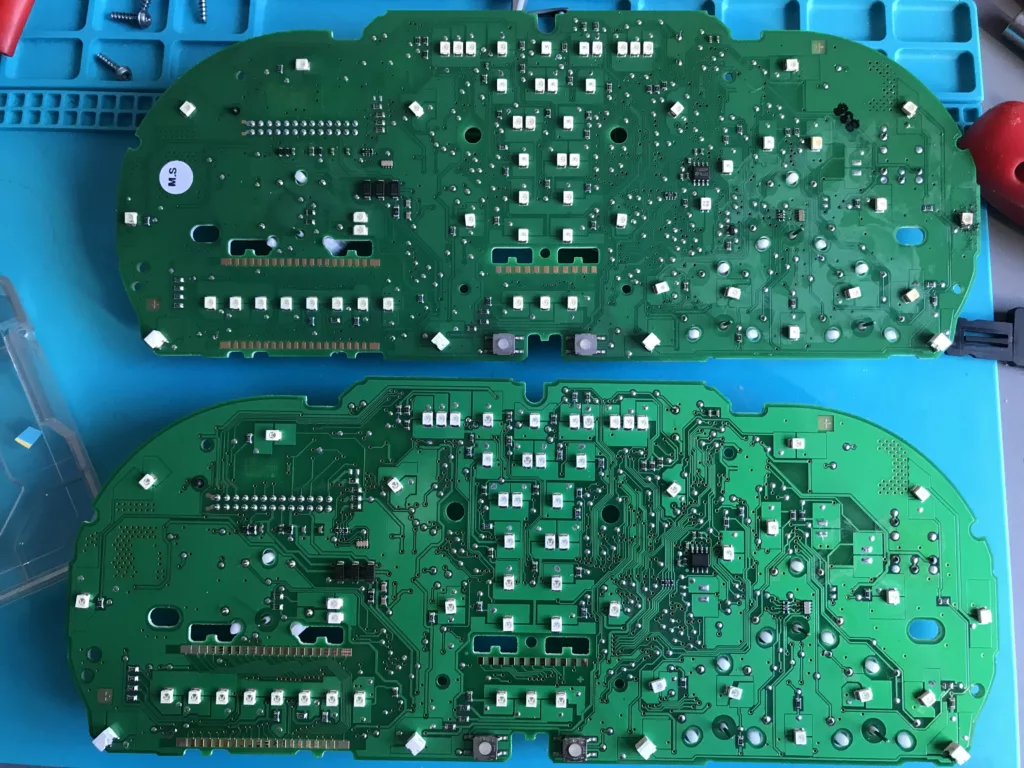
When inspecting it is apparent that there is no LED in the place where the 4×4 light should be present on the bottom board versus the salvage one at the top.
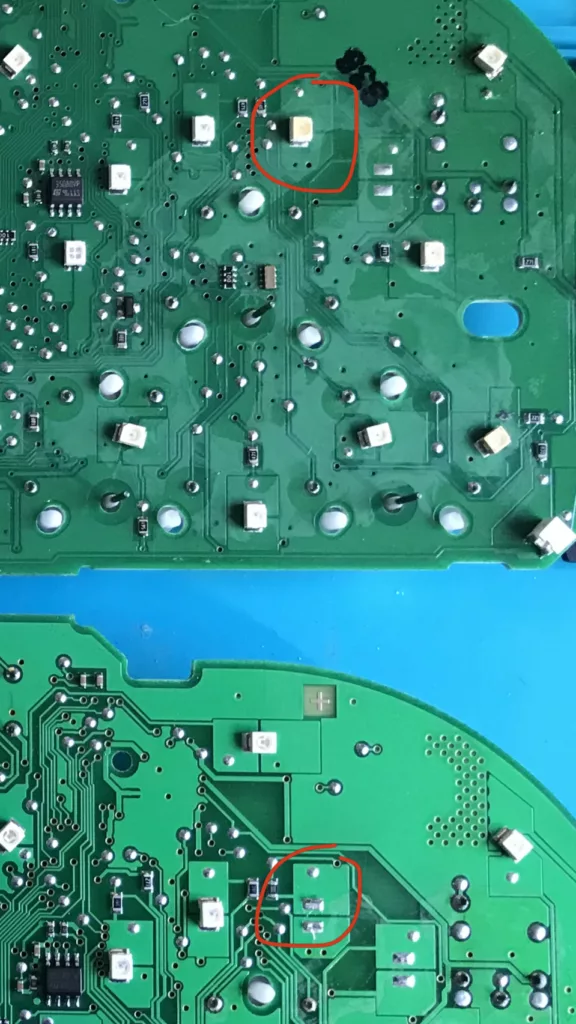
Now removing the LED is up to you. Using a pointy soldering iron tip was my choice. But it might also work with a hot air station. I heated up the iron to 350 Celsius and a few light taps on each side of the contacts while lifting it up with some tweezers was easy enough to pull off without any damage.
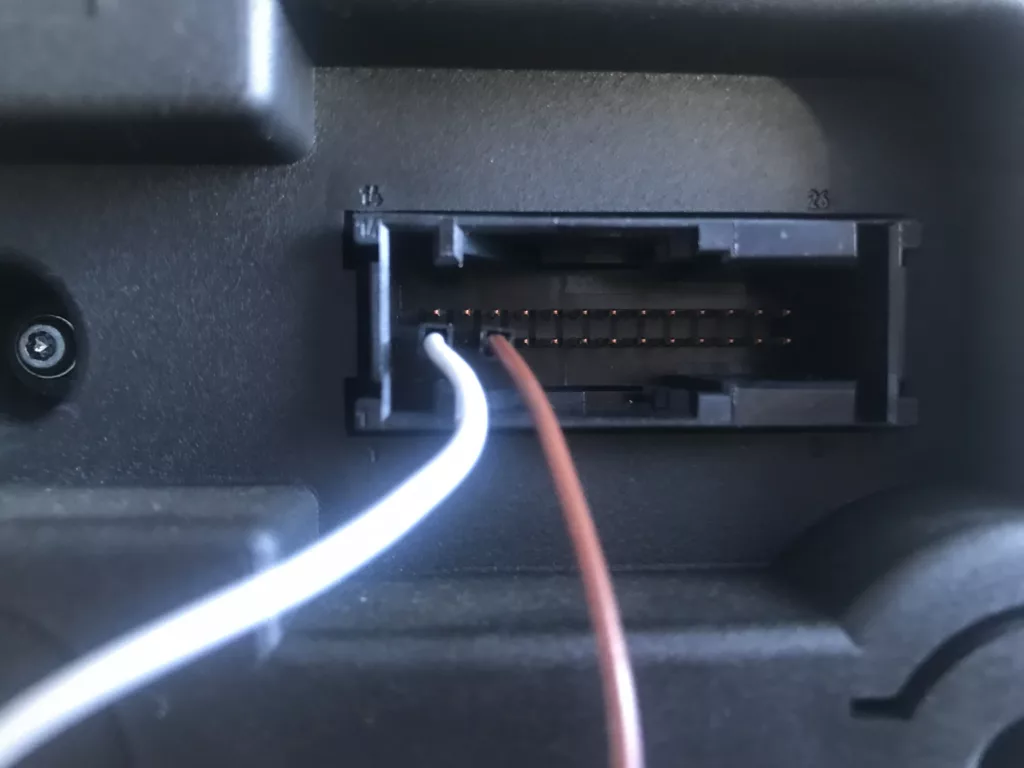
Also, there are a couple of ways to test the LED lights when removed from the car. Using a 12V power supply you can attach PIN1(white cable) to GND and PIN3(brown cable) to 12V and it will power the cluster. This way you can perform TEST 2.0 as shown in the previous video and check the functionality of the lights and needles. The LED bulbs themselves do light up individually if a 3V power adapter is applied to them. So this can be done as well but is not necessary.
This helps with not needing to go back and forth to the car to test if everything works and you can use it as a test bench.
With pulling and soldering the LED light back onto our working cluster and using the power supply to test I confirm that the light works and we can go backwards with assembling the cluster.
Once back in the car I test and see that the light is functioning as normal.

Conclusion
This is rather involved work doing such repairs, it most likely could be done by just replacing with another working cluster if you find one for cheap. But that also involved setting the mileage and perhaps other settings to match your car which would require some knowledge and software to make that happen. In total this cost me 10€ for the cluster and around 2 hours of time to perform. This may also help with those who perhaps prefer modifying their cluster like changing the color of the LED for example. Just one of the use cases. In any case, I need to advise you to be careful with this as there are many places where unrepairable damage to the cluster could happen if not done properly. I cannot be held responsible for any damage done.
As always I hope this helps you out.


Recent Comments