
Sovol SH02 Filament Dryer Mods
Introduction
I have the Sovol SH02. It’s a compact two-spool filament dryer with touchscreen controls, PTC heating and an internal fan. It’s one of the cheapest two-spool dryers on the market, making it an attractive budget option if you want to dry two spools simultaneously without spending for pro units. But it comes with some downsides, like the filament guides are not really and the best angle to be feeding directly from the unit. Also the fan is quite loud when its in drying mode. So let’s look into fixing that.
Parts & prep for the quietness mod
There is a great mod posted on Printables which details on how reduce the speed of the fan, while keeping the functionality intact while lowering the perceived noise by slightly lowering the fan voltage using a resistor and adding printed feet for vibration isolation. Below are the parts and printing recommendations you will/may need. I’ll also add some other printable accessories that might be worth looking into.
| Part | Qty | Notes / recommended spec | Example / link |
|---|---|---|---|
| JST-XH 3-pin extension cable | 1 | Used as safe inline connector to fan harness | Aliexpress link |
| 47 Ω, 10 W wire-wound resistor | 1 | Wire-wound recommended for heat dissipation | Aliexpress link |
| BHT0.5 crimp connectors (optional) | several | Safer than soldering for removable connections | Aliexpress link |
| Heat-shrink tubing | several | Insulate all exposed joints | Aliexpress link |
| Printed feet / riser STL | 1 set | Print in PETG/ABS and not PLA | Printables – feet & quietness |
| Angled filament coupling (optional) | 1 | Improves outlet geometry for short bending radius. PETG recommended for printing | Angled coupling |
| TPU cap for Bowden/PTFE tube (optional) | 1 | Print in TPU flexible seal for tube end | TPU cap |
| PTFE tubing | 1 | For the filament guide grinding and smoother filament passing | Aliexpress link |
Step-by-step: install the quietness mod
For obvious safety, unplug the dryer from mains power before opening it. If you’re not comfortable opening electronics or wiring, ask someone experienced to help. Working with mods likes this carries it’s own risks so please do so at your own discretion.
First remove anything inside the dryer housing like filament or desiccant. Next we will remove the screws from the bottom to get access to the fan and its connector.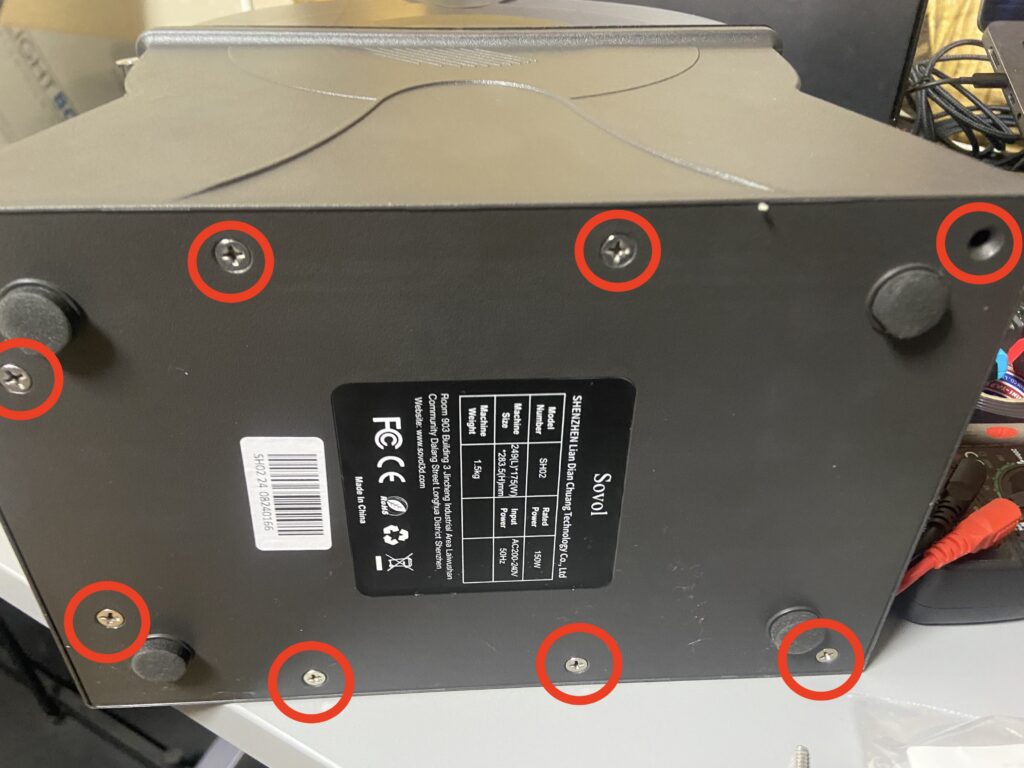
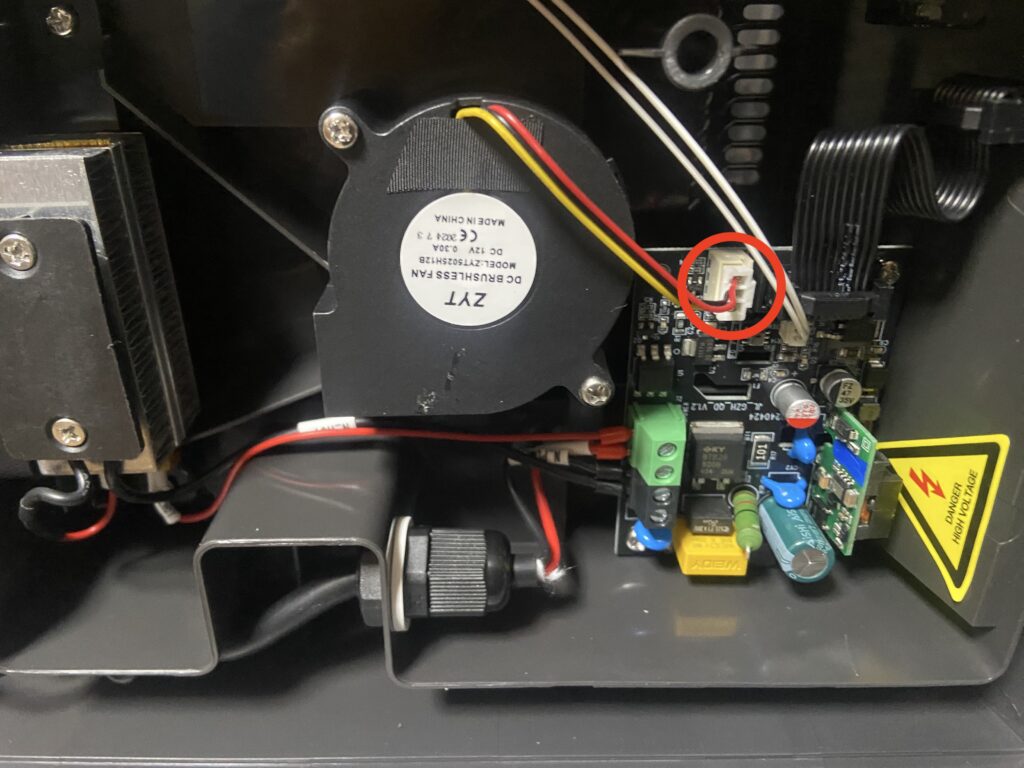
Next we can see the cable running to the board connector which we can unplug since we will be working on adding the modification here in between the fan and board.
Next we take out the JST-XH connectors and start preparing.
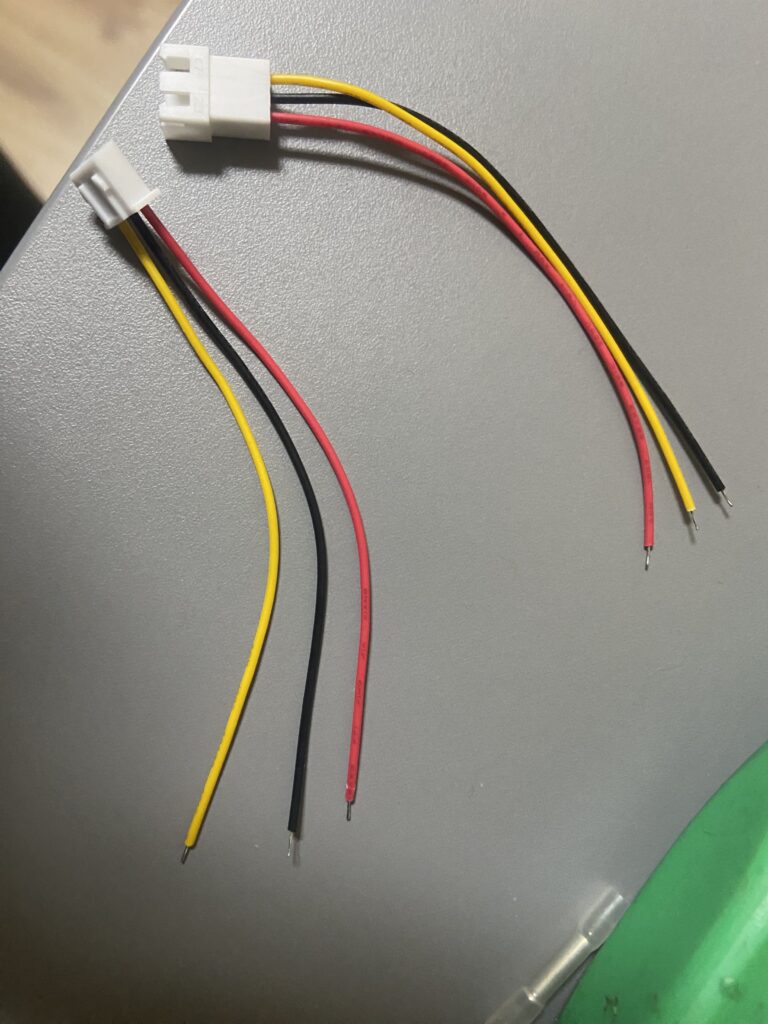
Check on your end the wiring colors, while the colors themselves do not have to match you need to make sure that each of the wires go into the same place on the board between the fan as to not mix up. As In my case the connectors came in the colors swapped.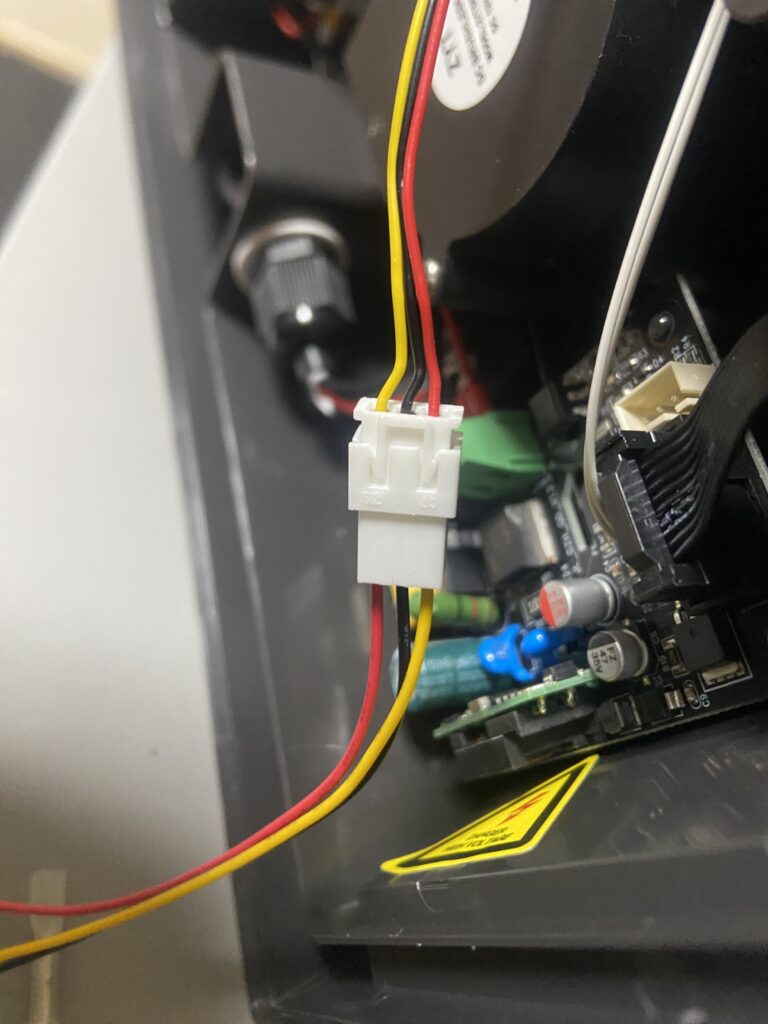
This can be easily fixed by using a small flat head screwdriver and pushing in the pins on the connector and pulling out the cables.
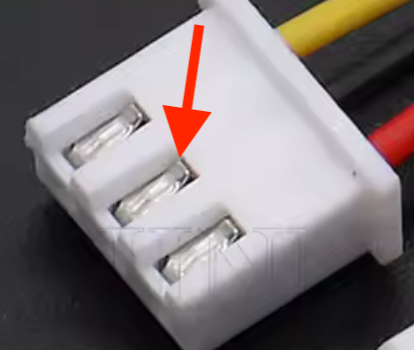
This way we can match the color coding of the cables to prevent any issues with wiring.
And now we have the wires going correctly and we can avoid any confusion.

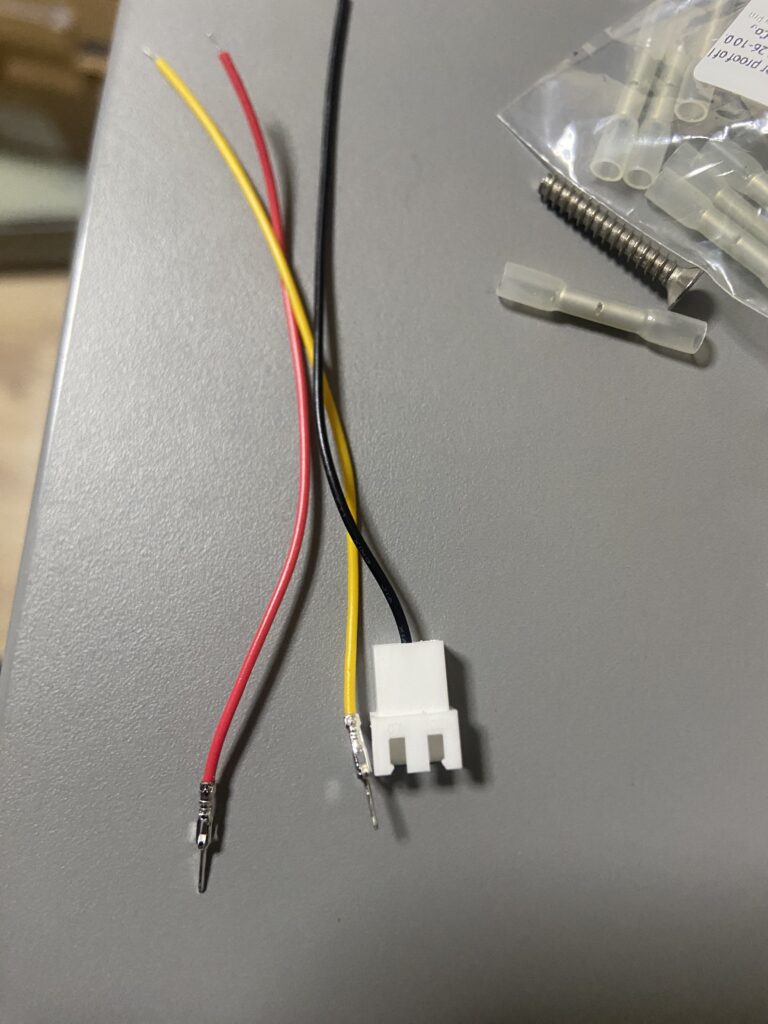
So now we ant to prepare the live connection in our case the red wire. We get the two connector pieces with the wires if needed shave off the cable sleeve to expose more wiring. And if you need you can trim the ends of the resistor since mine came in quite long i just adjusted based on the crimp. Don’t forget to add the heat shrink here since after crimping you won’t have easy access to the cable to slide the heat shrink on and will need to unhook one of the connector ends of the wire to get access to it. And we crimp both ends of the red wire cables with the resistor also in place. I just used some pliers to firmly clamp the connect.
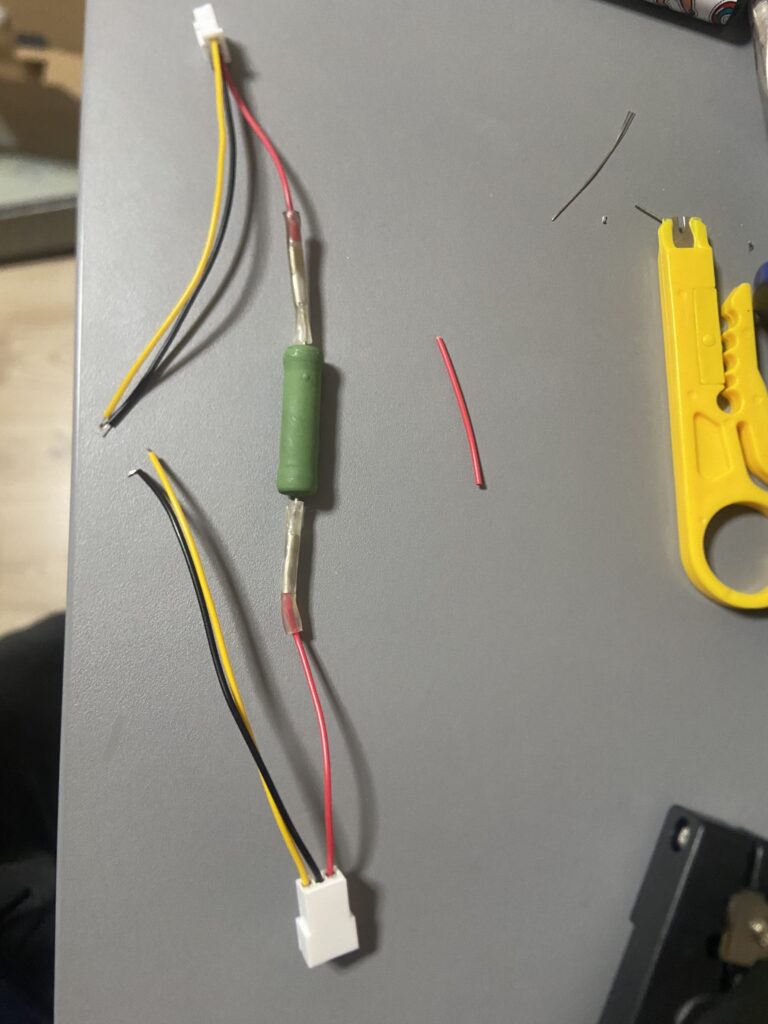
While it’s not mandatory and probably not needed I added some electrical tape and then placed the heat shrink tubing on top. All there is left to do is to use a heat gun or a lighter at a safe distance while moving it around the sleeve to shrink around the resistor.
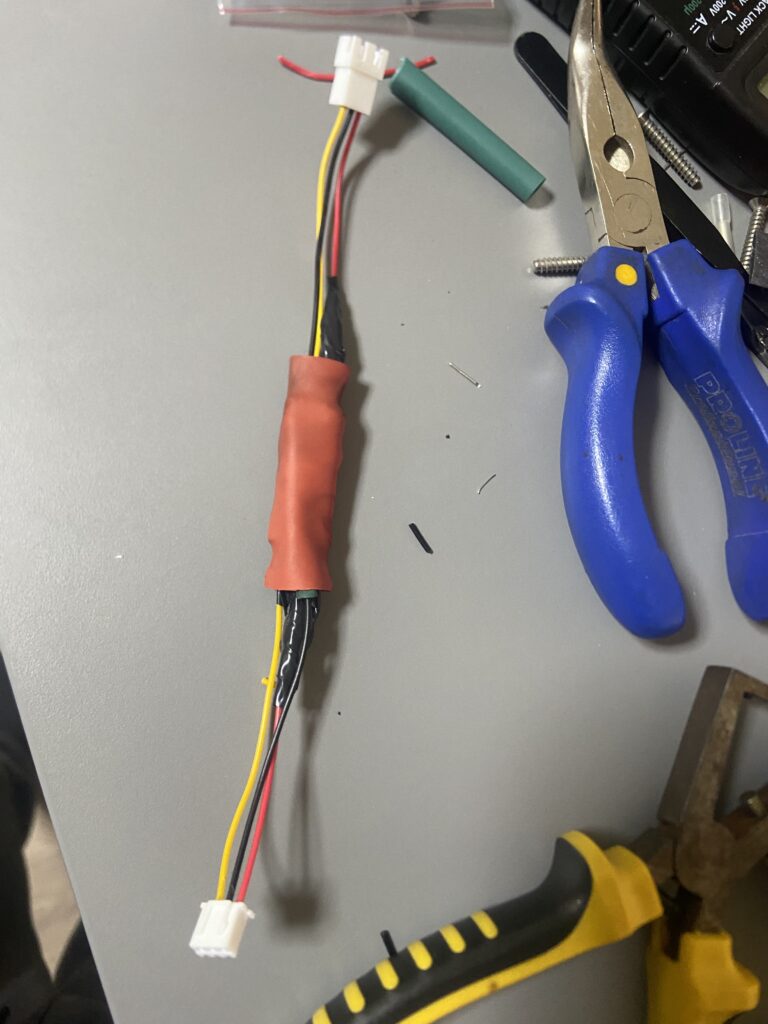
All that is left plug it in between the fan and board connectors.

Now we just tuck it inside of the housing. In my case i just tucked it in between the fan and one of the screw posts. This doesn’t interface with the fan and the heating element next to it.

After that is to close it up and screw everything back in. So you can test. In my case the difference was very noticeable in sound. It can actually be used for long periods without being annoying if you for example are in the same room. The minor downside here is that it takes a bit longer to heat up since the fan is spinning slower, instead of reaching target temperature in 5-7min it now would achieve this in about 12-15min. A bit of a trade off. But when you are usually drying for hours the difference is minuscule. Don’t forget to add the printed feet as this raises the bottom of the dryer to help with cooling since we are now spinning the fan slower. For first time testing obviously I would advise to check for any issues with heating as to not leave the device untended in case of any problems appearing.
Other printed mods & tubing
Angled coupling / filament guides: I highly recommend the linked guide. The angled coupling helps for smoother outlet routing and to reduce filament bending. Print these in PETG or a similarly heat-resistant filament. Since half of it sits inside the dryer.
TPFE vs Capricorn tubing: For simple setups PTFE (standard) tubing is acceptable. For better dimensional tolerance, smoother inner surface and improved retraction behavior, recommend Capricorn or other precision PTFE tube. This is for the angled filament guide you would just slide in some of the tubing to help angle the filament to your needs.
TPU tubing cap (optional): Not mandatory but handy to print the small flexible cap in TPU to seal the tube end when not in use to avoid moisture build up.
Safety, testing & troubleshooting
- Always unplug before opening the dryer.
- Mount resistors somewhere where they don’t impact the airflow or the heatsink.
- If the dryer reports a fan error after the mod, confirm the wiring was not damage, has good connection and that only the red (positive) line has the resistor. If firmware rejects the fan, revert wiring to stock since this mod is easily reversible.
- Fan not spinning → check connectors and ensure red/black wires are correct.
- Dryer reports fan error → ensure tach wire is intact and connected to the board.

Recent Comments