
Turn an old tablet into a Home Assistant wall display
Introduction
Do you have an old Android tablet lying around, collecting dust? With a little effort, you can repurpose it into a sleek, wall-mounted control panel for your smart home using Home Assistant. In this guide, I’ll walk you through the steps to convert your tablet into a powerful, always-on Home Assistant display using the Fully Kiosk Browser app.
Repurposing a Lenovo Tab TB-8504X for Home Assistant
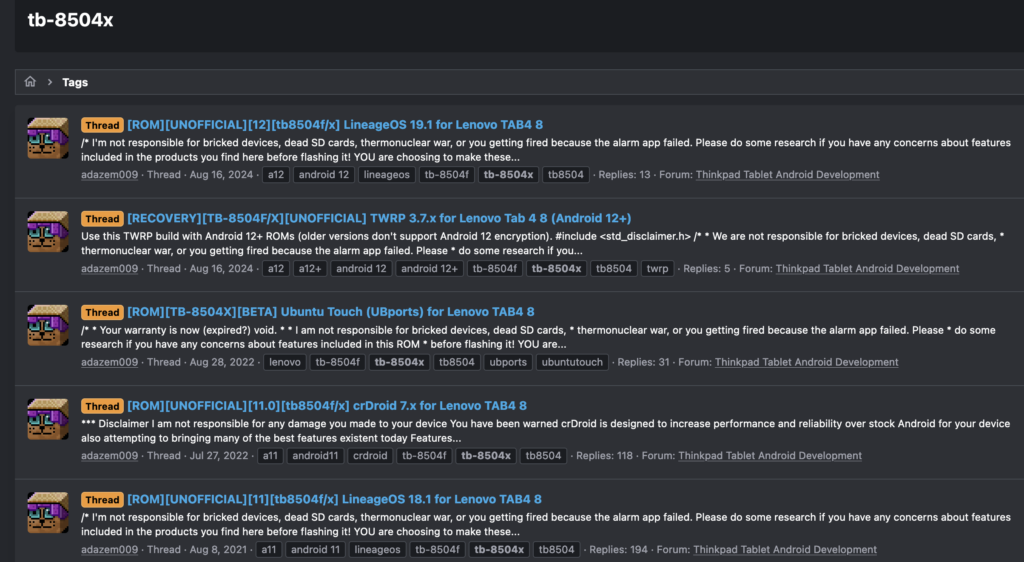
I have a Lenovo Tab TB-8504X device running Android 7. Which was collecting dust in my drawer. Although fully functional it seemed bloated running the stock firmware it came with. To optimize its performance for Home Assistant, I explored custom ROMs available on the XDA Forums, eventually settling on Android 10 with LineageOS for better compatibility with newer applications and performance. However, it’s important to note that flashing custom ROMs and unlocking the boot loader can be risky. These actions can potentially soft-brick your device, rendering it temporarily unusable. Additionally, if your device is still under warranty, these modifications might void it. This depends on what device you are attempting to perform this but most tablets should be fine. Just based on searching for my device’s model tags comes up with multiple results to choose from.
Custom ROMs: Opportunities and Risks
Flashing custom ROMs and unlocking the bootloader can enhance your tablet’s performance but comes with risks. This can negate features locked by the vendor. Which usually prevents gaining root access to your device. While this allows for way more customization of your operating system and allows a wider plethora of apps to run outside of the stock Android and Google Play store ecosystem, it does come with its risks. So caution is advised if attempting this. The XDA Forums mentions a wide plethora of knowledge, support, and tutorials to achieve this if you are willing to take the plunge.
Installing Fully Kiosk Browser
Let’s say we removed any software we do not want from our tablet, whether it’s just removing apps from running or flashing custom firmware to de-bloat it. Fully Kiosk Browser is the key to transforming your tablet into a dedicated Home Assistant display. This app locks the tablet into a single app mode and provides various customization options for the user interface. You can download the APK directly from their website or install it via the Google Play Store. Some settings are marked as PLUS features which are under a one-time payment if you need them, but they can still be activated, the only downside is you will have a watermark on the screen until you pay.
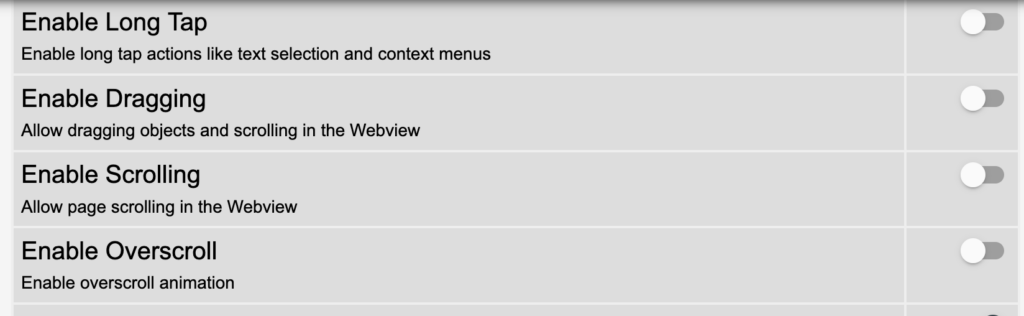
As a recommendation when configuring the settings if you do not have a specific use-case for it. I disable these features due to the tablet sometimes registering touches or taps as sliding or scrolling and not registering as a button press, but after these are switched off it works and registers all taps for me.
Setting Up Fully Kiosk Browser with Home Assistant
Once Fully Kiosk Browser is installed, follow these steps to set it up with Home Assistant:
- Configure Fully Kiosk Browser:
- Open the Fully Kiosk Browser app.
- Navigate to Settings > Device Management and input the URL for your Home Assistant dashboard.
- Set up credentials for a secure connection.
- Create a Custom Dashboard:
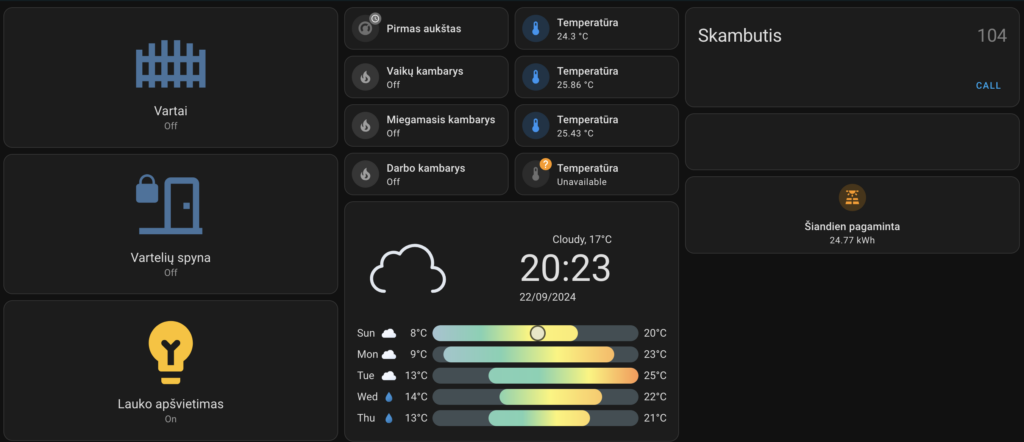
- In Home Assistant, design a custom Lovelace dashboard tailored to your preferences. This will be the interface displayed on your tablet. This can be done at a later time.
- Install the Home Assistant Integration:
- Go to Home Assistant > Configuration > Integrations.
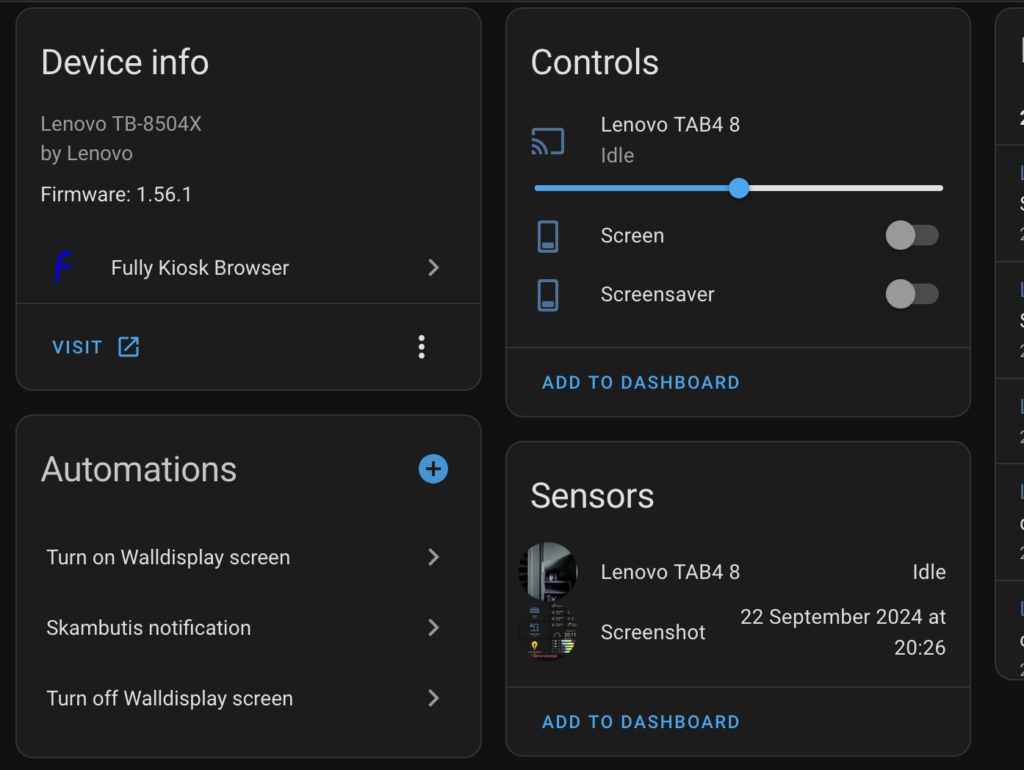
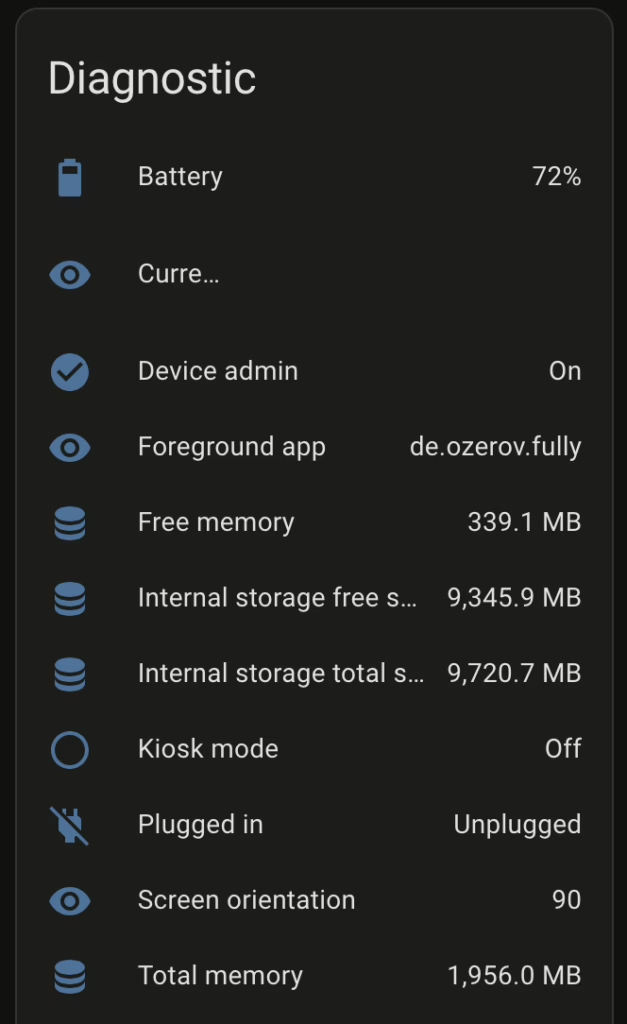
- Search for “Fully Kiosk Browser” and follow the instructions to set up the integration. You will need to know the IP address of the tablet to complete this setup. This is a great addition as it can expose a lot of sensors and other things that you can use in automation/scripts or for statistics.
- Set Up MQTT (Optional):
- For advanced control and monitoring, set up MQTT between Home Assistant and Fully Kiosk Browser. This allows better communication and automation triggers. You can refer to one of my previous posts regarding MQTT setup on other devices.
Wall Mounting the Tablet
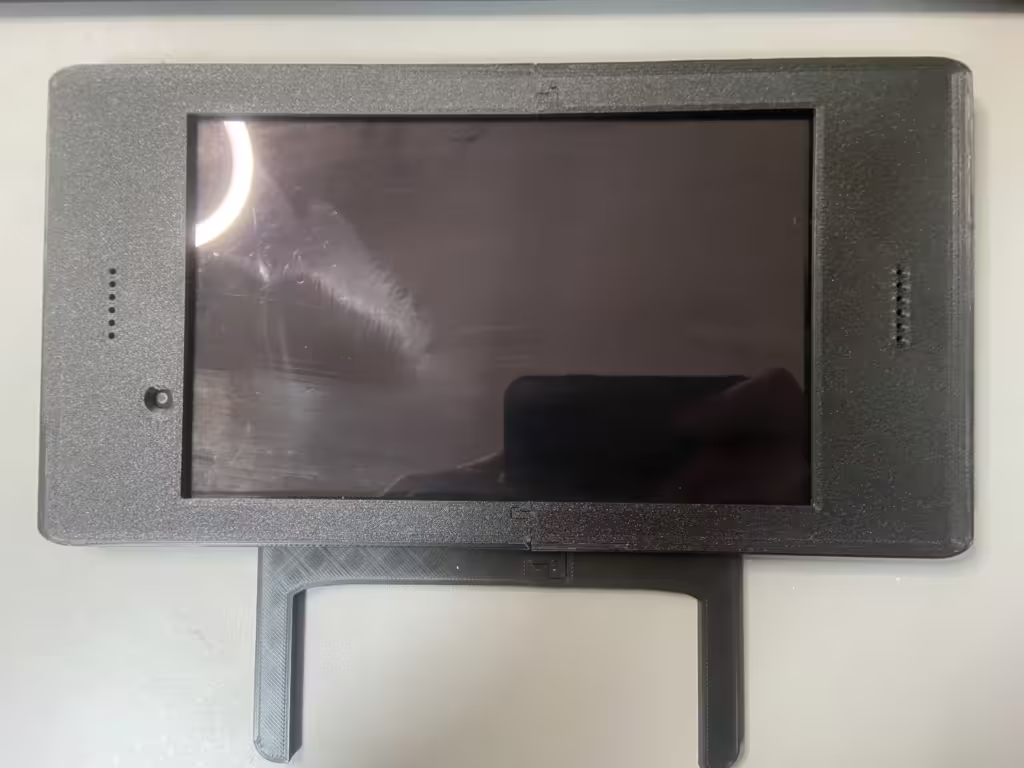
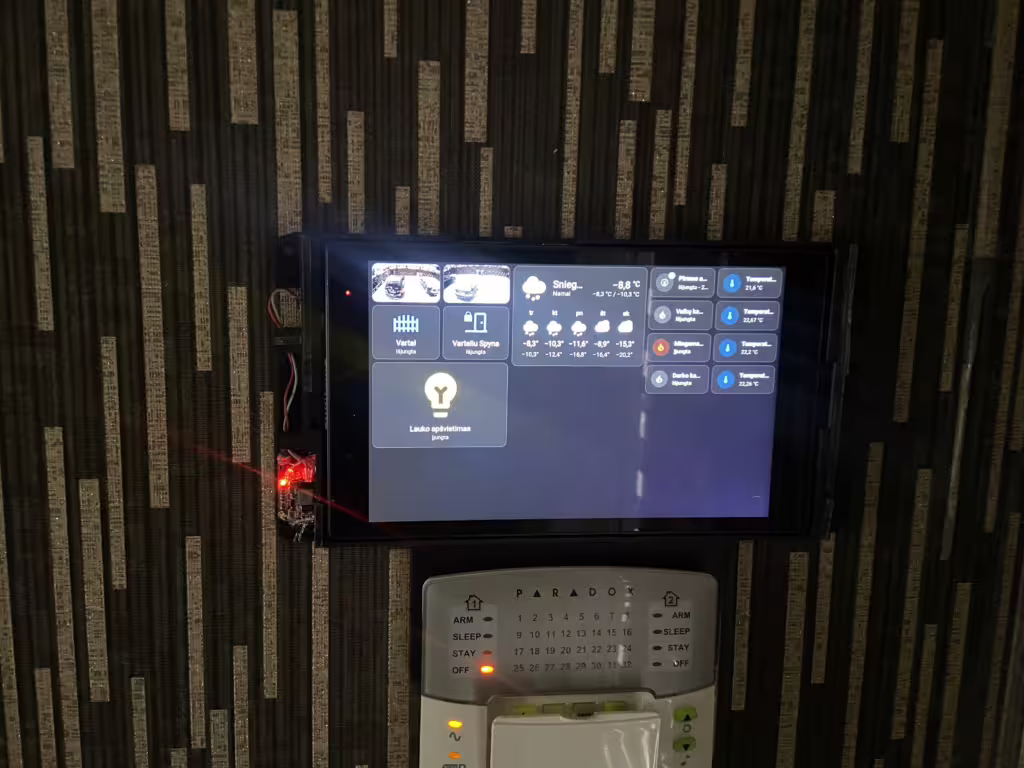
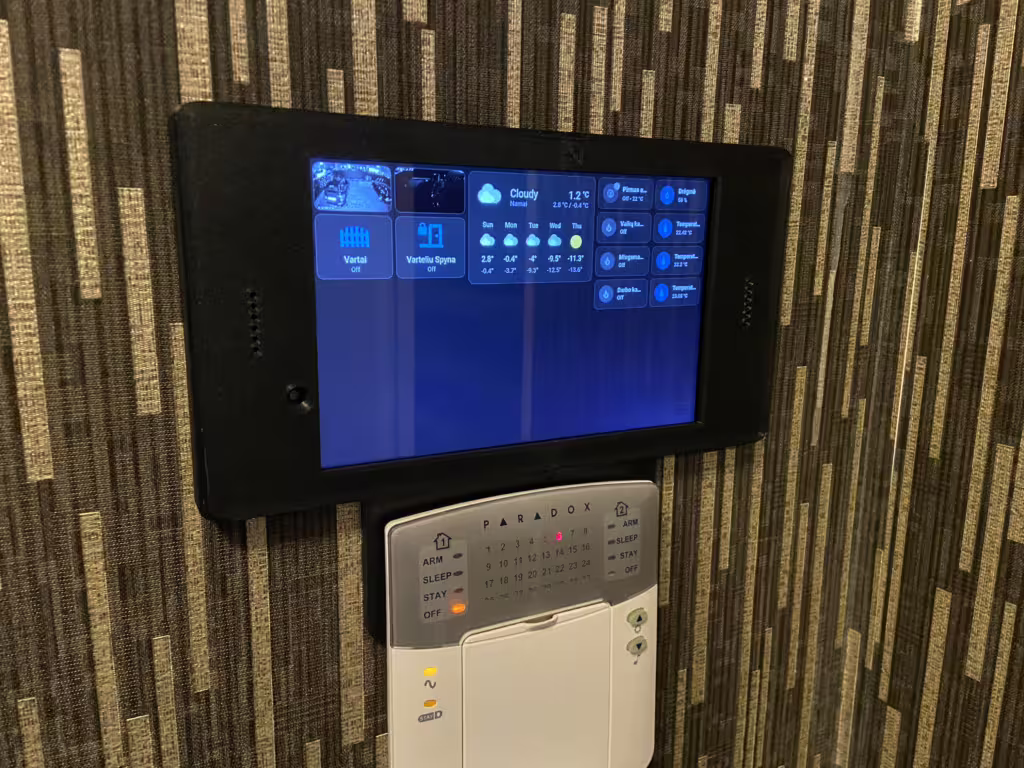
A clean, accessible setup is crucial for a home control panel. I mounted my tablet on the wall above the alarm keypad panel using a modified 3D printable mount from Thingiverse. I modified the design to fit my setup using modeling software like Fusion 360 by Autodesk. Then printed it for mounting. Now in any other cases, you may not find models ready for 3D printing for every single tablet. So you can always just search for tablet wall mounts to purchase on the internet. Plenty to choose from and will probably be more sleek and fitting to your needs.
In my case I wanted the tablet to sit in the corridor where the alarm panel is so the design was modified to accommodate it. Once the model was ready, some double-sided tape to prevent it from moving making it almost a permanent mount. My modified mount to accommodate the wiring and the buck converter can be downloaded from here:
Powering the Tablet
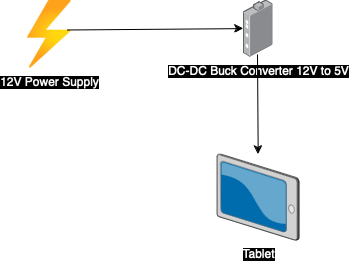
Another thing to consider is a consistent power supply for an always-on display. In my setup, there was no nearby outlet, so I used a 12V power supply from the alarm’s main board and stepped it down to 5V using a DC-DC Buck Converter. If you have an accessible outlet, this step may not be necessary, but for specific setups, this power solution ensures the tablet stays charged without voltage drop issues. Why I chose a 12V power supply because my mounting point above my alarm keypad had a few unused wires that I wanted to utilize for charging. But since the wires go a fair bit of length to where the alarm main board is installed the voltage drops over the length of the wires and in testing, it was not able to charge the tablet, so I went for the 12V and the right at the tablet mount point added a step-down converter to lower it to 12V which worked out great. I should note in no way am I a certified electrician and this may not be an ideal setup by any standards.
Managing Battery Health with Battery Charge Limit
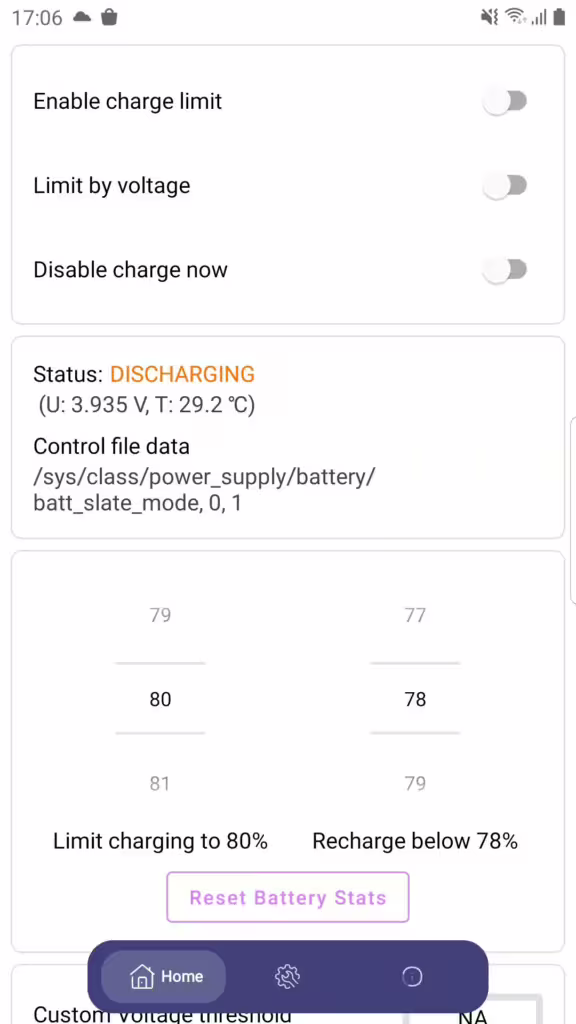
To prolong the battery life of the tablet, I installed the Battery Charge Limit app from F-Droid. This app lets you set a charge limit between 20% and 80%, preventing constant charging, which can degrade the battery over time. Note that this app requires root access. It also may be incompatible with newer Android releases but I have confirmed at least that it works on Android 10.
If rooting isn’t an option, consider alternatives like BatteryCare from the Google Play Store or check your device settings for built-in battery protection features. You can also set up the Battery Charge Limit to launch automatically with the tablet using the Fully Kiosk Browser.
For this, you enable the charge limit and set the percentage of when to start and stop charging.
Then in the Fully Kiosk settings go to Universal Launcher and there is an option to start applications in the background. You select the applications you want, this launches the listed apps when Fully Kiosk launches. So if you have it start on boot it will always start the apps you listed along with it.

Another way I have done this is to just use Home Assistant to automate the charging for you with something like a Smart Switch. In my example I use a Sonoff ZBMini l2
This is then paired with my Zigbee network and is already present in Home Assistant to be configured. Since the Fully Kiosk already reports the battery percentage to Home Assistant we can create a simple automation.
alias: Tablet charge control
description: ""
triggers:
  - trigger: numeric_state
    entity_id:
      - sensor.lenovo_tab4_8_battery
    below: 40
  - trigger: numeric_state
    entity_id:
      - sensor.lenovo_tab4_8_battery
    above: 80
conditions: []
actions:
  - choose:
      - conditions:
          - condition: numeric_state
            entity_id: sensor.lenovo_tab4_8_battery
            below: 40
        sequence:
          - condition: device
            type: is_off
            device_id: 8d6ac6343bdac6375c11ea8ad8ce63ce
            entity_id: bbea6b4104e1d0aa51548f02bfe3dd04
            domain: switch
          - type: turn_on
            device_id: 8d6ac6343bdac6375c11ea8ad8ce63ce
            entity_id: bbea6b4104e1d0aa51548f02bfe3dd04
            domain: switch
      - conditions:
          - condition: numeric_state
            entity_id: sensor.lenovo_tab4_8_battery
            above: 80
        sequence:
          - condition: device
            type: is_on
            device_id: 8d6ac6343bdac6375c11ea8ad8ce63ce
            entity_id: bbea6b4104e1d0aa51548f02bfe3dd04
            domain: switch
          - type: turn_off
            device_id: 8d6ac6343bdac6375c11ea8ad8ce63ce
            entity_id: bbea6b4104e1d0aa51548f02bfe3dd04
            domain: switch
mode: single
This way the triggers are the battery percentage sensors and actions are based on checking whether the battery needs to be charged or not this way toggling the smart switch to either on or off state.
Conclusion
This shows an overview of what you can do to repurpose an old tablet. Though not a requirement some posts I have seen use newer hardware or hardware designed for it that are sometimes basically touch screens while the hardware sits elsewhere. There are multiple ways to go around this. This just shows one of them. As always I hope this helps you out.
Additional resources
https://xdaforums.com
https://lineageos.org/
https://www.fully-kiosk.com/
https://www.home-assistant.io/
Custom recovery menu – Android
STL finder for 3D printing
DC-DC buck converter

Recent Comments