
Cheap solution to Error 5B00 on your Canon PIXMA TS5000 + Future proof
If you or someone you know owns an ink printer. You probably have encountered the usual problems with something like dried ink or printheads. The usual fix for this is either replacing the cartridges or consistently printing in a timely matter. But the ink printers have one problem and most of them have it as a stupid solution. The printer produces waste ink. Which needs to be stored somewhere. Some better-quality printers use a container inside the printer which can be replaced or emptied. But most printers use some sponges. A couple of tubes go to these sponges and expel the build-up of waste.
You are probably thinking that this is a bad solution and you are right. Well for one the sponge is not infinite and will at some point fill up and overflow. Ah yes, the manufacturer has this figured out for you! Say hello to Error 5B00.
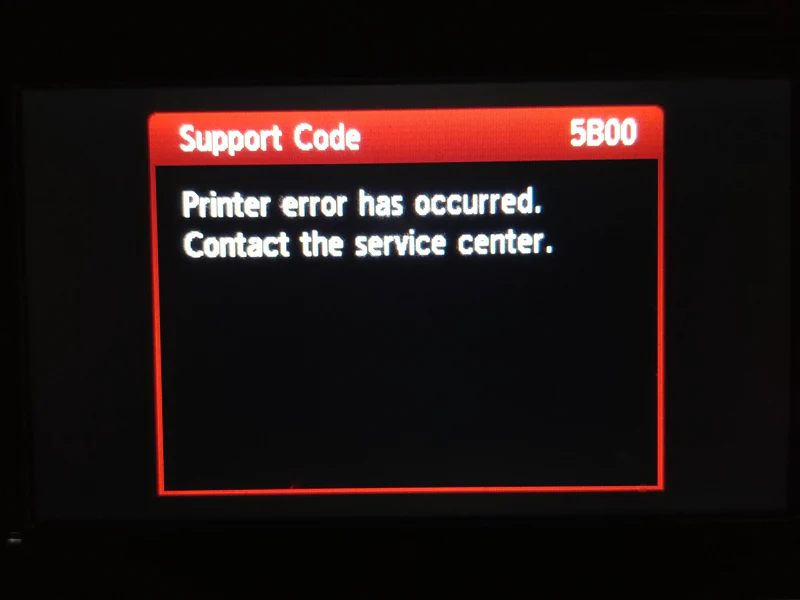
Very informative. Tells a lot about what went wrong. Don’t worry your printer is fine but it has developed a software block. There is an internal counter for the waste ink set and when the counter reaches a specific point it blocks the printer from printing until this counter is reset. So to do this normally you would bring the printer to Canon and get it fixed for some absurd price. Why do I say absurd? Well because from my experience with printers the waste ink placement in printers is usually in very obscure and hard-to-reach places inside the printer. Just the work needed to be done to replace it would cost a lot.
The 5B00 Error fix
For my specific model the TS5050 there is no publicly available service manual sadly so I had to roll with what I found. First of all, we need some way to resolve the error. So this needs a service tool. Which is called the Canon Service tool. For this printer, we need the v5103 version. These are seemingly elusive to get and people try to sell them on eBay for between 5-10$. But with a bit of digging, you can find it for free. I will be the good Samaritan and provide it here as well.
Virus total scan report: https://www.virustotal.com/gui/file/71d91e02d55c7ee86e129bc73f46b66baedd19b1a3b30b5038bcb7715856cc79
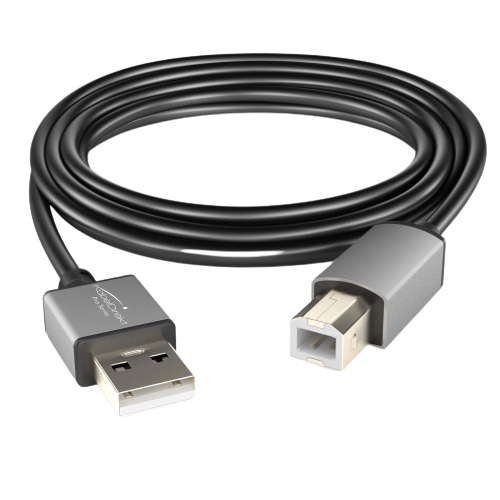
With the tool acquired, you will also need a USB 2.0 A/B cable for connecting your printer to your PC.
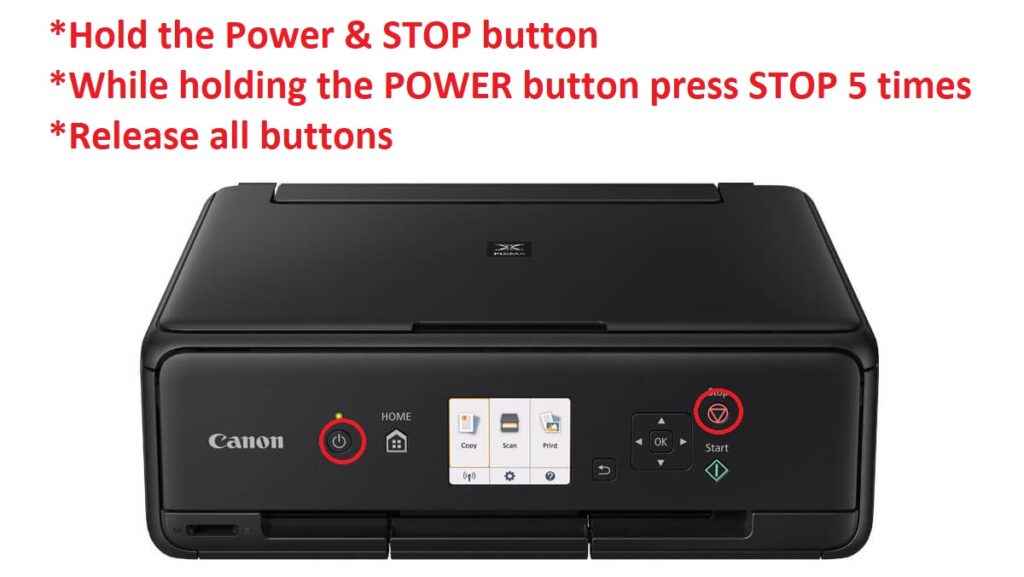
Turn off the printer if it’s on. Connect the cable between your PC and printer. Perform the next steps on the printer to initiate service mode.
The screen should light up and you can start the service tool .exe program and it should detect the device. To double check you can go into your device manager you should see your printer detected as “Device.
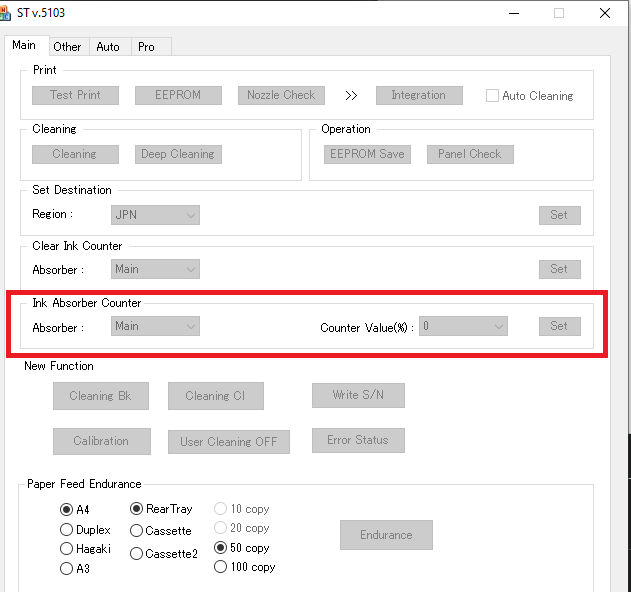
You will see the Ink Absorber counter and you can set the percentage value. Set it to 0% and click Set. That’s it. Your waste ink counter is reset. You can reboot the printer and the 5B00 error will be gone and you can continue to use the printer.
Future proof
Although you can use the printer as is the problem remains. We have not replaced the waste ink sponge. But changing that will also just give us some time until it happens again. Without replacing it you risk the waste ink overflowing and destroying your printer. My solution is to make the waste ink go into a container.
First, we need some silicone tubing and connectors. You might be able to get some at an aquarium shop or something similar. Mine came from Aliexpress. Links here:
2.4mm Silicone tube
For this printer, you will need two connectors and two pieces of tubing, 100cm of tubing is plenty and can be cut in half.
We are going to disassemble the printer to gain access to the tubing that comes from the ink cartridges to the waste sponge at the back unplug them and add connectors.
Disclaimer: I don’t have a service manual and did this by disassembling it bit by bit until I had enough access. My guide will not gain you full access to the whole thing. From my point, it just seems that you have to practically disassemble the printer completely to access which I just don’t want to do. But if you are feeling adventurous you can give it a go. This involves removing some parts, unscrewing screws, melting some plastic, and hot gluing.
Disassembly
That’s it for prep. Let’s get into it.
The printer turned off and unplugged of course.
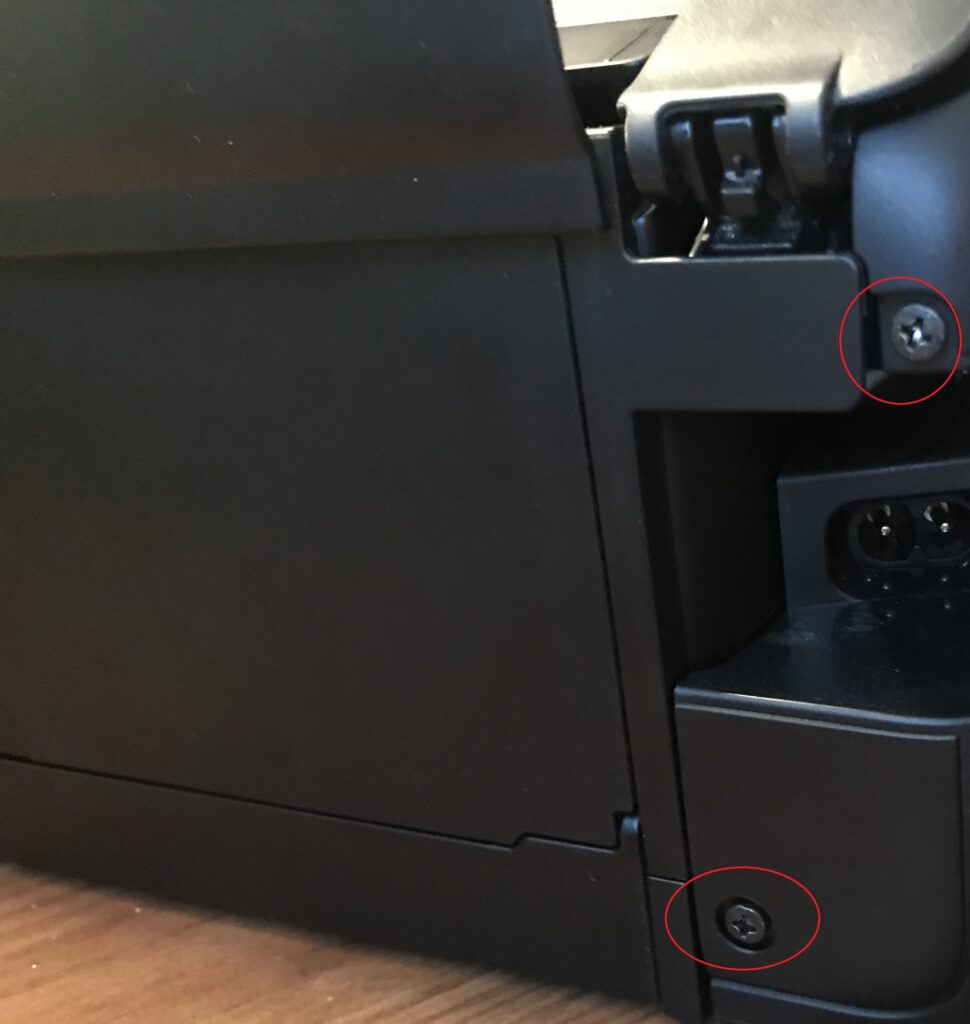
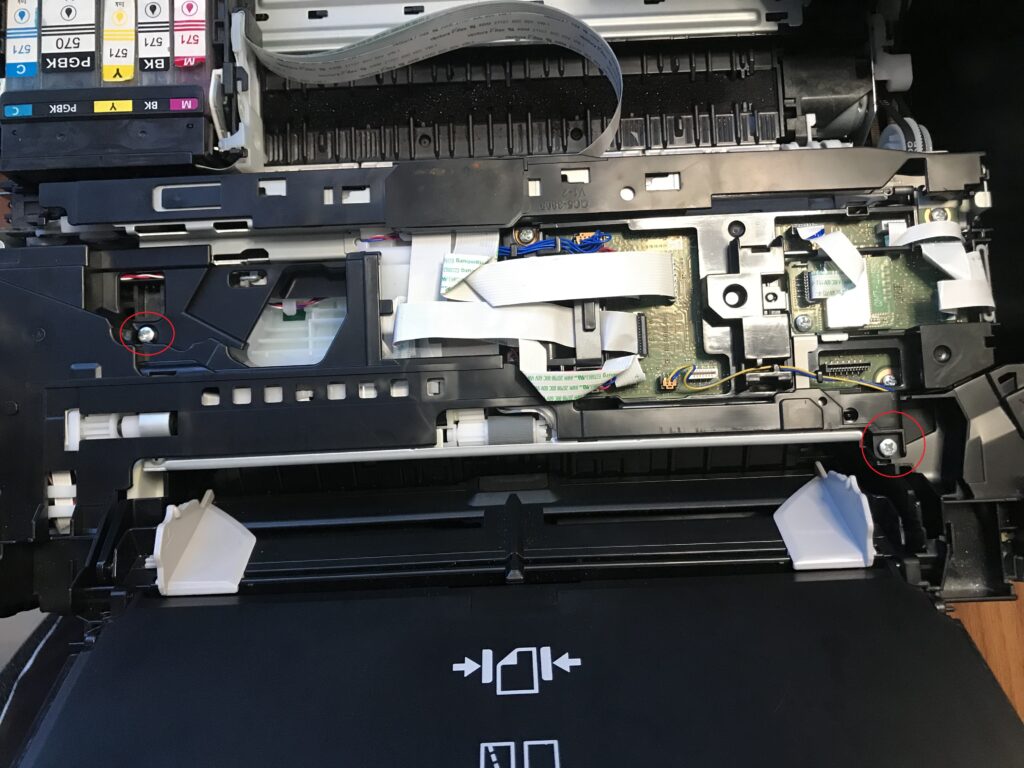
Open the scanner tray on top to expose the cartridges. On the right side unscrew the screw. Take note of the holder tabs on top. There are a few on the bottom you can start unhooking them but don’t remove the part completely there are two screws on the back
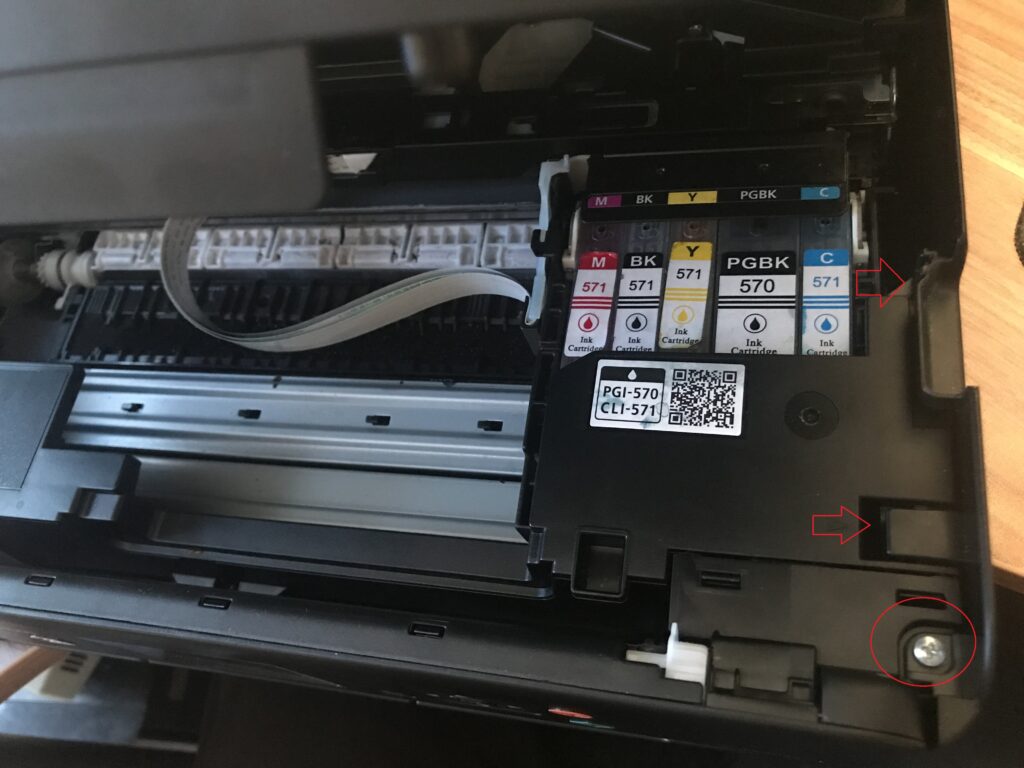
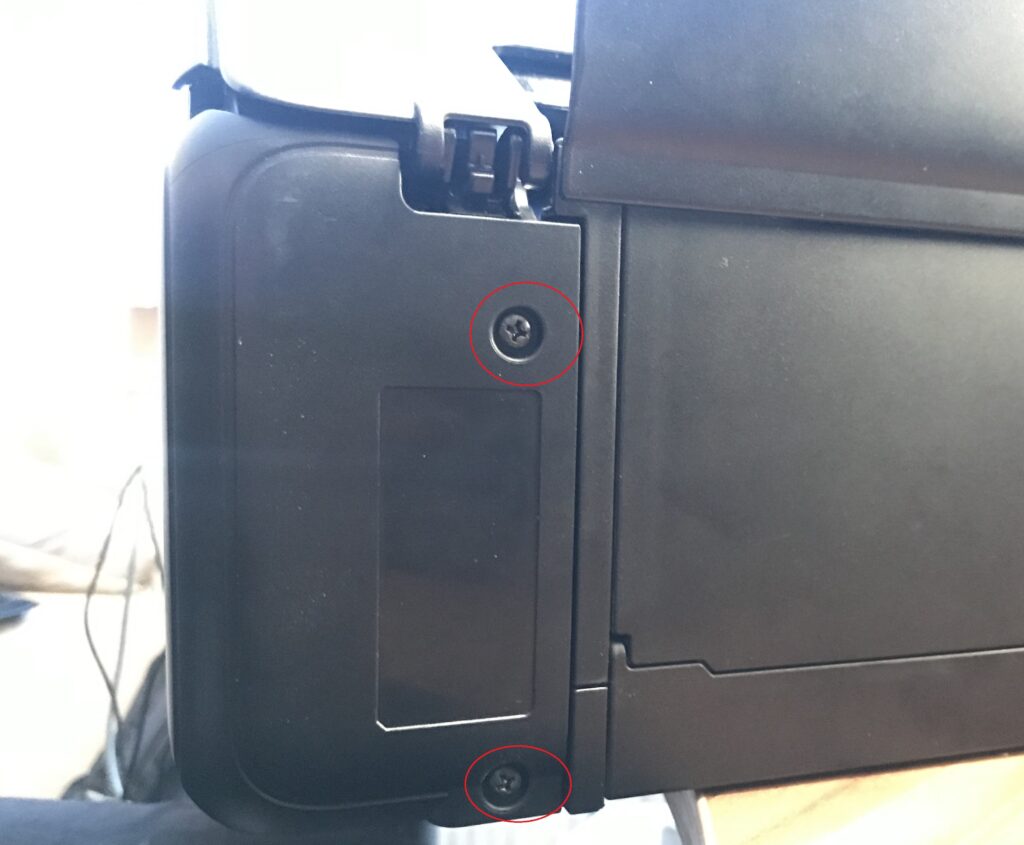
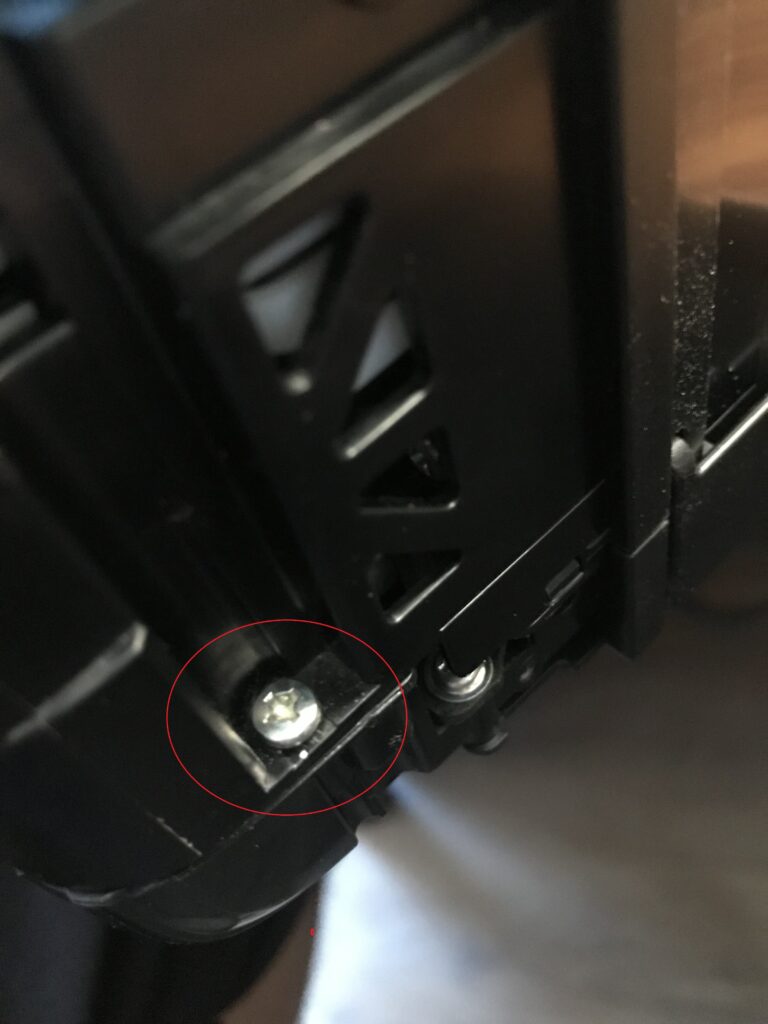
As mentioned unscrew the two black screws on the rear as well. Then you can remove the side panel. It should come off easily without much force.
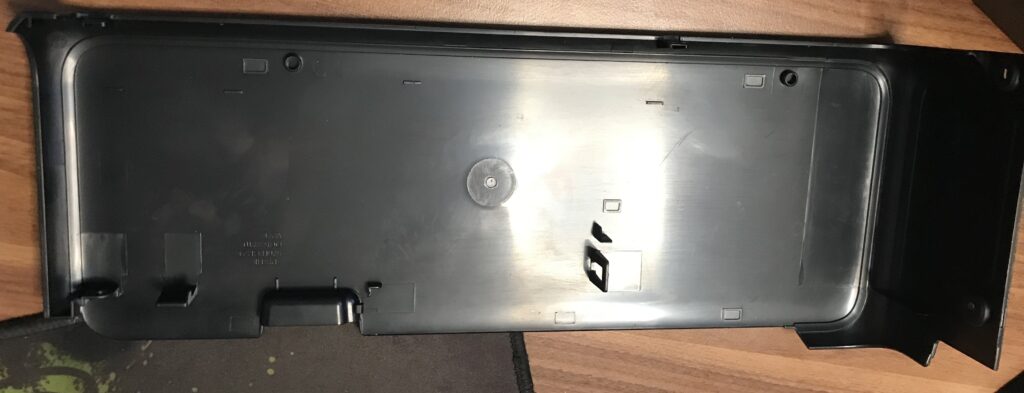
You can take note of the tab locations of the panel here.
The same goes for the left panel. Screw inside the corner and two on the back.
Rear panel screw locations too.
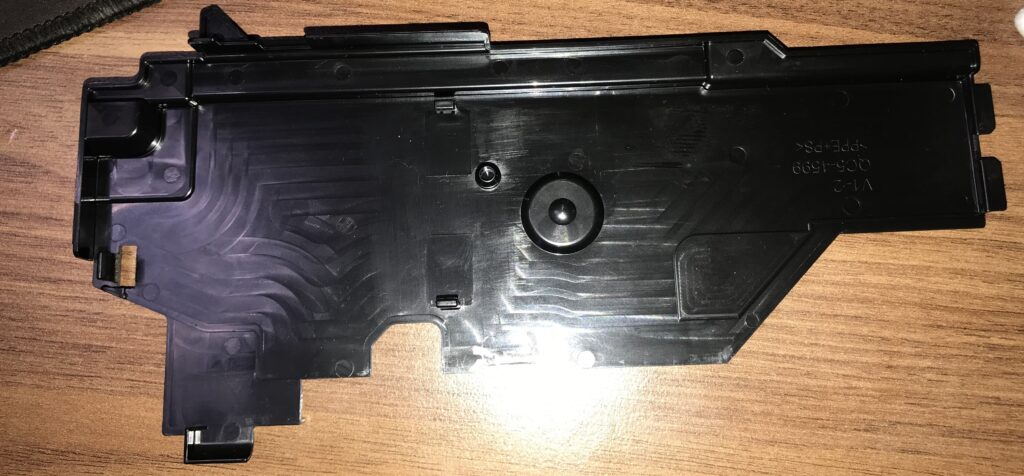
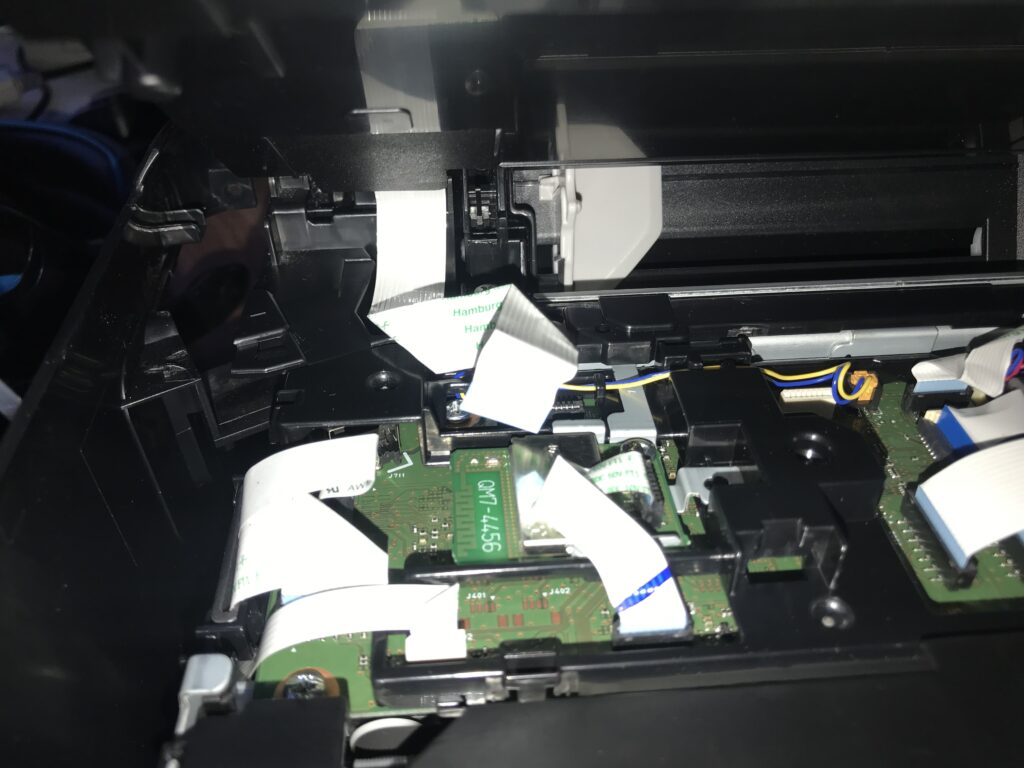
Next inside the printer at the back, there is a black cover that covers the board and cables. Start removing it from the left side to the right. It is held in by plastic tabs as well.
Reference the cable cover bottom to see the places it fixes to
Unplug the two cables that go up to the scanner.
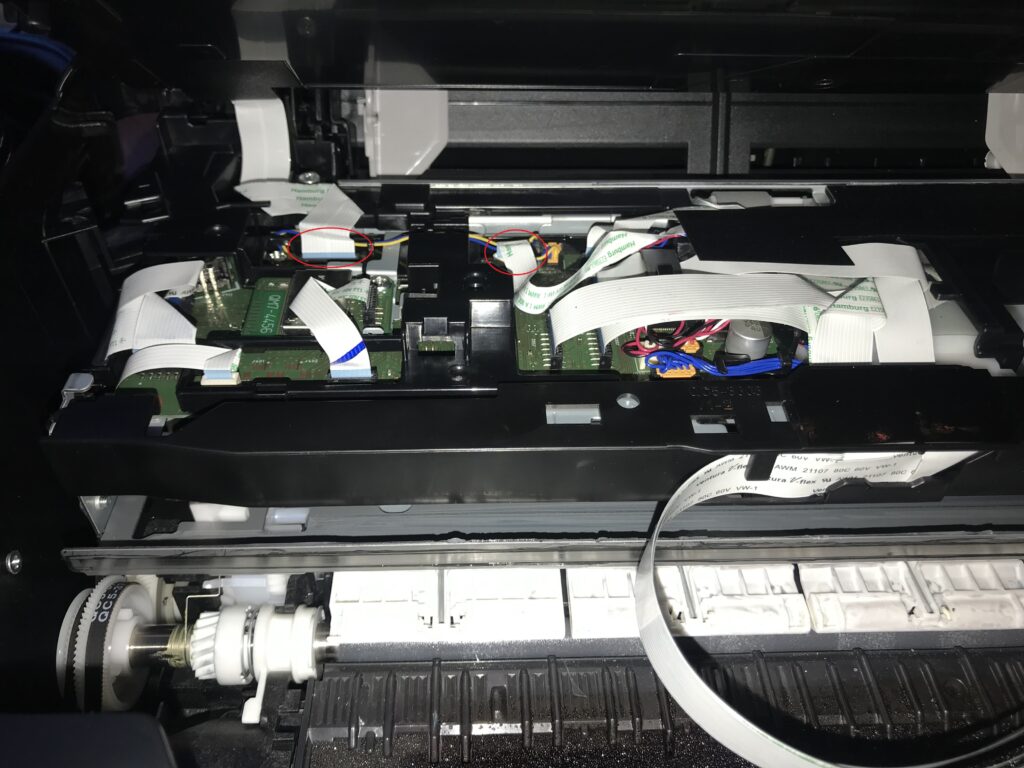
The cables will be held by some double-sided tape so take care while removing them as we will need them to come off with the scanner off the printer. The right cable which is longer has a black sort of tape on top that goes up to the hinge so just peel it off. It should come off with the cable together.
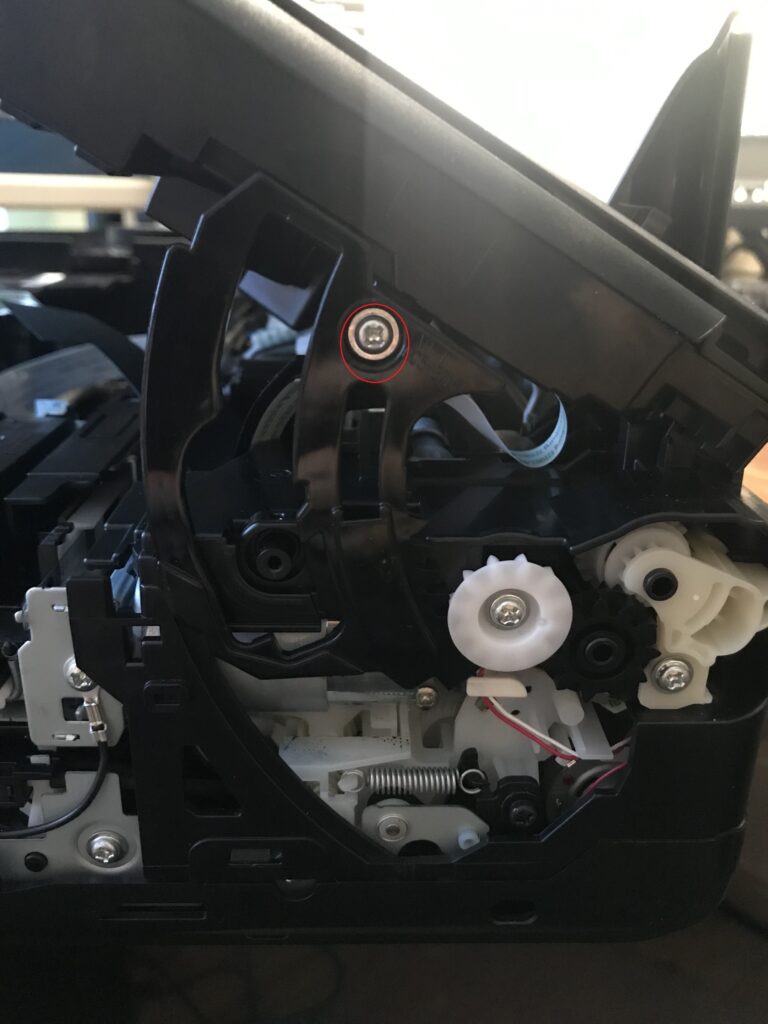
On the right side unscrew the screw that holds the scanner in place.
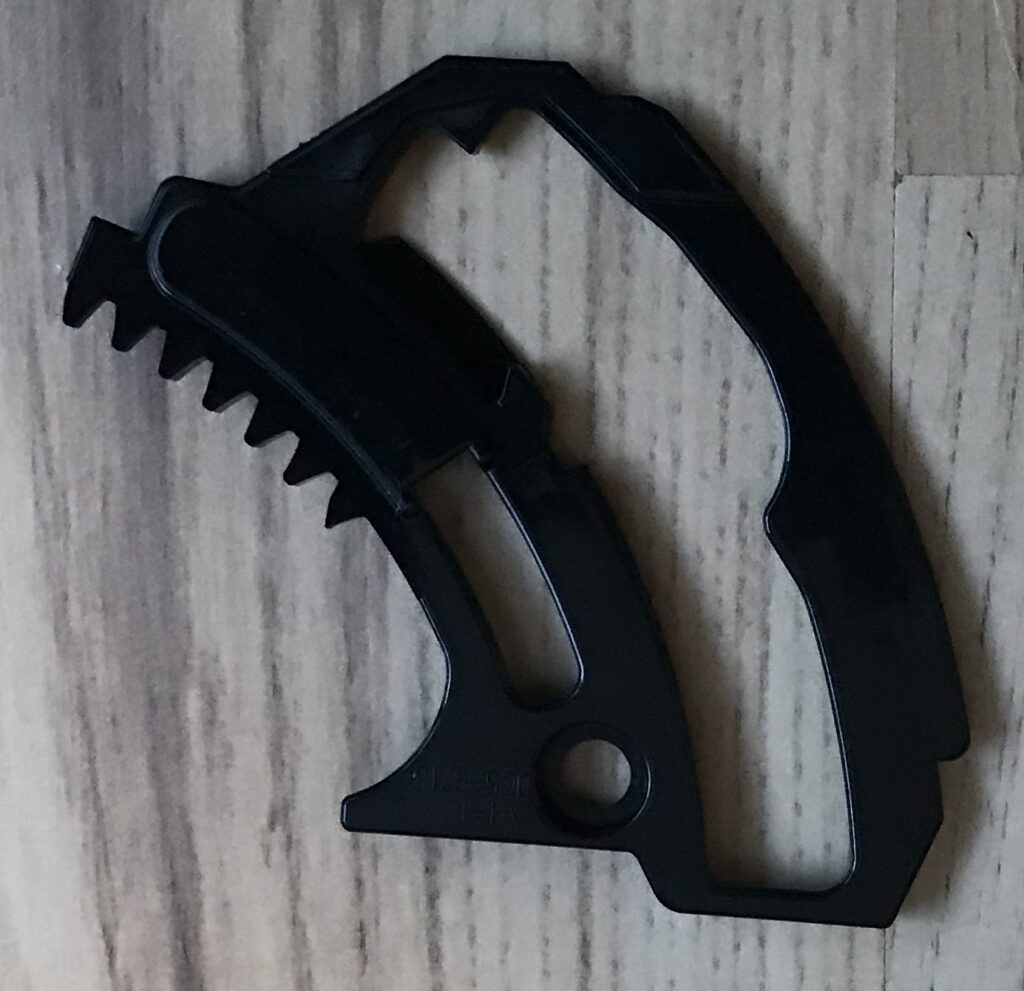
Holding the scanner and removing the holder as well. Hold the scanner as it will fall if you let it go. So just gently place it down.
Keep in mind how everything goes. As you will need to assemble it back again.
You can now flip the scanner up more than previously so open it up to a 90-degree angle and you can lift it upwards. Start lifting from the right side it should easily come off at the hinge and do the same on the left.
The scanner comes off and the hinges are here for reference.
This is what we have now once removed
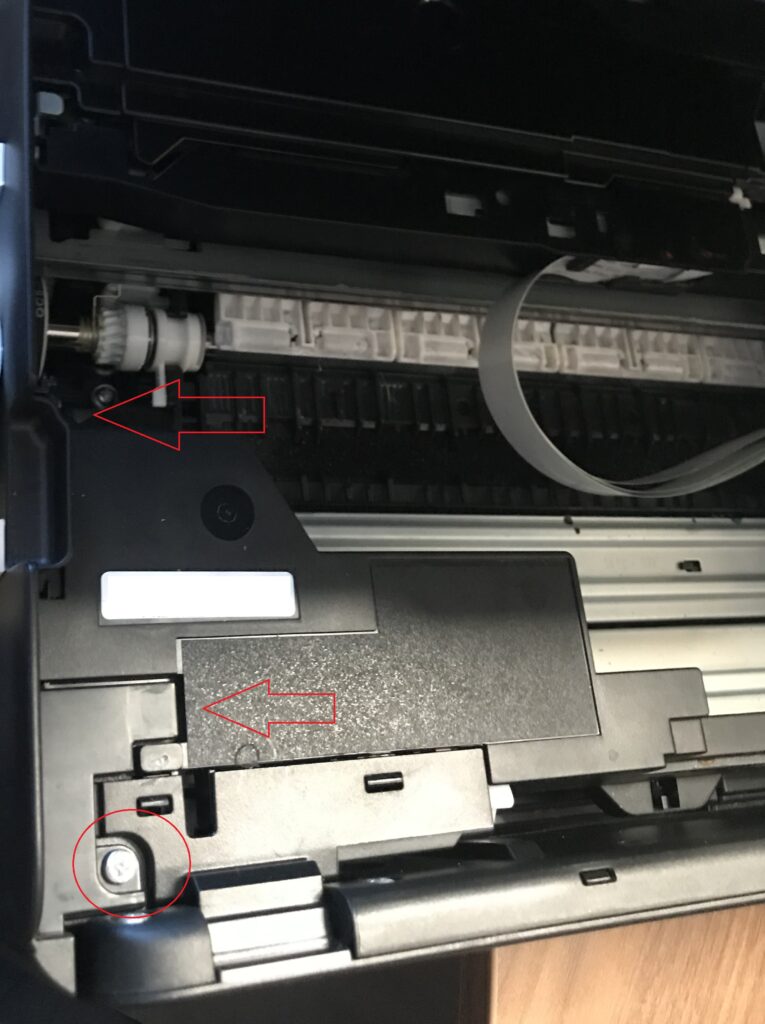
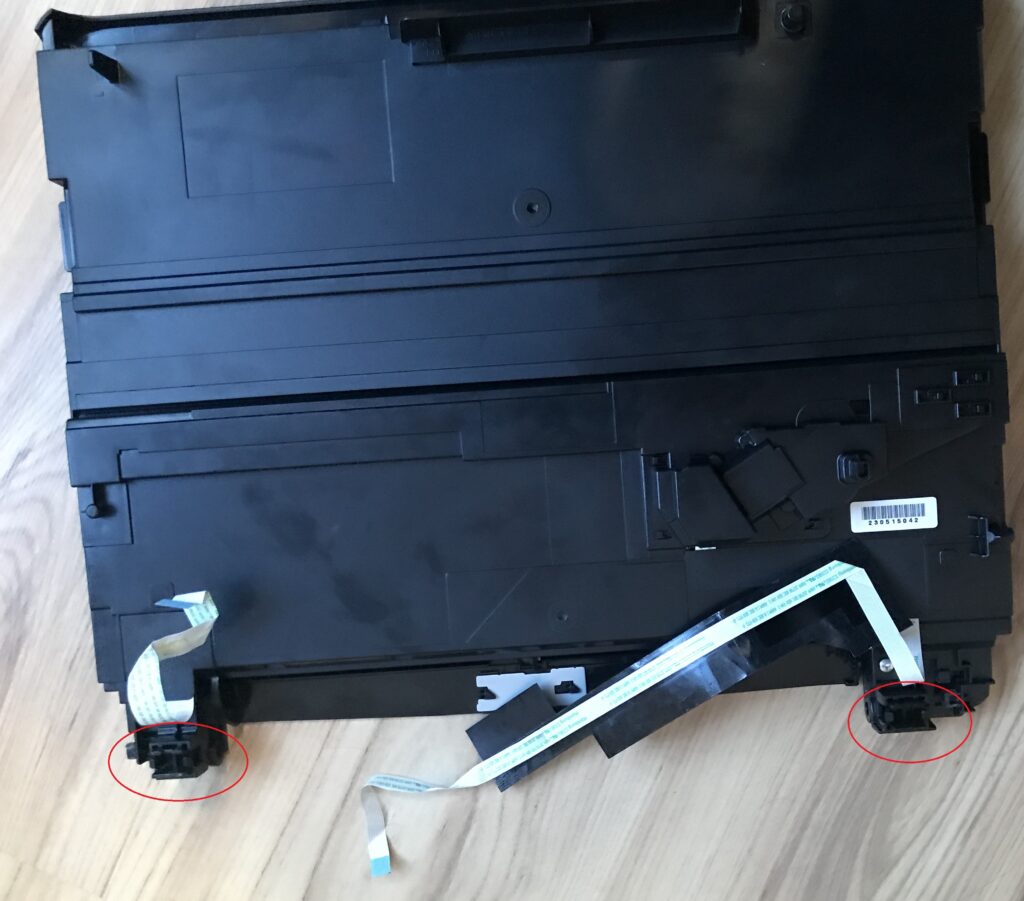
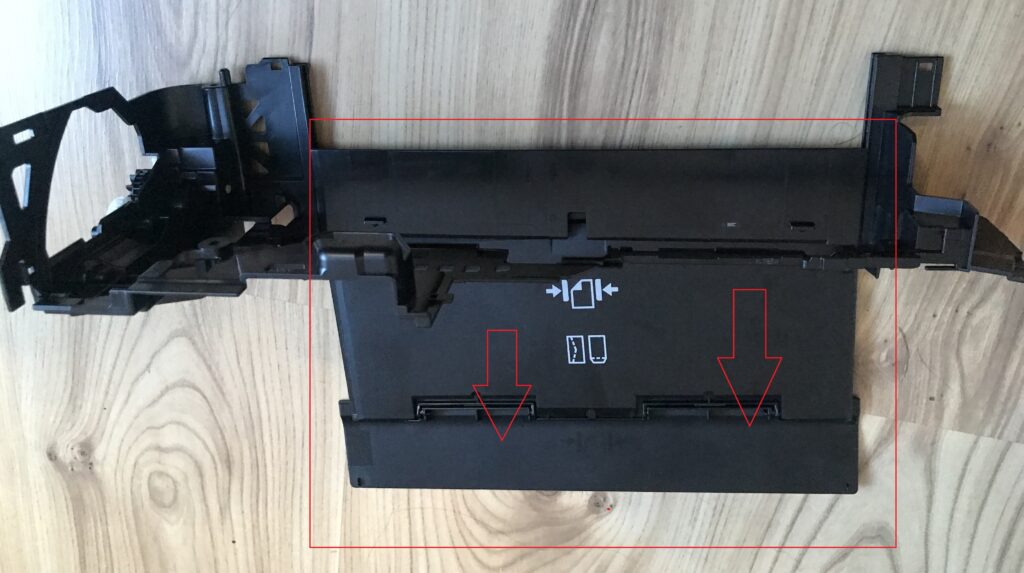
We need to remove a few more screws to remove the paper feeder part at the rear. Remove the two screws here
On the rear of the printer, there is one more screw that needs to be removed when we removed the right panel (looking from the front). It’s hard to reach so it’s easier when the scanner is removed
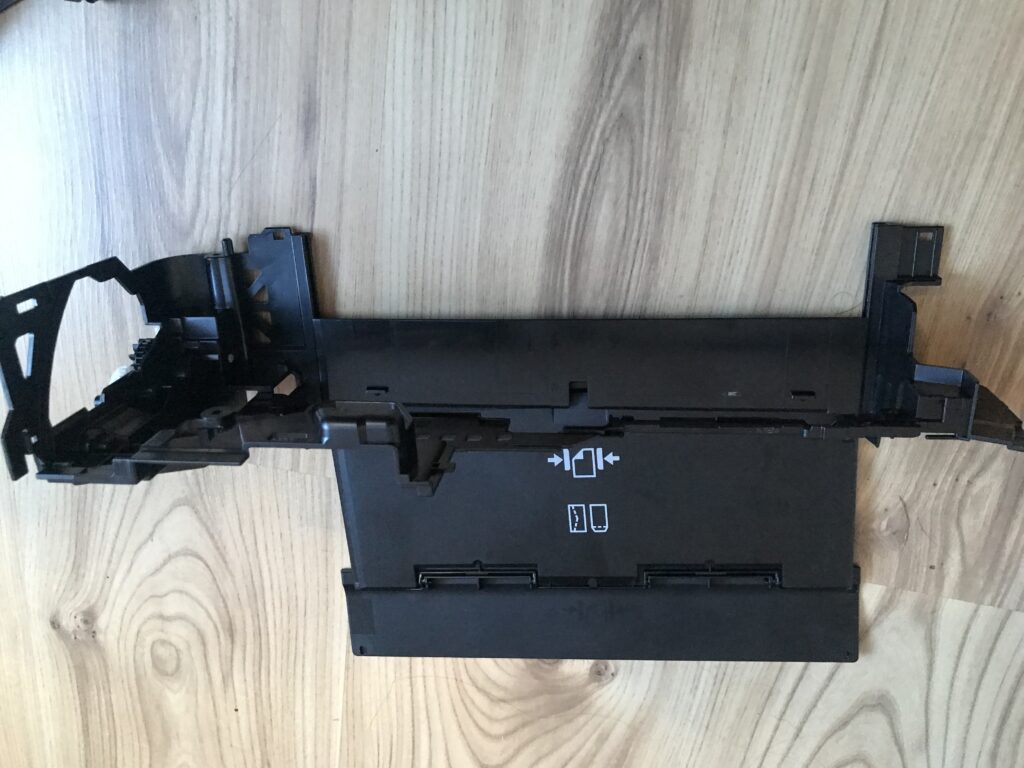
You can now lift the paper feed with the top plastic cover that covers the other cables off.
Check for plastic clips there are some on the left and right of the printer as well as the back around the paper feeder plastic.
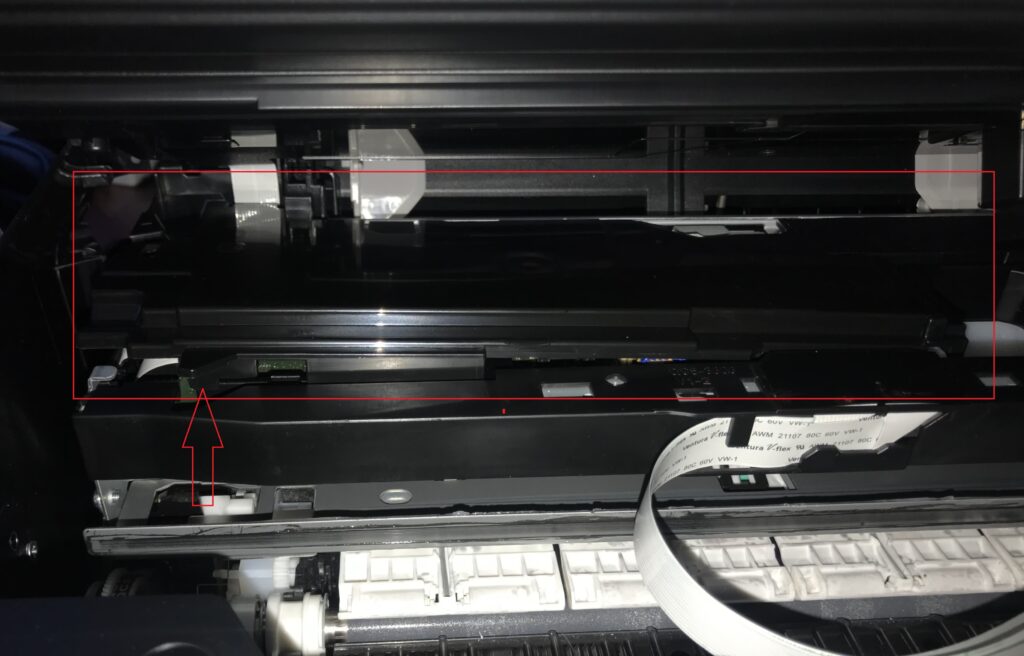
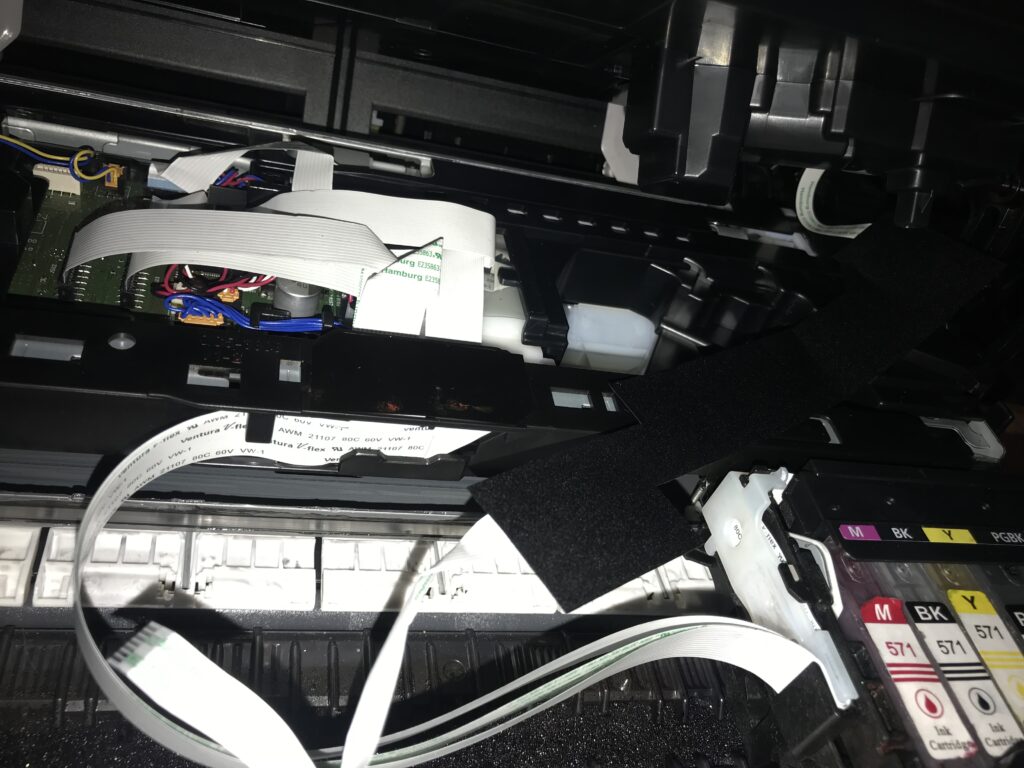
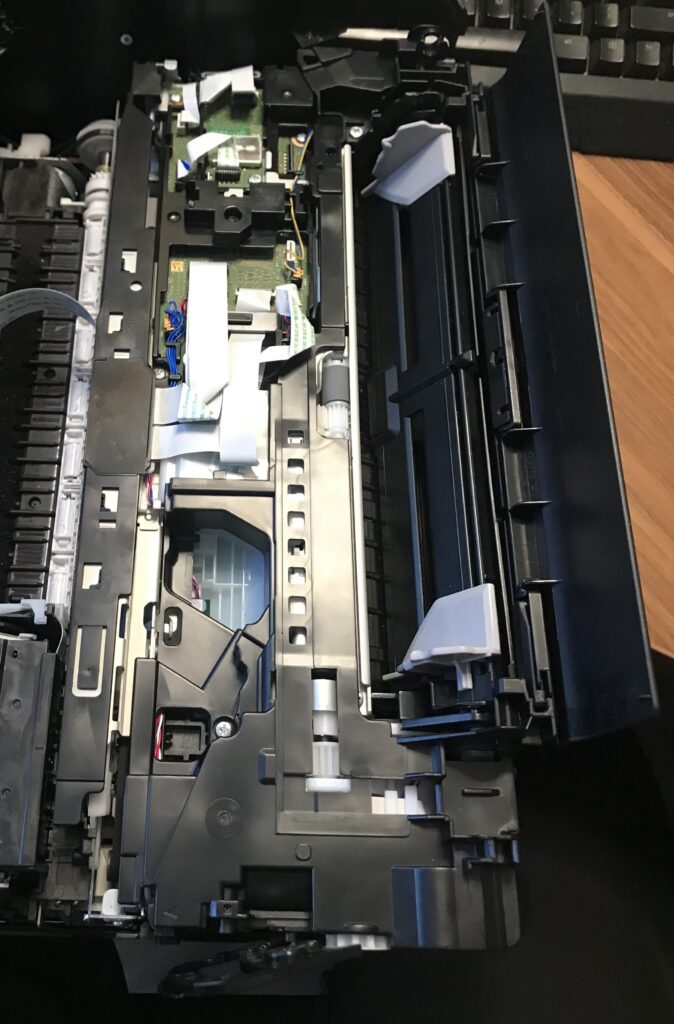
I don’t have a picture of where the tubing sits initially but they can be easily spotted by shining a flashlight inside
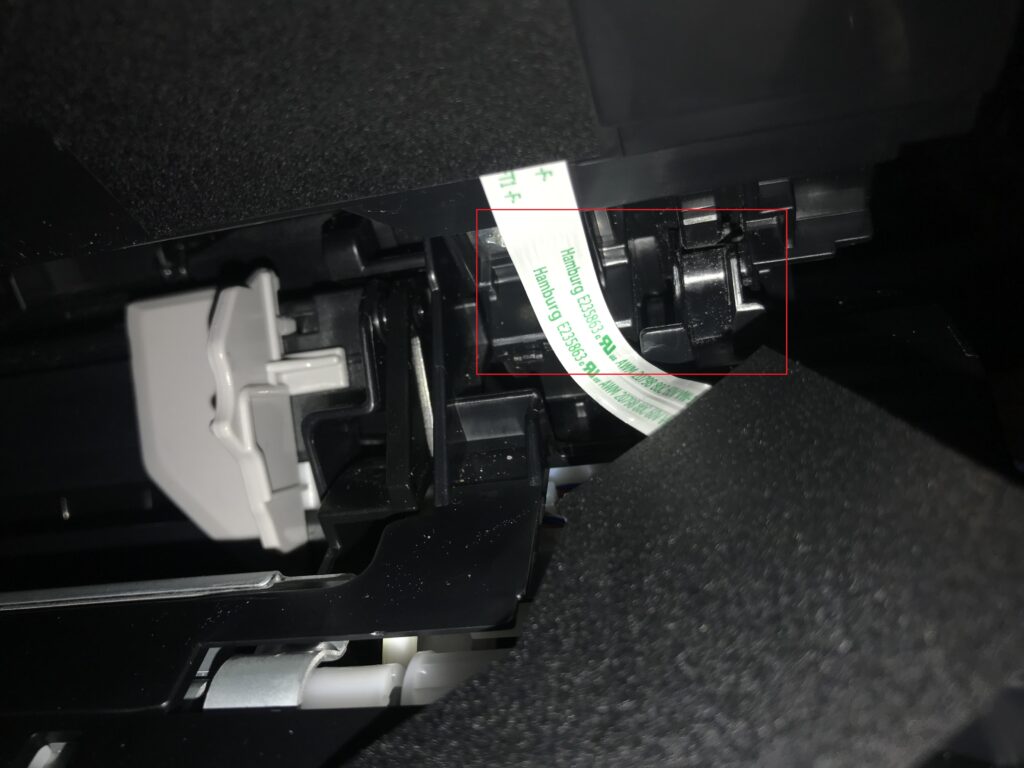
The waste ink sponge can be seen inside this spot between the two plastic parts you can pry the slit apart with a little bit of force but to completely get in there as you might have noticed there is the whole board and parts with cabling on top to get to it. So what I did by the circle was I cut out in the plastic with a heated blade to have more access
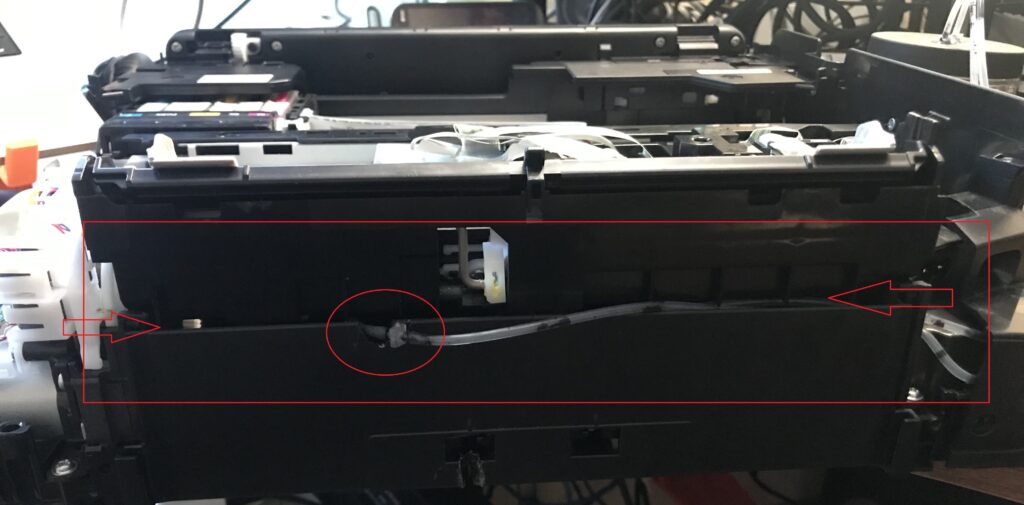
From the spot where the grey tubes that come to the waste ink can be seen, they are plugged downwards. The point why I made the hole is that I used a pair of narrow pliers to grab onto the tubes to unplug and take them out to attach the connector and tubes. There are two grey tubes. So use a pair of pliers or a small form hook so that you can unplug and take them out. They are not screwed in or glued on they are similarly plugged into the waste ink as we plugged the into the tube connector. They come off easily and they are very elastic so they won’t break easily. You can use some moderate force.
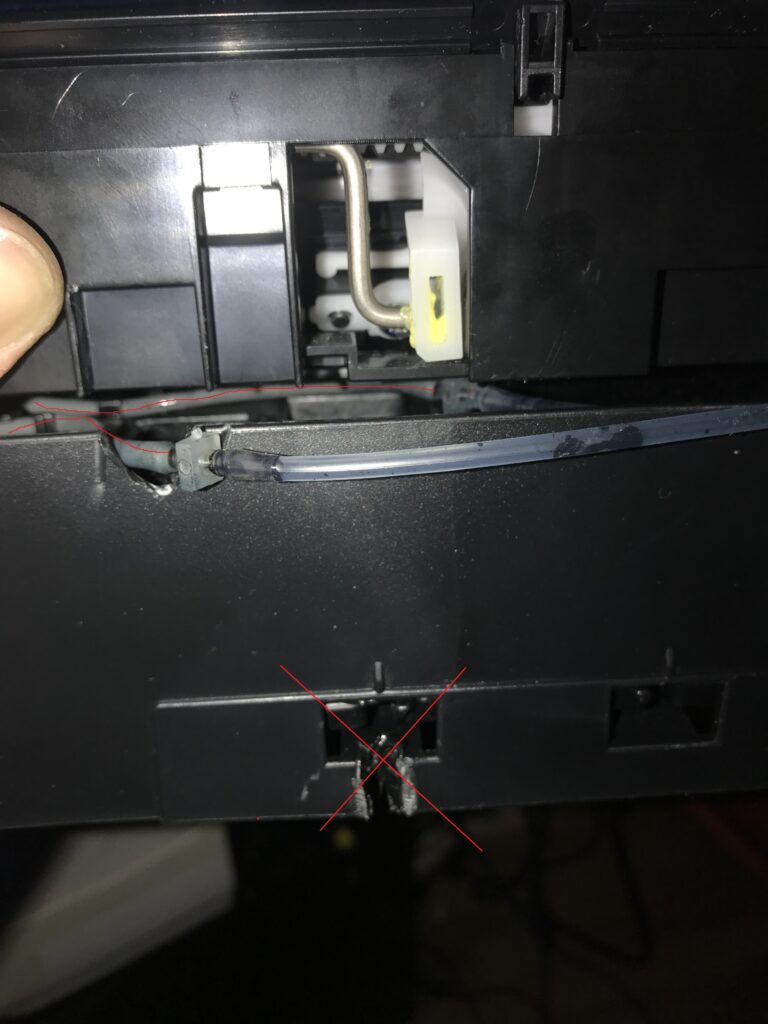
Ignore the melted plastic at the bottom I was wondering if I could feed the new tubes through the bottom but that would have been obstructed by the paper feeder so it was a no-go. Instead, they are routed to the left of the printer (looking from the front).
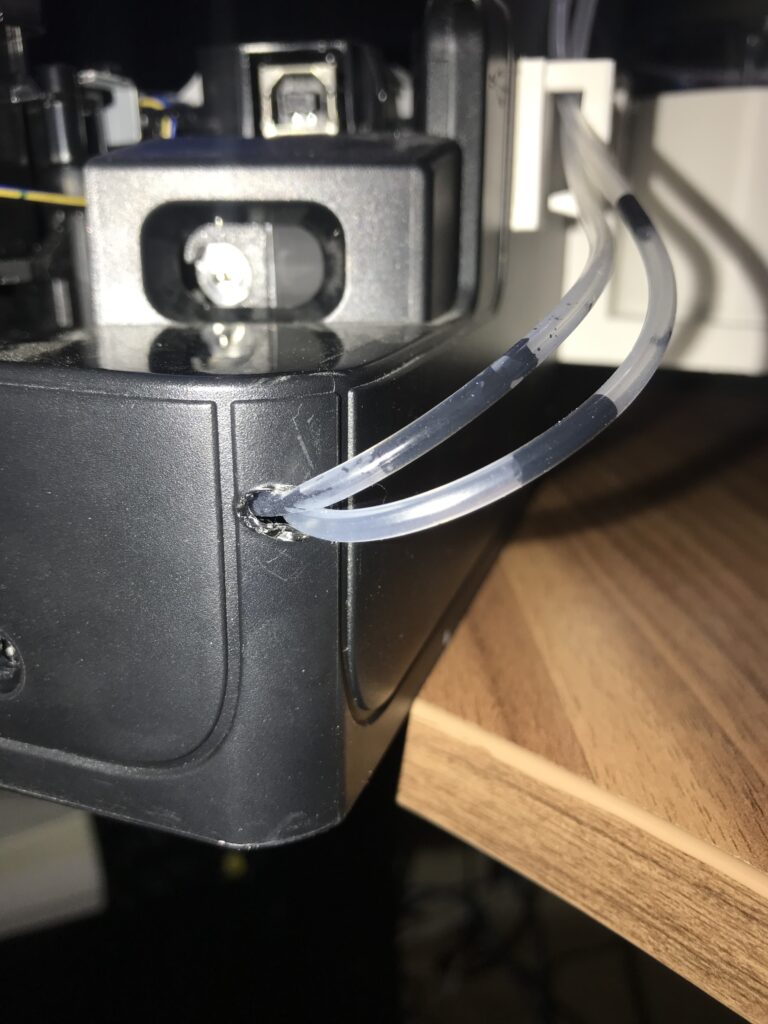
They are fed through and there is a small gap between the parts internally to leave the waste ink area and go into the side panel under the power connector
Next, I made a hole in the side panel to fit the two tubes. Make the hole big enough to prevent snags.

Here is how it looks on the outside
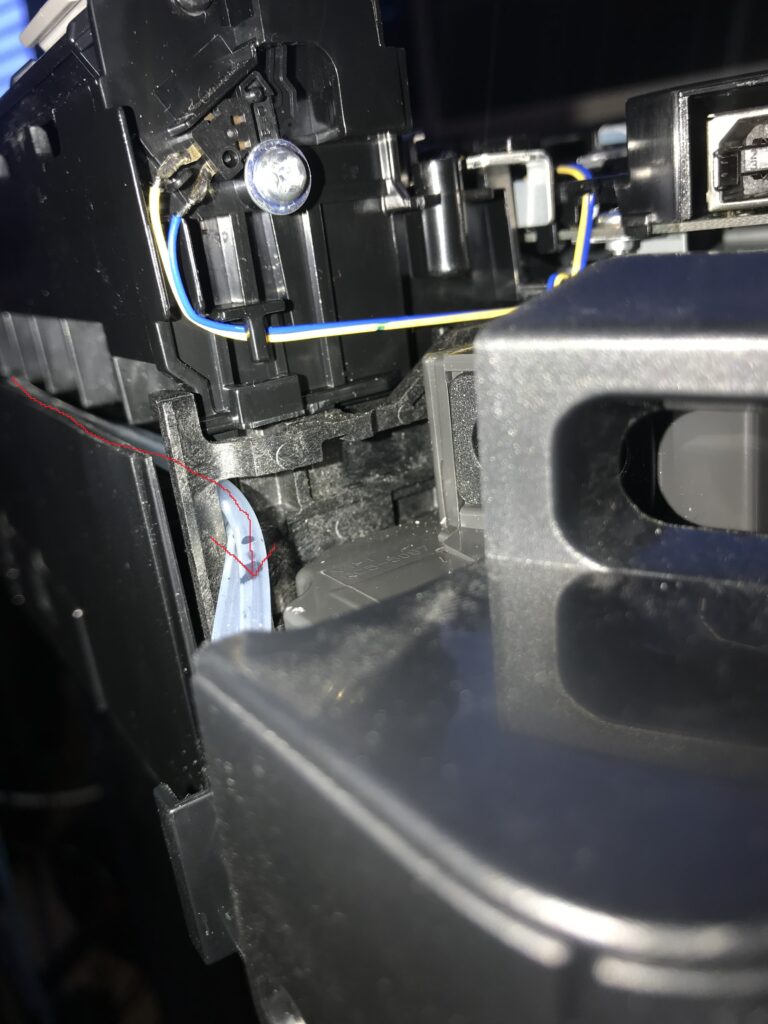
So we can test if the tubing works. Take one of the tubes and look at the pads in the front underneath where the ink cartridges sit.
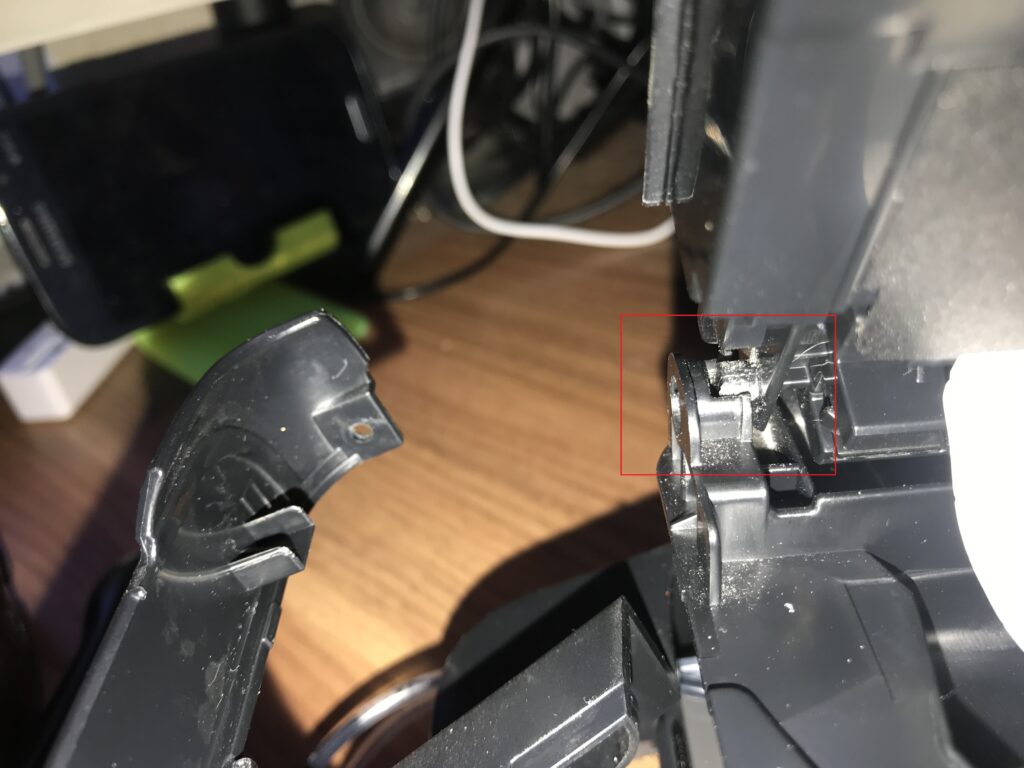
Mistake: The ink carriage is going to be in the stop position on top of the pads that soak up the waste ink. I don’t have a picture of how to unlock it. But from the right side (from the front) You can find a little plastic locking clip underneath the whole ink carriage. It should be a movable part so you press it down and then can push the carriage to the side. I will try to get a picture of it and update it.
Continuing blowing on one of the tubes you should see some ink bubbling on the pads
If air is coming out you have connected them properly and when the waste ink is pushed it will start coming out of the tubes.
Get some kind of plastic container. With a cap or lid whichever you prefer. Make two holes for the tubes at the top and feed them through. Use hot glue to seal them in place so they don’t move or fall out.
I used a little screw-on cap container with holes in the top. So if I need to discard the waste ink I can take off the cap and empty it.

For assembly, you just basically go backward. I can just give a suggestion when placing the scanner back as the hinges are placed on these two plastic nubs on their sides in the slots of the printer. Before putting it on slide out the Paper Feeder part from the bottom. It just slides out
What this does is it doesn’t interfere with the scanner when trying to place it back on. Makes it easier to reassemble.
When placing the scanner on I started on the right (from the front). And align the nub with the hole. Then did the same with the left. The left needed a little bit of force and snapped into place. Refer to the hinge placement
Everything else is straightforward to reassemble. There should be no issues. Take care with the cables and the scanner holder. Add the scanner holder with the scanner closed for easy assembly.
The result
Once assembled you can test by turning the printer on printing something and turning it off. Usually, once something is printed and the printer is off the printer will purge the waste ink before shutting down. You can view the ink flowing through the tubes
I made a custom 3D printer holder for the container and screw it into the side panel. Since I don’t know where to get such a container I don’t think my 3D print will apply to any other so I don’t see a point in sharing it. But I can if needed. Just let me know. But you can use the same super glue to just fix it to the side or just place the container next to it. It’s your choice.
The printer will purge the waste ink in the container and not the sponge. Do keep in mind the error 5B00 will reappear in the future after some use. But you can reset it again with the service tool. The main fix here is to protect the printer from the waste of ink overflowing and damaging the printer. The counter can be reset as many times as you want.
This can drastically prolong the life of your printer as well as save you money for repairs or replacing the printer.
Cleaning tips
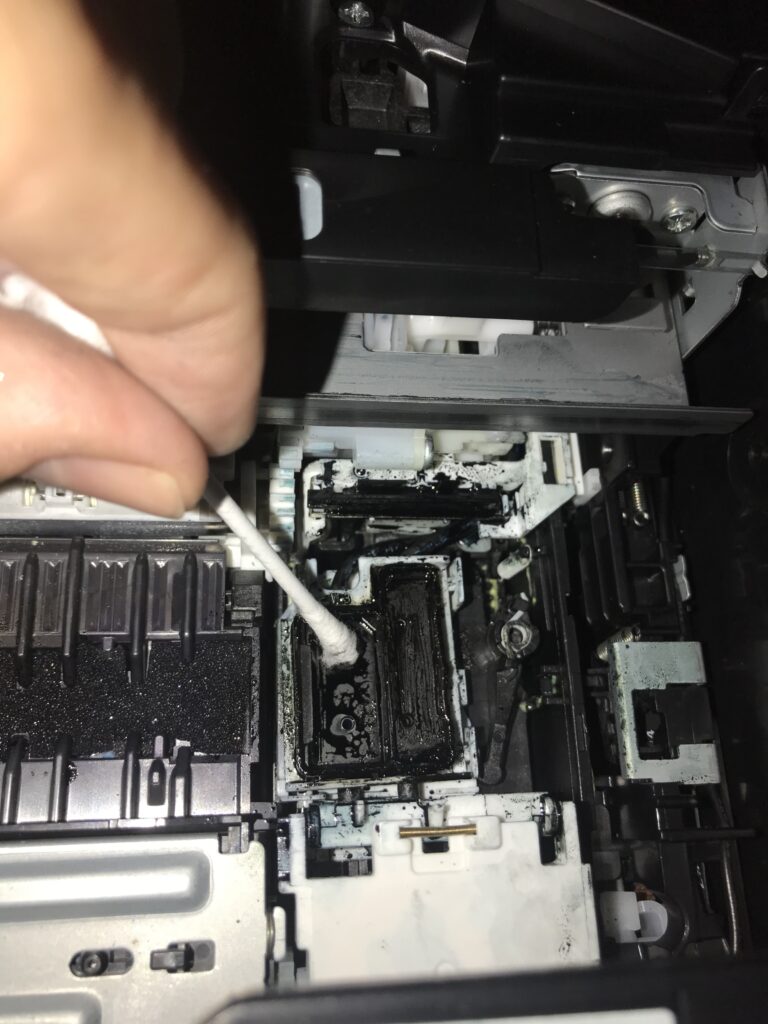
I will also add some tips on how to keep the printer clean. Remember the waste ink pads underneath the cartridges? Well, they can be cleaned. They can be taken out and washed, just run them under some water. So do that every once in a while to prevent buildup. Also, take a Q-tip and clean the place where they sit.
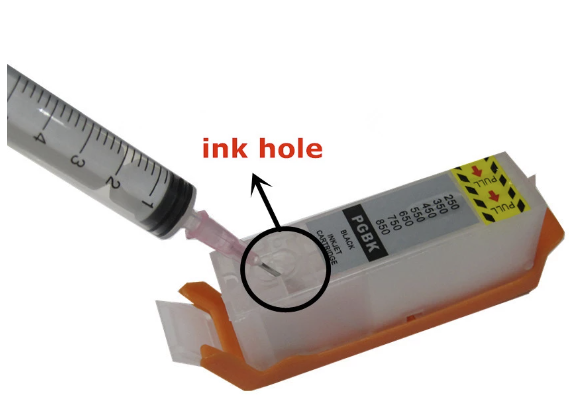
Get some refillable cartridges with ink as well. Get some syringes or they usually come with the ink you buy. The refillable cartridges have a nub on top to refill them. Also, the chips on them reset the counter automatically so you don’t have to replace the cartridge.
You can find some cartridges and ink here here
Refillable cartridgesFull kit set
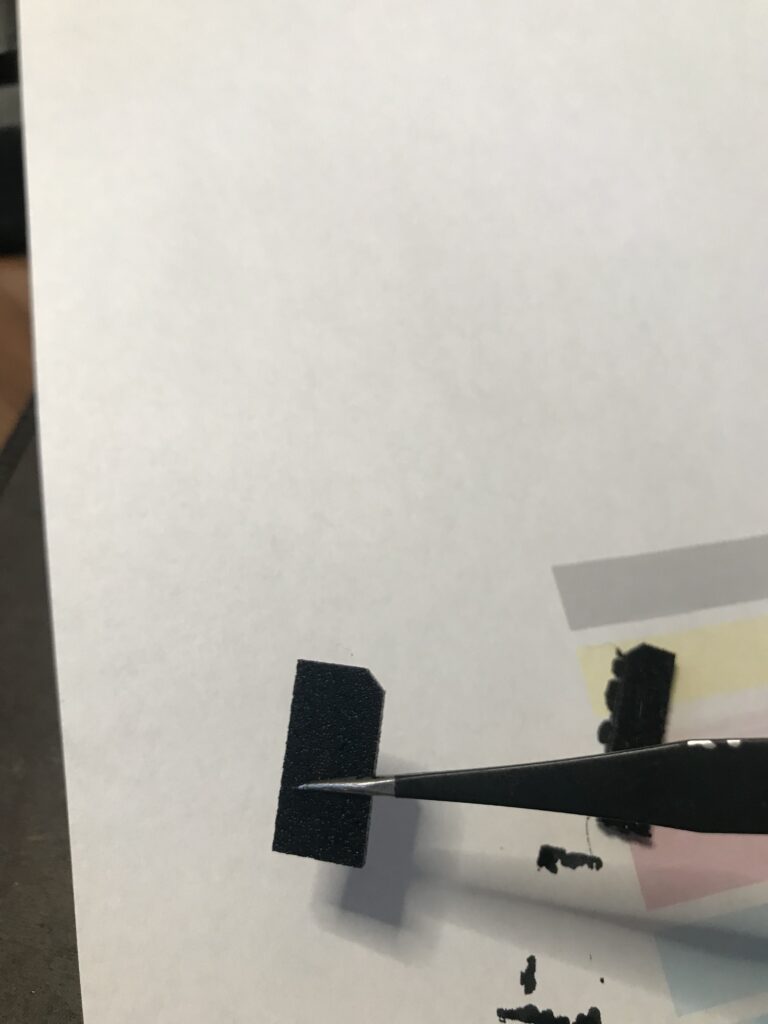
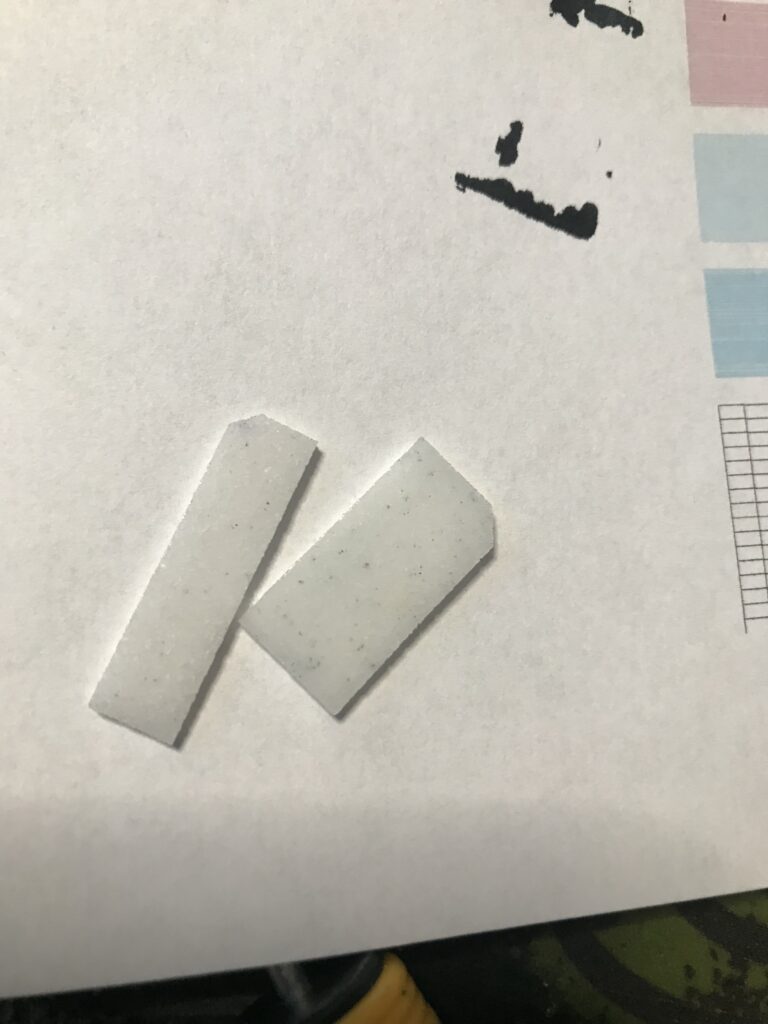
Also for clogs, the printer sometimes clogs on some colors and the internal print cleaning function doesn’t always unclog it. The best way is to get a print head cleaning kit and use a cleaning solution to unclog them. It has worked every time I had a clog and I haven’t replaced my printhead in over two years.
Printhead cleaning kitAn example of how the cleaning works can be seen here:

Conclusion
This post is quite long. But you might be able to adapt most of what I mentioned on similar printers. As they incorporate similar technology. Like the waste ink sponges and ink cartridges with chips that count usage. Cartridge refills. Cleaning etc. They will most likely look the same between models.
As always I hope this has helped you and will prolong the life of your printer.


Recent Comments