
Reviving old electronics instead of disposing of them
This time it’s a short one. However, I want to get a point across that people tend to mostly create e-waste where it is most likely not necessary. Whether you drop stuff on the ground, it breaks spontaneously, or you spill it with soda or water, but most likely even after that happens the electronics you use may be fixable and it is not that hard really.
Why do this?
I can relate. I have things that I didn’t want to do in my life. Whether it’s plumbing, electricity, or any other household thing that usually will at some point in time break somewhere. There are also limits as to what you can and cannot do based on the severity of the problem. So like in terms of your electronic devices. Let’s say it catches on fire. I would just not suggest even trying anything on it. It is most likely damaged beyond repair. This is a normal reaction and we shouldn’t be forcing ourselves to go out of our way to just make it work again even if it is financially and time-consuming to the point where it is not worth it. This is with everything in life and you should use your better judgment in every situation.
As with everything new that you try there is a learning curve or an initial investment that is usually needed. For example, in terms of electronics especially smaller ones, a screwdriver set is a necessity. If you want to just simply open the thing up that’s a must. I will just give a simple example I had last weekend where my kids dropped one of these really old 9999999 in-1 brick game consoles and of course, it broke.
Fixing stuff
Although perhaps not too common it happens. So my kid’s dropped it more than a couple of times and the last one was enough to break something that now makes it a paperweight. Now, this is the point at which you ask yourself. Is it worth fixing it? Depends. But let’s do it for the sake of it on just portray the difficulty.
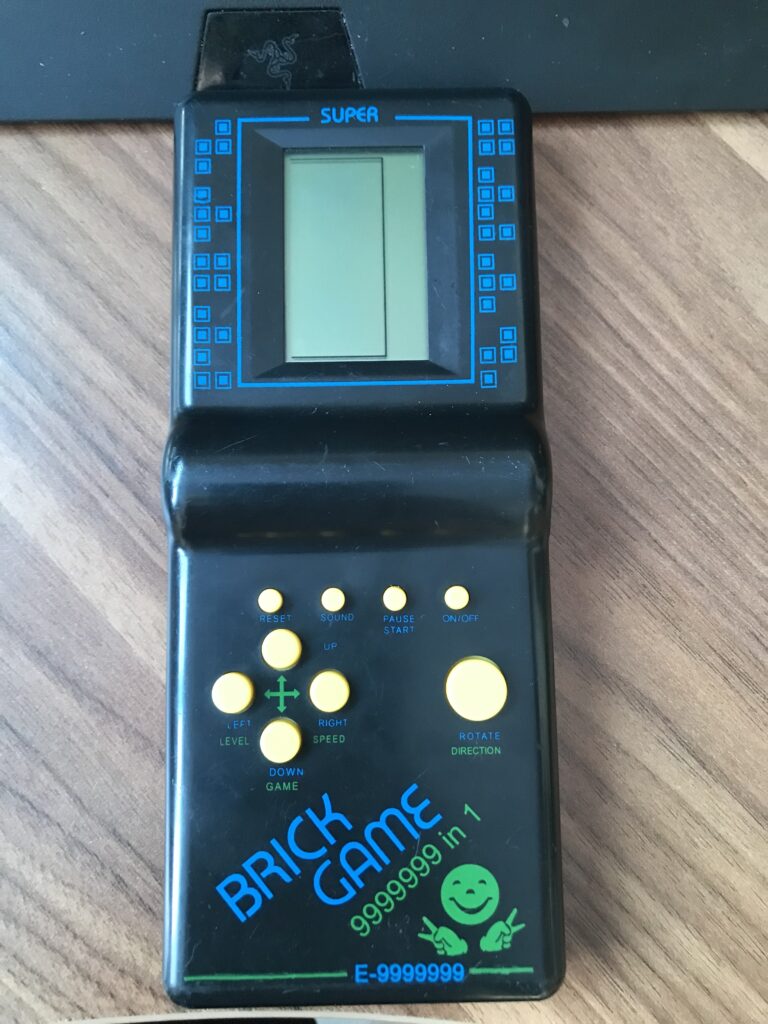
So this little gadget was bought at some point in a local pawn shop for probably like 2-3€. This means investing money in it is not viable besides swapping the batteries. But let’s view the damage first and assess the situation. From the front, it looks perfectly fine. The years and being in my kid’s hands have done some overall visual damage like wear and tear.

At first glance taking the back cover for the battery compartment reveals the first problem. The contacts for the batteries are no longer in place and the plastic holding them has broken off. Hard to say the severity of the damage but just placing the right contact and holding them in place by hand with batteries inside reveals that the game works. So we need to take it apart by removing the 6 screws and see how much damage there is and if we can fix it.
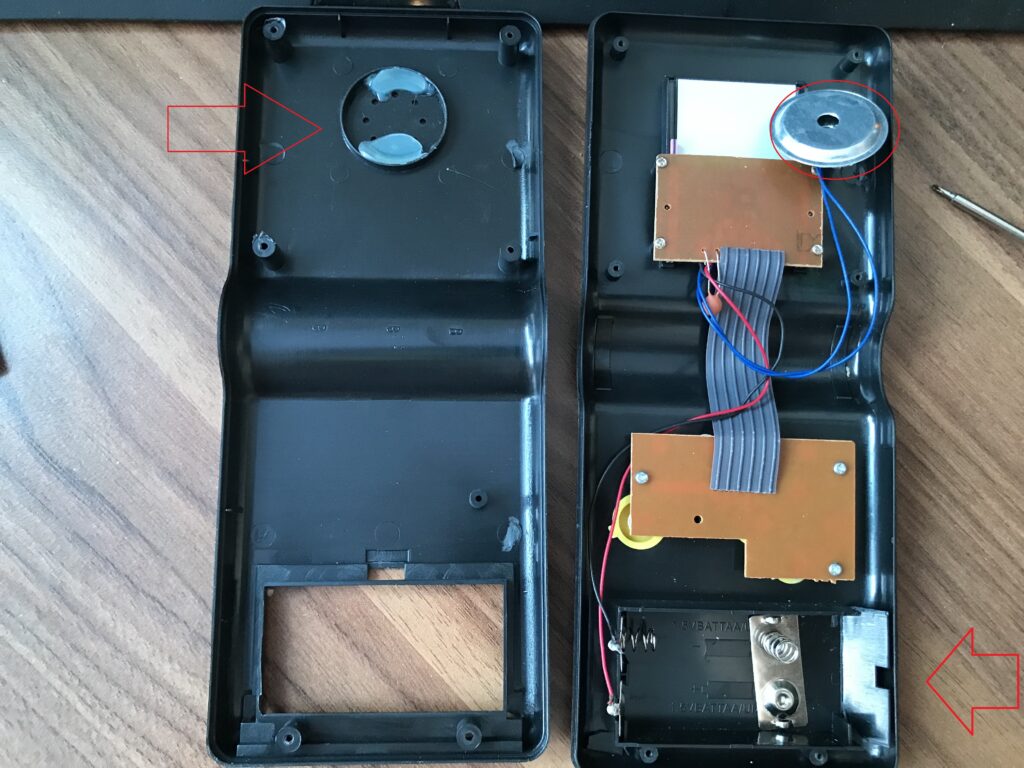
Opening it up the first thing that I notice is the speaker up top has come off. As we can see it was held in with most likely hot glue. The bottom part where the metal contact piece has to sit in place has its wall broken off and bent outward. So I am going to use some super glue as well as hot glue to place everything back in place.
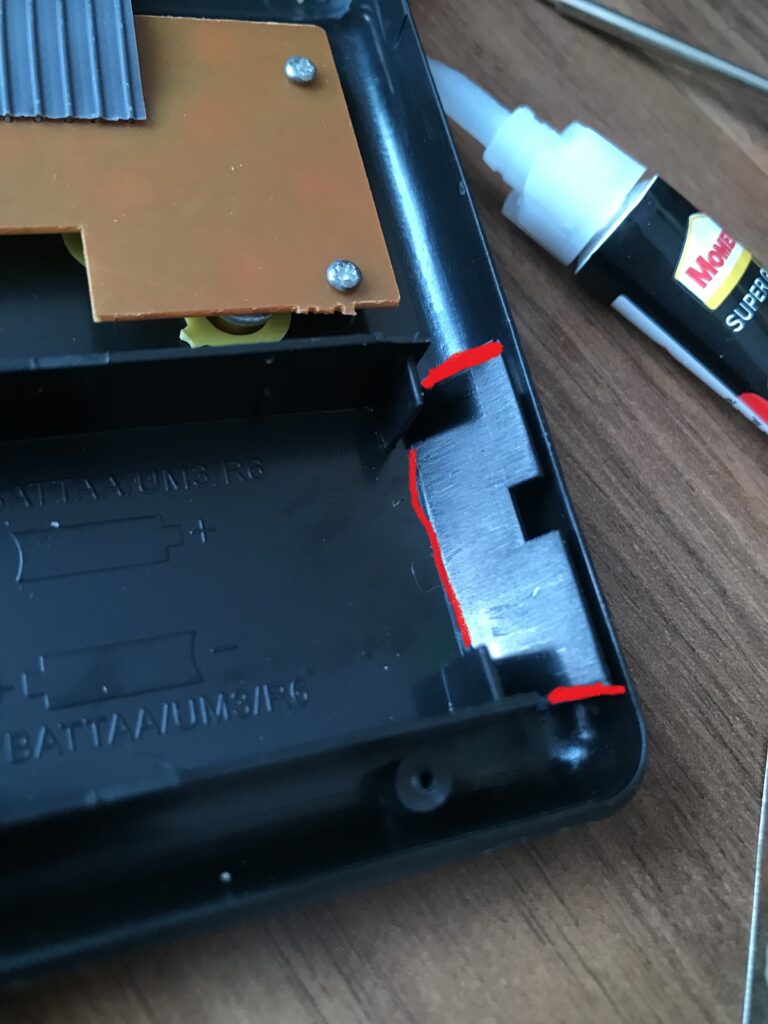
Taking some super glue I added a small amount to the broken parts and the bottom bent part in red. Pushed the part back slowly without breaking it so that it sits in place and adheres to the walls. Once it was holding tight by itself I left it for about 30 minutes to dry.
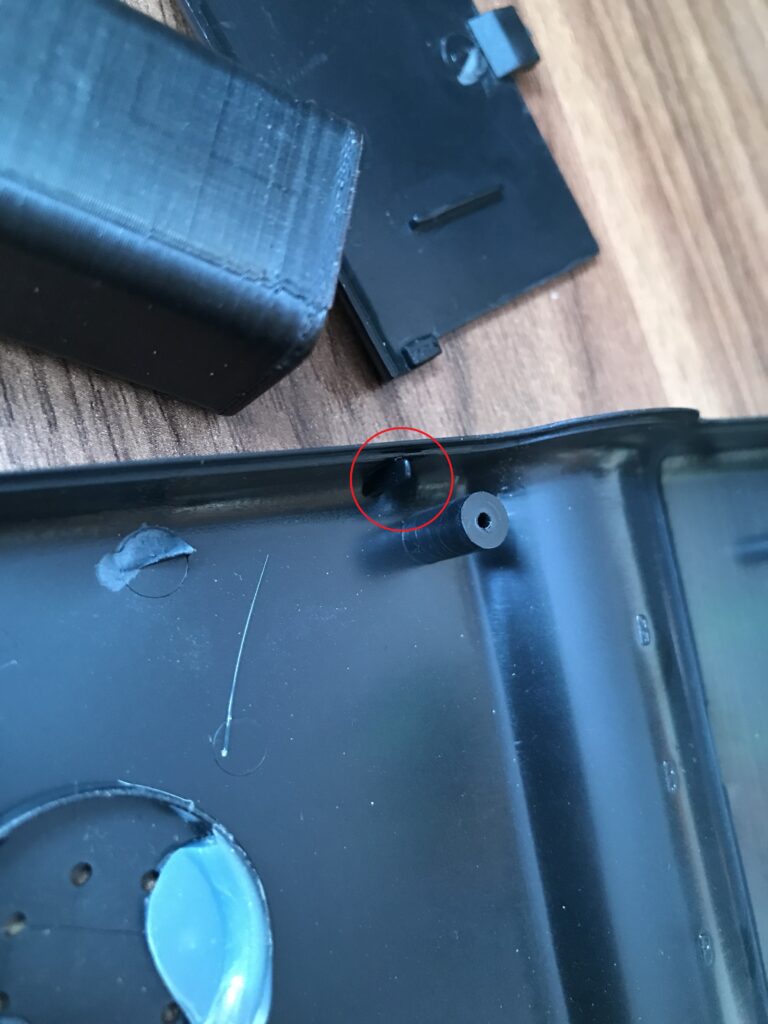
Noticed a small broken piece near the edge which was lying around near the broken part so I glued that back on. It probably won’t have any noticeable difference, but since It’s already disassembled I figured why not? The last step was to use a hot glue gun and glue the speaker back into place. Before putting it back on. I just removed the old adhesive which was so old and hardened that came off easily and practically in one piece. I had a picture of it but my phone somehow decided to not save it immediately and waited for me to move to save a blurry picture. But it’s pretty straightforward.

I added some hot glue to the outer sides of the battery compartment just in case it gets additional force and when pushed by the batteries do not break so easily again. We slot the battery contact back in between the plastic grooves and reassemble it with the 6 screws.
Once reassembled we put some batteries in and tried it out.
Wrapping it up
In general, this was an easy fix. Of course, getting many of the tools to have in place might need a small investment. But generally, a screwdriver set and super glue can get you results easily.
Overall with fixing electronics over the years the most common tools I get to use besides the ones mentioned are of course a hot glue gun, solder iron, isopropyl alcohol, and a multimeter. If it’s fixing laptops or phones. A screwdriver and isopropyl alcohol are the usual fixes. Something like a laptop is prone to get spilled on and it causes shorts inside the board. So just have a disposable toothbrush dip it in the alcohol and do a light scrub in the water-damaged areas. The corrosion will mostly come off and if there was no severe damage done and the spill was recent you can save your piece of hardware and continue using it.
Nowadays, we have so much information at our disposal with tutorials and deep dives into many different topics, and being able to fix things around the house without producing waste while prolonging your device’s life is a great personality trait to have. Hell, some even make a business out of it. I would at least suggest giving it a shot.
That’s all for now and I hope this has helped you out.


Recent Comments