
Home Assistant Hot Tub Integration
If you have automation for your home set up like Home Assistant. Chances are you are using MQTT as a way to communicate and control with different devices that support this feature. You may use different automation software or different brokers to communicate with your devices. But for this post, we will be discussing Home Assistant and the MQTT Broker Add-on.
Prerequisites
First of we need a few things before we begin integrating our hot tub SPA to work with our home automation:
Have Home Assistant installed and running:
You can find the official guide on how to perform this setup and the different ways to achieve it
https://www.home-assistant.io/installation/
Use the supported MQTT broker addon:
https://www.home-assistant.io/integrations/mqtt/
You have your SPA setup and working and the GUI of the hot tub is accessible for you:
https://antanaitis.lt/2022/09/07/wi-fi-on-your-lay-z-spa-make-it-easy-to-remote-control/
Optional to have is HACS which can provide us with some custom Lovelace cards:
https://hacs.xyz
Integration
For this guide, I am running the Home Assistant Operating System on a Raspberry Pi 4. The installation is fairly straightforward you get to setup your username for logging in all the steps are provided in the official guide. Do keep note of the IP address you use to log in since based on this guide we will have the broker inside the same machine so we will be using that address for establishing communication.
Regarding the MQTT broker installation beyond what is provided in the integration guide, you can check out this quick video on the steps to set it up quickly.

Having Home Assistant, MQTT, and our Lay Z Spa running we can start with integrating them.
As mentioned in the video above we should create a user we will use to authenticate to the MQTT broker from our Spa.
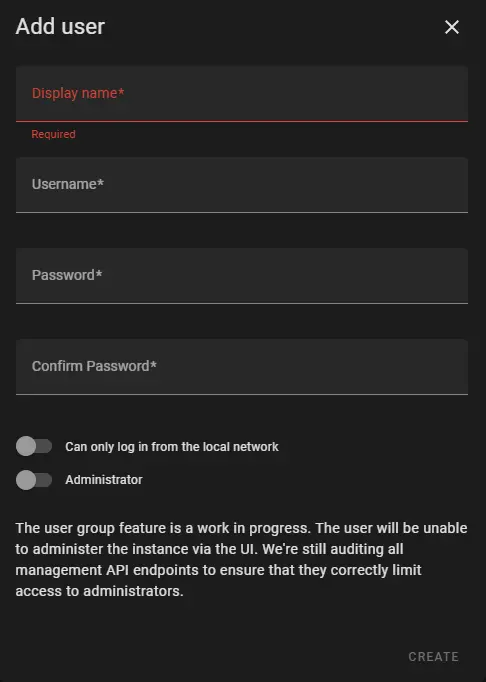
In Home Assistant we navigate to Settings -> People. Open the Users tab and click + Add User. Here we fill out the details and keep note of the Username and Password we just created as we will need that.
Next, we can go to the Spa UI interface by going to it’s IP address in the browser, and from the main menu click the “Hamburger” icon in the top right and select MQTT Config in the drop-down menu.

Here we need to fill in the details:
Enable MQTT by checking the box
Enter the IP Address of the MQTT broker. Depending on your configuration this would be the same IP of your Home Assistant or if you use a different broker then provide the correct IP address.
Port 1883 is the default if you use a different port you will need to adjust this.
The username and Password are the user credentials we created previously.
For Client ID and Base Topic, you can use something identifiable. Like Lay-Z-Spa or hot tub.
We click save if the Spa interface doesn’t restart we can restart it manually from the “Hamburger menu”.
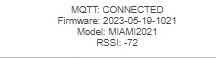
If everything is correct. On the Home page of the Spa you should see this message that it is connected:
If this still shows disconnected you can wait a little bit or check the MQTT addon by going to Settings -> Add-ons -> Mosquitto broker and opening the Log tab to check if there is a connection attempt happening or if there are any errors and troubleshoot from there. Also, make sure that if you are having problems there isn’t any network devices that could have rules or firewalls that could potentially be blocking communication for these devices. For additional support or if you have any issue with the integration your best bet would be to join the Home Assistant community for help.
https://community.home-assistant.io
Once connected you can check the device and its applicable controls and sensors in the Integration tab. By going to Settings -> Devices & Services -> MQTT (Under Integrations tab). You will see your devices.

If you open your device you will get all the controls and sensors you can use for either your automation or creating device cards etc.

From here you can already test if this works. For example, turning on the hear or bubbles and see if the Spa reacts accordingly. If everything goes well you now have integrated your device into your home automation application.
Lovelace
This part is not mandatory. Since we have the integration working. We can create a beautified or simplified card whichever you prefer to control our Spa. If we go to the Overview tab and on the right top corner click on the 3 dots and select Edit Dashboard you will get an option to + Add Card at the bottom right. By default, Home Assistant has some default cards for you to choose from based on your device which would fit your needs.

For example, we could pick the Thermostat Card. Which would give us settings like Temperature control. Having buttons like heating etc. But this is very unintuitive as it is more designed for air conditioning units and some buttons just don’t make a lot of sense.
This is where HACS comes in. If you went along and got HACS installed you can use that to get custom Lovelace cards to use for your dashboard.
Courtesy of user @dwoosnam on the GitHub page of the Spa integration by visualapproach https://github.com/visualapproach/WiFi-remote-for-Bestway-Lay-Z-SPA
He has provided his own custom card that you can use which has a good-looking approach to controlling your hot tub.
This is detailed in his post:
https://github.com/visualapproach/WiFi-remote-for-Bestway-Lay-Z-SPA/issues/96#issuecomment-1158128142
You will need to get the custom cards mentioned from HACS:
https://github.com/kalkih/mini-graph-card
https://github.com/piitaya/lovelace-mushroom
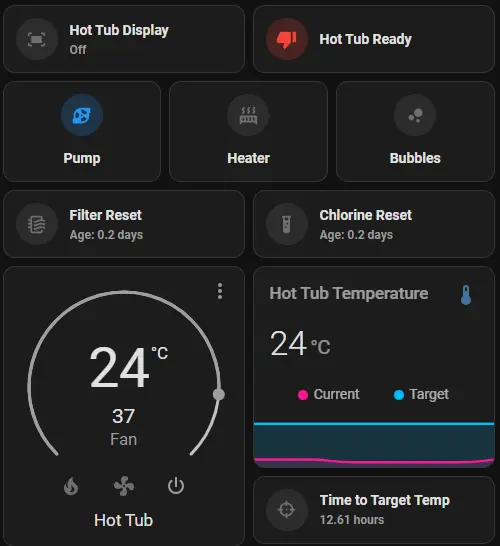
Once you have those installed. You can go to add a new Lovelace card. Scroll down to the bottom and select Manual. In the YAML configurator, you can paste the code provided for the card from the post mentioned previously. Now some things will not work since his integration is probably named differently than ours so we will need to change a few sensors, etc.
Here are some of the changes I made that make the card more functional:
First off you will get an error for this entity: sensor.nodered_bdc8d8e3_805f28 which will not exist in your installation
Replaced this with the sensors that are available from the MQTT devices page we viewed previously.

Like for example for this one I took the ready sensor. You can get the entity name by clicking on it and in the window click the cog icon and you will get it from the Entity ID line. Once that is replaced instead of sensor.nodered_bdc8d8e3_805f28 it will show information as expected.
So this goes for other sensors that may have different naming conventions than yours. Like the temperature ones, etc. Just get the correct Entity ID and replace it with the ones in the YAML code configurator and you should be good. Once satisfied you can save it and that’s it you can now comfortably use your Spa controls from your phone.
Now @dwoosnam has shared more than one of these cards so you can use which you can find here:
https://github.com/visualapproach/WiFi-remote-for-Bestway-Lay-Z-SPA/discussions/462#discussion-4945319
Whichever you prefer or create your own from scratch. There is no one size fits all and everyone has different tastes and opinions on how they want to control their stuff. So it’s up to you.
As always I hope this helps you out.

Recent Comments