
LG TV LED backlight repair
TVs are a part of most households and usually issues with them are not common. But unless it’s physical damage like the Nintendo Wii days where you would chuck your controller breaking the screen. Perhaps you have a power surge that blows the internal components of your television it’s usually an unfortunate event. But something like degrading visuals are annoying and with one of my screen’s displaying such symptoms and being many years out of warranty I decided to find a solution.
The symptoms
In my case, this is not something new and has been experienced by others. Symptoms may include bright white spots. Discoloration like the whole image has a blue-like tint. Dark spots like there is no light shining on the screen or just a plain black screen but seemingly you have sound but nothing is showing on the screen. This and similar symptoms are usually the cause of the LED backlights degrading or becoming faulty.
I have had 3 TVs in total that had similar issues. 1 had the white spots. Another had the blue tint which we will talk about in more detail. Also, one which experienced dark corners at first and later became completely black.
Possible solutions
Diagnosing issues can be difficult but with the right tools, many can be identified. As an initial starter, I would recommend checking out this YouTube video detailing some proper steps to take when troubleshooting.

This and more are detailed on the internet and you may be lucky to find issues on your specific models on sites like Ifixit so always check them out.
In all my listed issues, all have had one or another issue with the LED light strips that sit at the back of the TV. In all my cases replacing them fixed the issues. But always a good initial diagnostic check of the components is a good start to identify underlying issues.
My LG TV issue
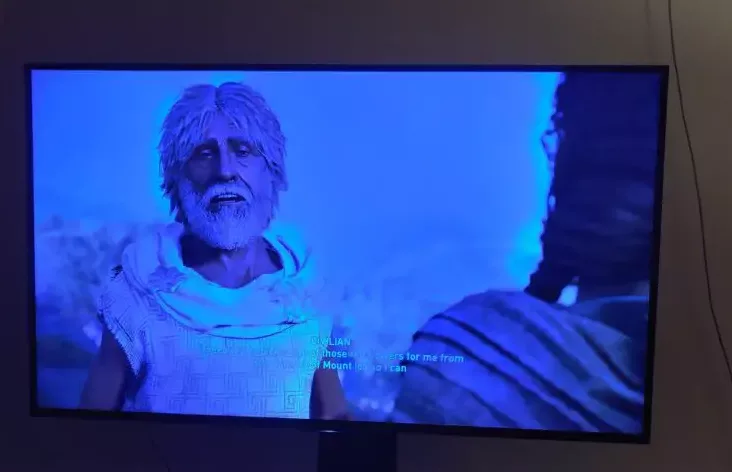
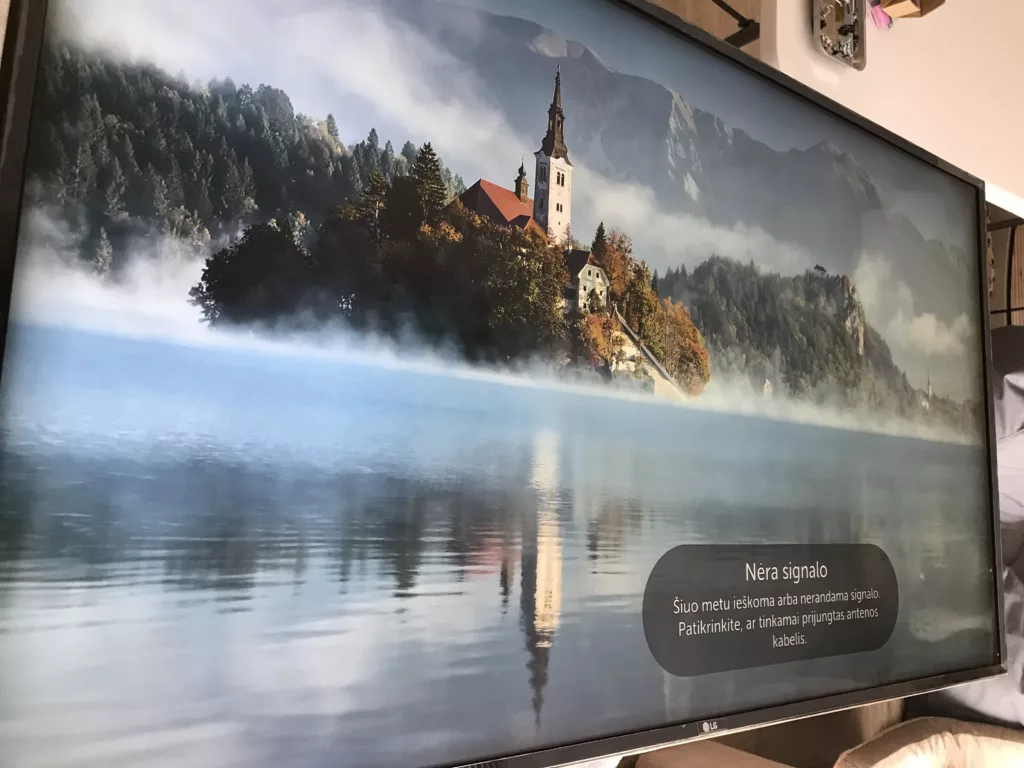
As mentioned previously I am going to detail one of the issues I had which was the blue tint issue. The main cause of this is a degradation of the LED lights where they should be lighting up white but due to poor quality, age, etc. They start producing a blue-like tint which makes everything on the screen extremely saturated in the color blue.
Let’s start off with some of the essentials. Disassembly of the TV requires some screwdrivers. In my case, all screws use the Philips head screws. So besides that if troubleshooting issues you want to look at some of the components a Multimeter will be a great tool for diagnostics. Some plastic spudgers to undo clips that are common in TVs. For big screens, I prefer to get window/glass suction cups. Since the screen itself is extremely thin and due to its size it bends quite a lot and it needs to be taken out so proper suction cups come in very handy to handle the screen properly.
First off looking for some common issues for your model we should check the back of the TV for the exact model no. Type that in your favorite search engine with some words regarding the issues you are facing and you will most likely get some familiar results.
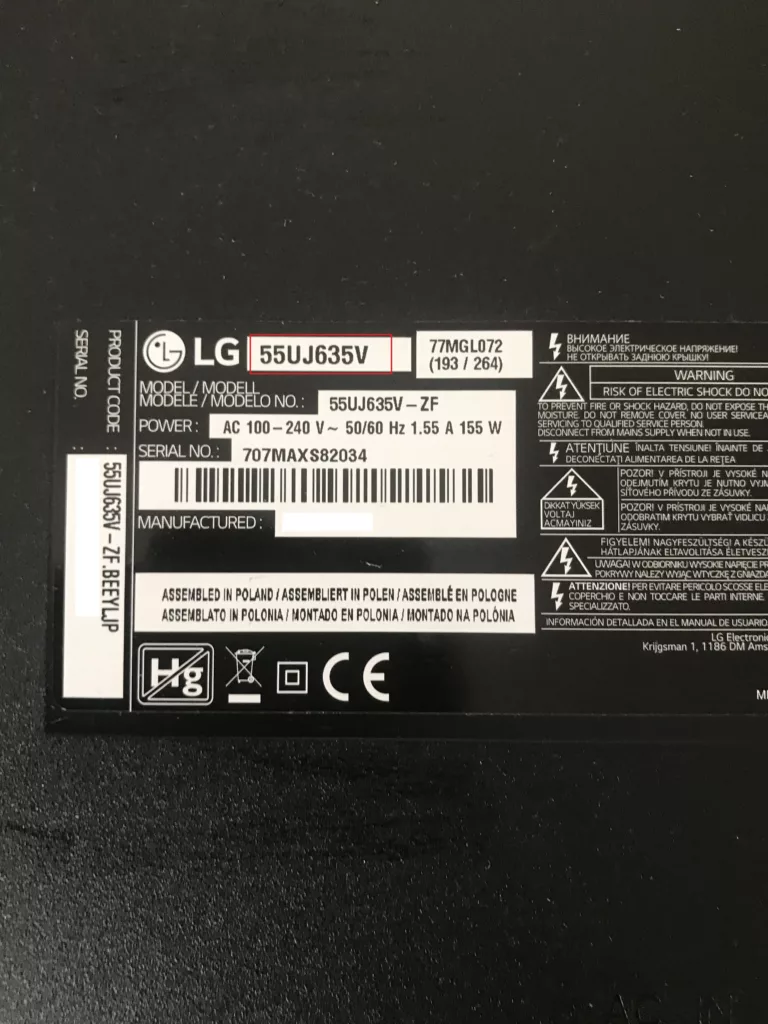
From my example, the model is LG 55UJ635V. The model is important not only to get information about it but also when searching for parts so that we find compatible ones for our TVs.
In my case since the TV is fully functioning and the blue tint can only be an LED issue. Unless you of course double check your Picture settings in the TV to make sure there isn’t something set that accentuates the color blue. I went ahead and searched for some LED strips for my model.
Which I found results on Amazon for example:
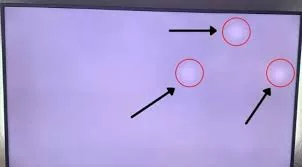
Having the tools and parts necessary we can disassemble the TV. First, we want to get the TV stand off which is usually screwed in the middle. Hence the arrows in the picture but mine was hanging off the wall so the stand is already pulled off. The screws go all around the casing of the screen so we will need to remove all of those. A thing to keep in mind is that you should always document the screws you take out. Many times the screws can be different sizes so take pictures/notes so that you remember and can backtrack the assembly.
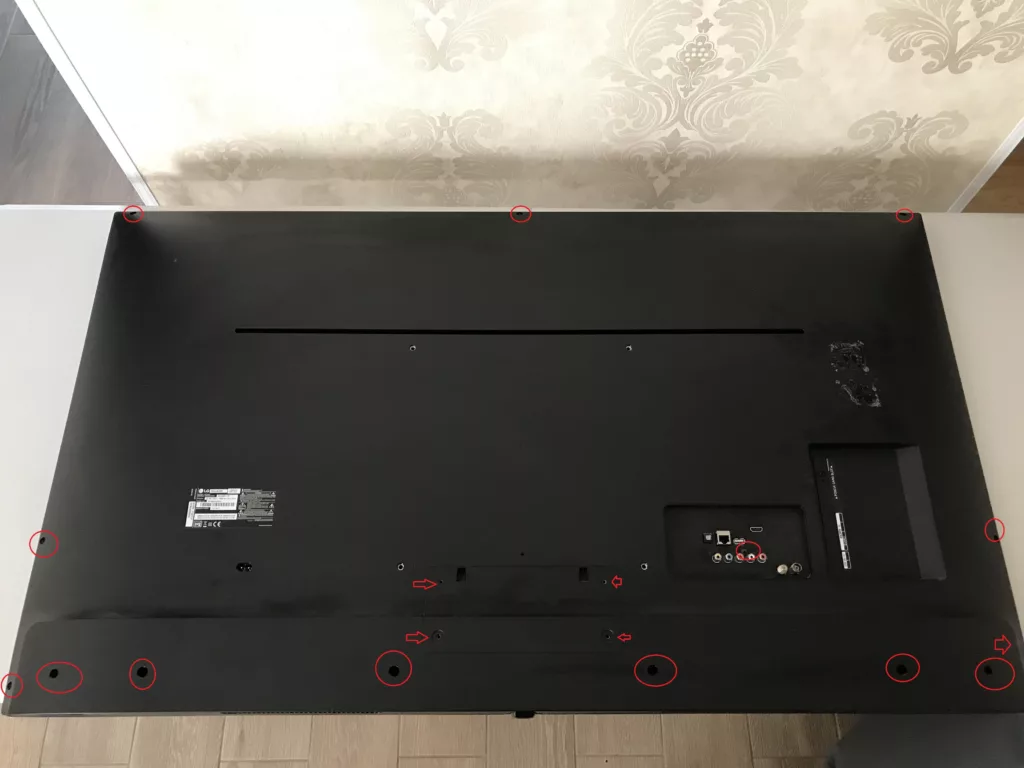
The back cover should be easily pulled off once the screws are removed. Here we get access to the internals.
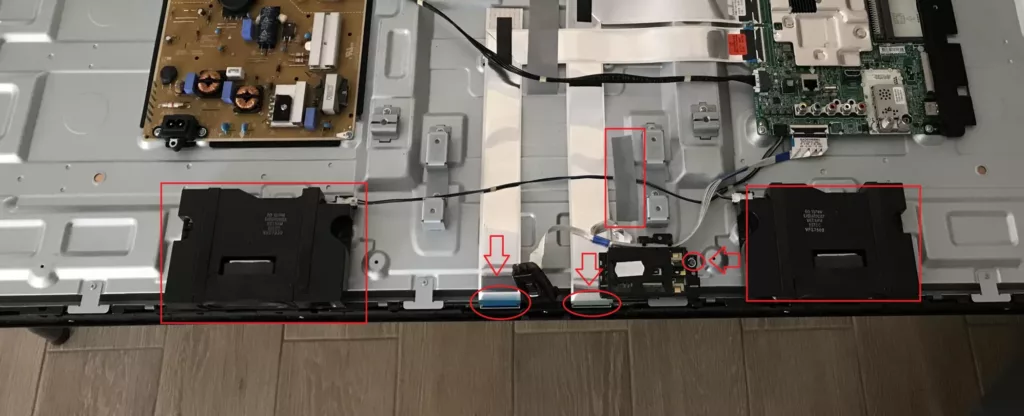
A few things to mention is that. The two black speakers in my case are just fitted without screws and can be removed easily to give us more access. Take care of the cable running through as it adheres with some tape. There is a small board at the bottom that is held with a screw that we need to remove as it makes it hard to pull out the two ribbon cables that run to the screen.
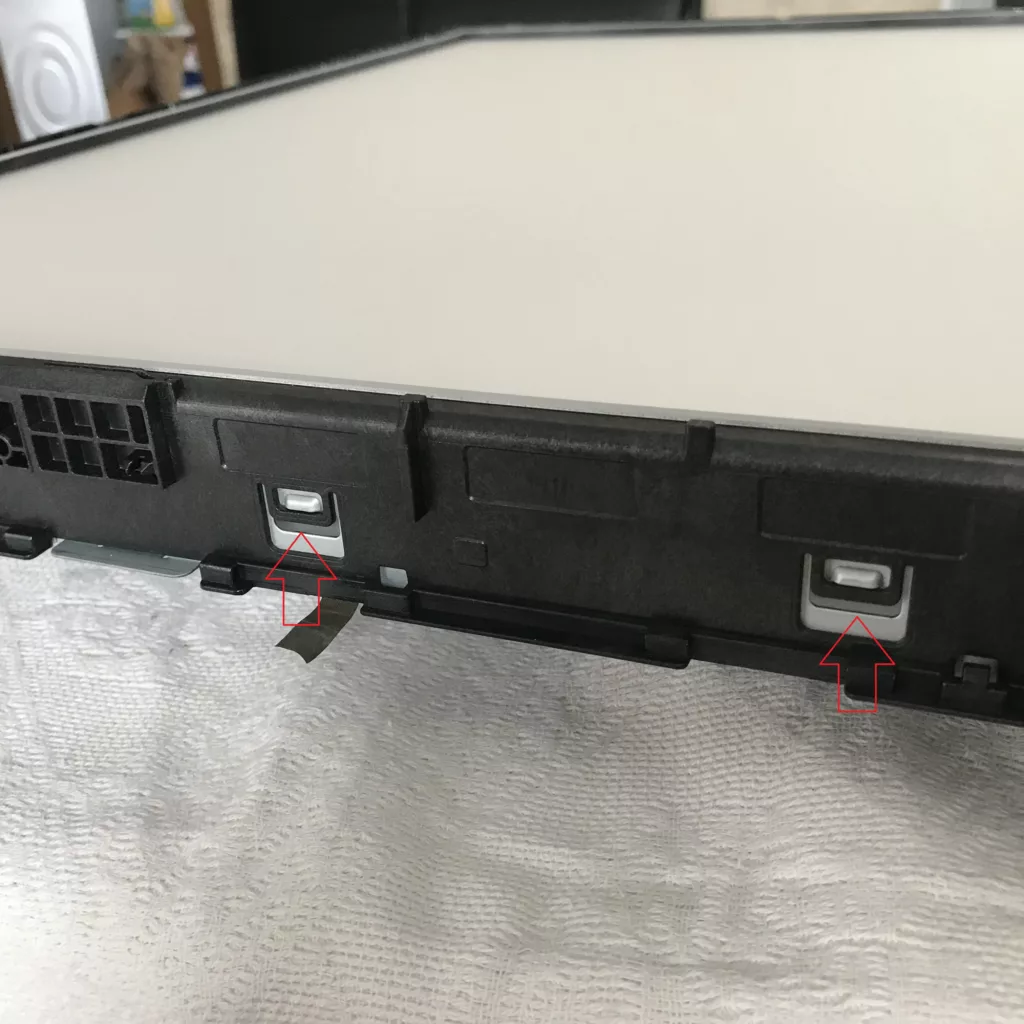
I like to move the bottom of the TV a bit further off the edge of the table as there are a few boards that we need to loosen so we can properly take off the screen. You will need to flip the TV over I tend to use some cardboard boxes to keep it elevated so no components are touching anything on the underside. Once flipped over you can remove the plastic molding around the whole TV screen. Mine was not screwed with anything. It was just held on with plastic clips. A little bit of careful pulling and it came off very easily. With plastic clips like this always take care and don’t use much force. They break very easily.
The screen edges are now exposed so we must be extra careful.
The two ribbon cables come to the side of these little boards that are connected to the screen. The ribbon cables that go directly to the screen are adhered so we can’t simply remove them. So we need to unplug the white ones to loosen them up so that we can move them out of the way. There are a couple of adhesive tapes and some tables so undo the tapes and unclip the little boards. Take care here as we do not want to damage any of the cables.
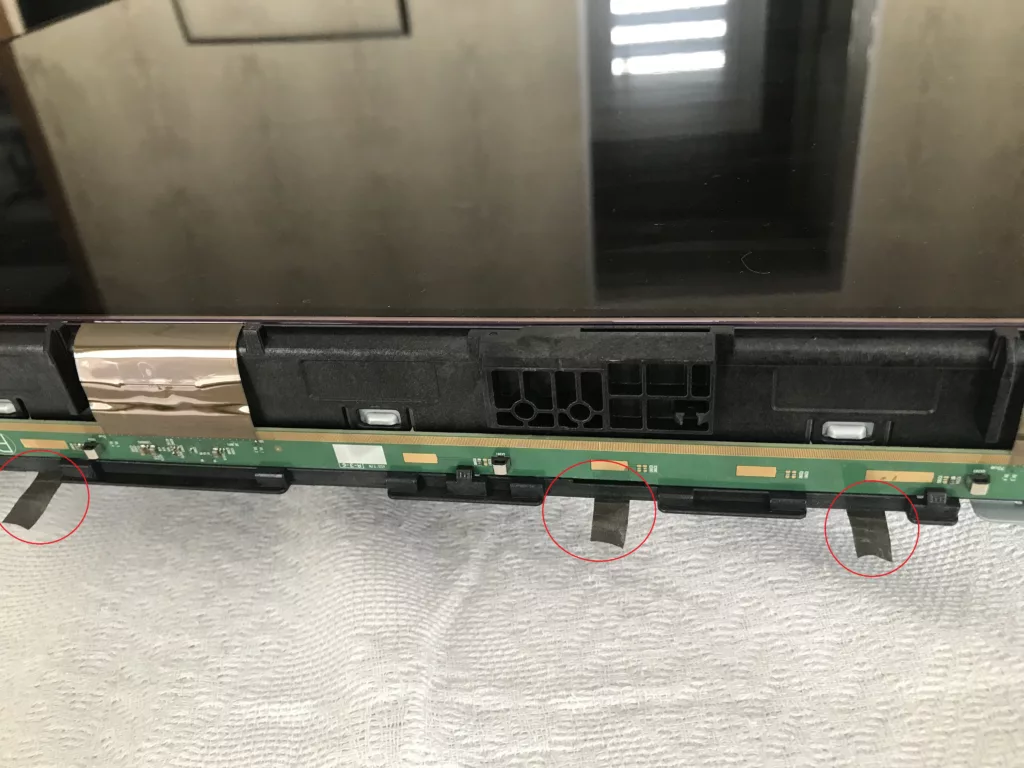
The boards should move freely while being attached to the copper-colored ribbon cables. Once they are free of obstruction.

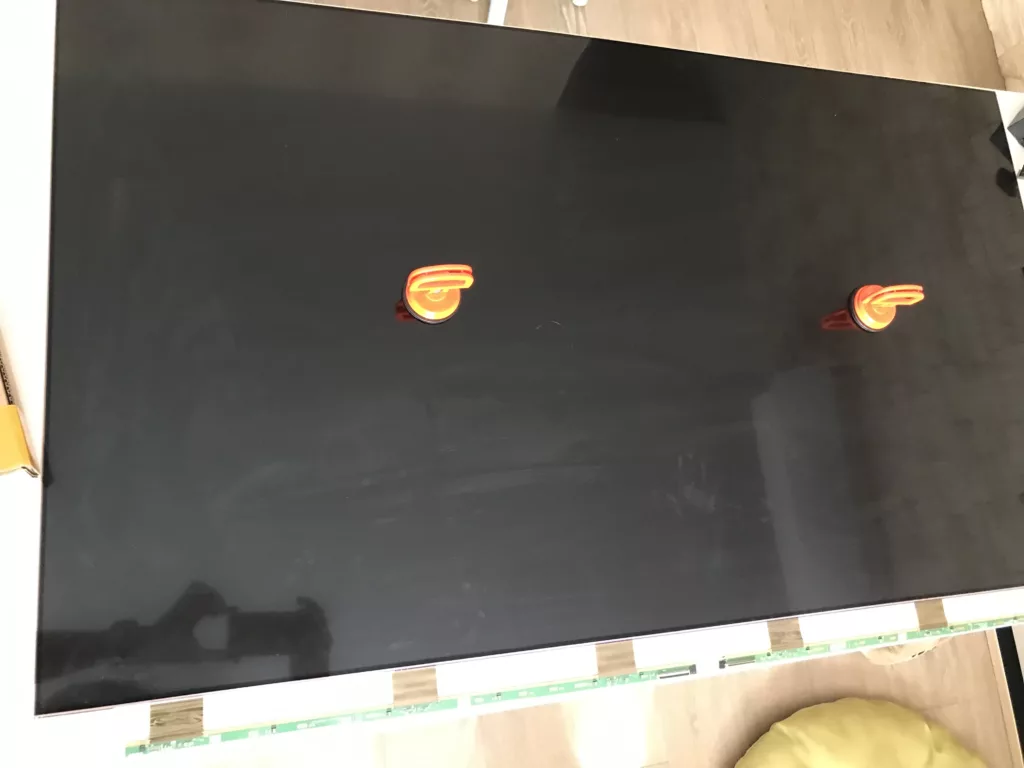
Due to the screen being large, I used the suction cups. Tripple checked that they were properly on so that they did not slip and fall as it would cause unrepairable damage to the screen. Have a place nearby to securely place the screen while the repairs continue.
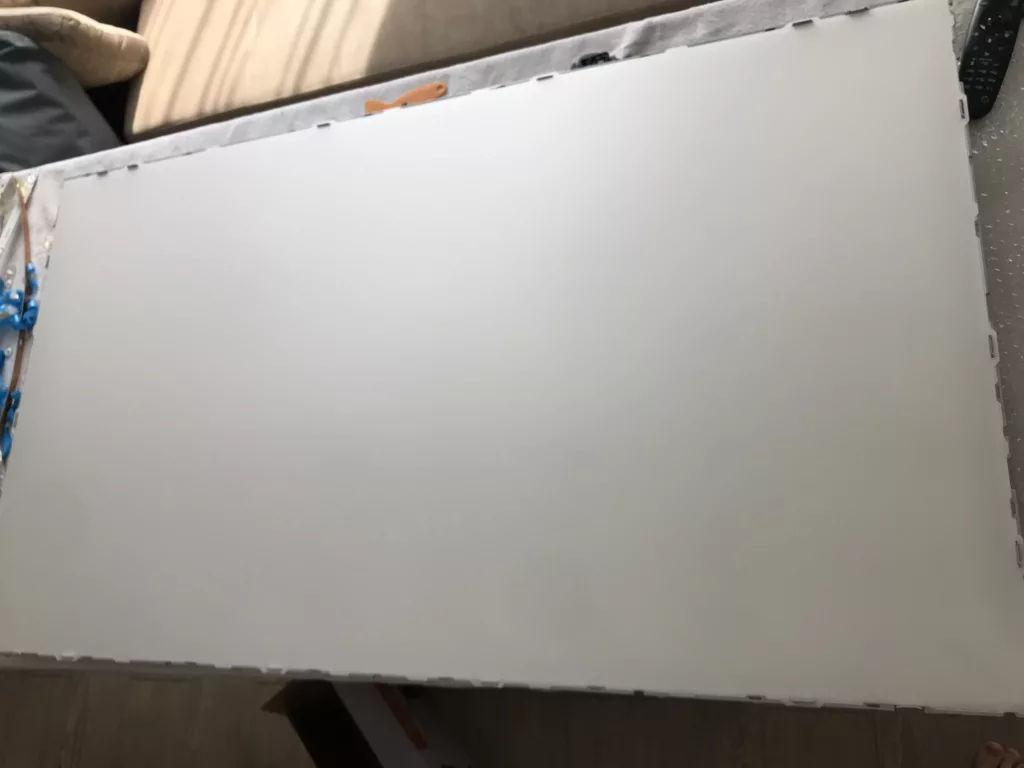
Once the screen is off we will see the diffusion sheets but to remove them we need to take off the whole plastic molding around the TV. This is one part but it is held with these plastic clips all around the TV. As always take care with undoing these as they can break easily.
Once that is pulled off the sheets are stacked on top of each other in these corner metal pins that they sit nicely. These can be safely removed. The sheets have several layers. Do not mix them up. Remove the stack and place them aside remembering the orientation.
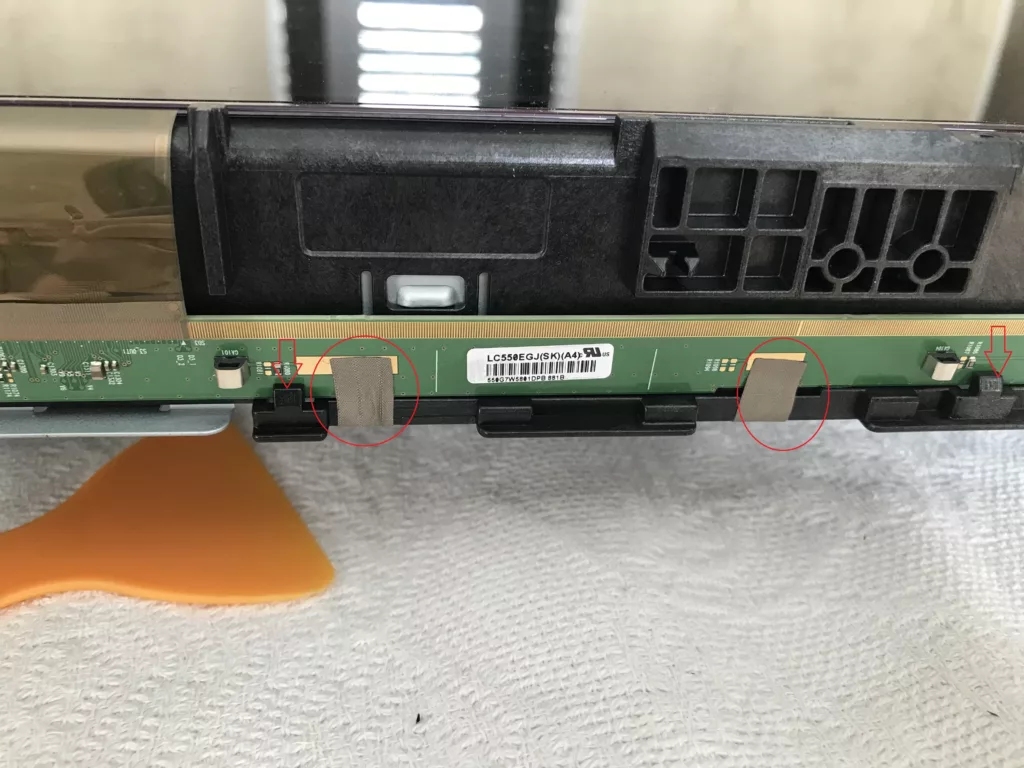
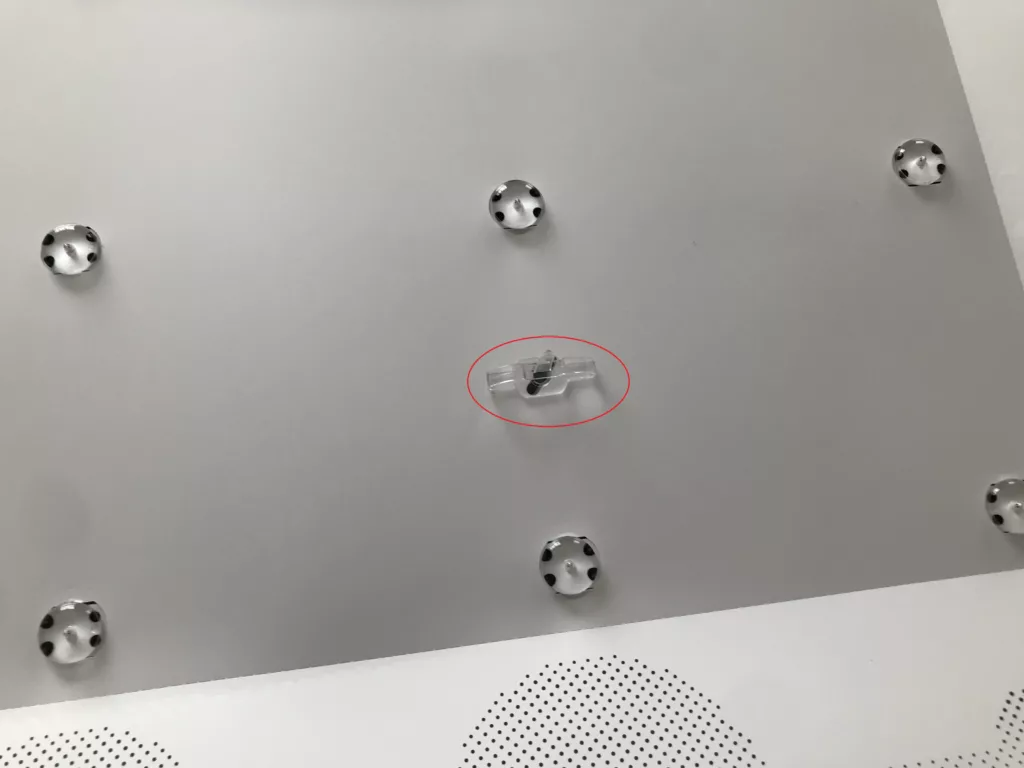
You will then see the actual LED lights sticking out but we still have some work to do. There are some transparent plastic parts that stick out that we need to remove. You need to twist them and they come out easily based on the cutout under them.
The harder part is taking off the whole white sheet which covers the LED strips. This can rip very easily you will have to take your time and go around the whole area pulling it off slowly. The hardest parts are under the LED bulbs as they are sort of tucked in a bit and when trying to pull them out they can rip. So patience is key.

Some of the LED plastic bulbs may fall off. Don’t worry as we are still replacing them the old ones have probably been already close to failing and their falling off is the common cause for the white spots mentioned at the beginning of the post.
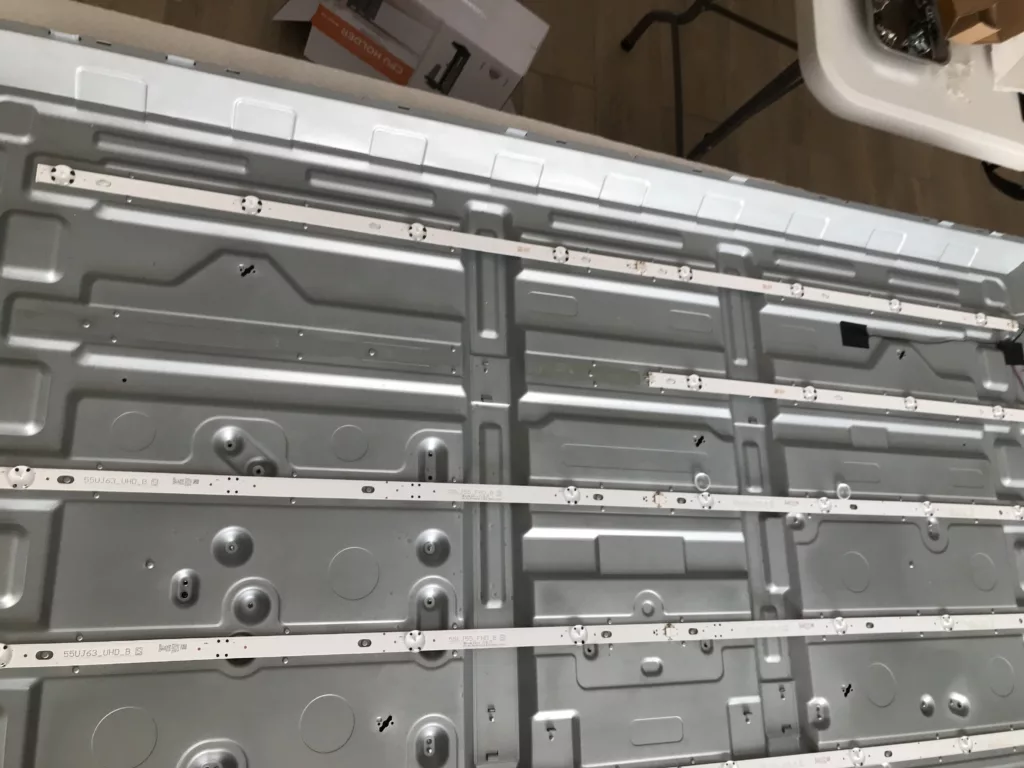
This is where the replacement is done. So we have rows of LED strips that are interconnected in the middle and have cabling running through on one end. To replace the LED strips start by pulling off the strip at the end which does not have the connector cable. You will reach the middle and can disconnect the other side. To remove the other one disconnect the cable that is connected and pull off the strip. The adhesive tape is quite strong so you may need to put in a little more effort here. Before pulling it off I tried to plug it in the mains power to see how it looks lit up. I would not suggest doing this on exposed components and the lights are VERY bright.
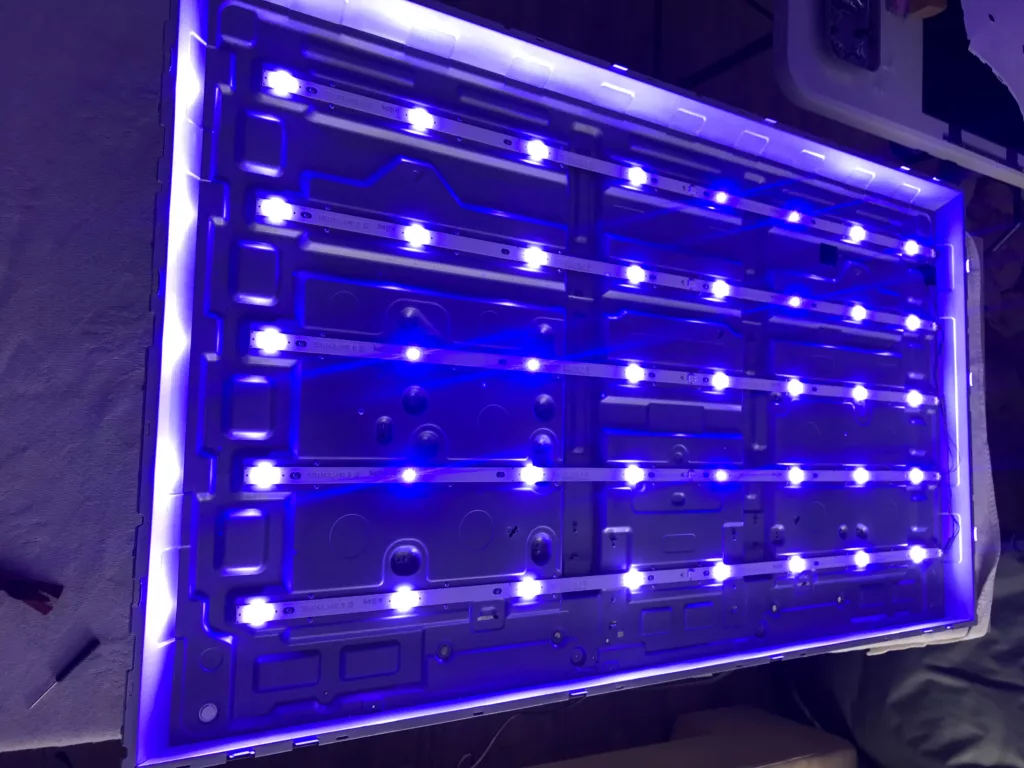
As you can see practically all LEDs have worn out and are shining a blue light which is causing the issues. My way of replacement once all were removed. was to start each row on the connector side. Peel the adhesive and connect the cable Start by placing the strip on the chassis. There are holes in the strips which you should align as well as marking lines so you don’t stray away when applying the strips. Start by placing the strip from one side and guiding it slowly. The repeat for all the rows. You should have the new ones in place and connected. So to test it I went and plugged in the TV to see if there was a difference and that the LEDs were actually working.
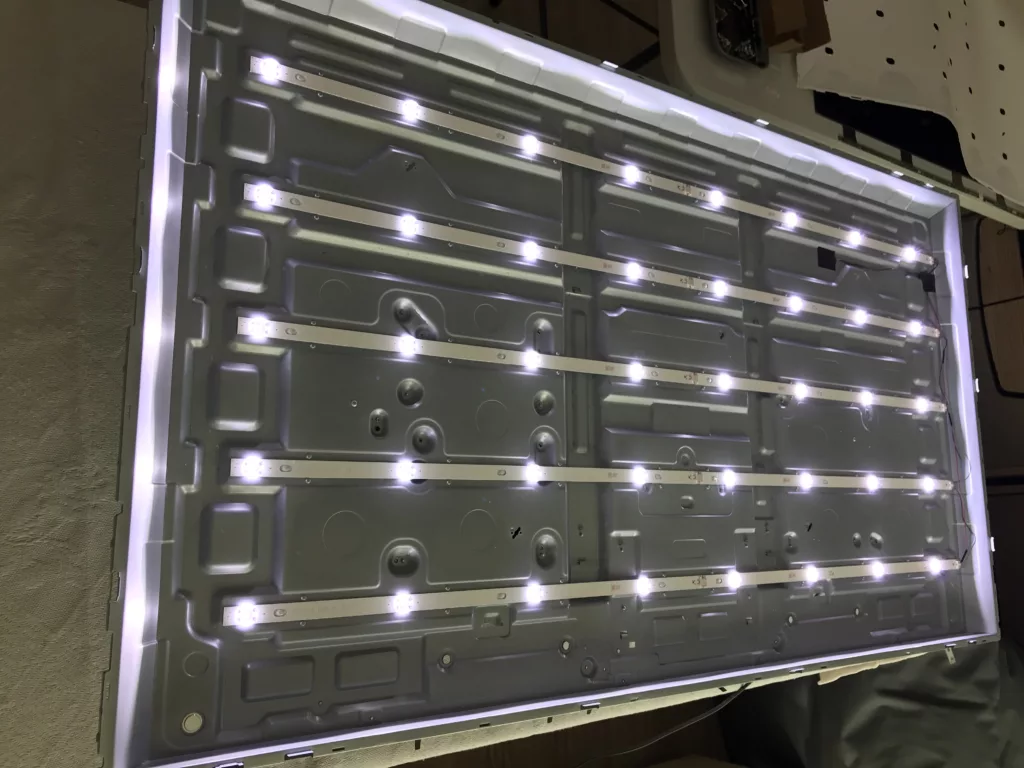
Once turned on I was greeted with bright white lights. I unplugged it and went on to continue. reassembling of the TV. Basically, everything done here so far just going backward step by step.
After reassembly. Once again plugged it in and I was greeted with a screen that I forgot even looked this good. I was so used to the blue tint that it was a night and day difference.
Conclusion
Although the repair is time-consuming and requires patience if you don’t want to shell out a bunch of money for repairs this is relatively possible to do with the right tools. The LED strips themselves are quite cheap. The tutorials available on the web are a great source of information to help you get started. This is just one example of the possible fixes.
I hope this has helped you out.

Every tutorial dosnr explain how to glue back that sheet thing that has holes…
there is no glued sheet , so no glue is used